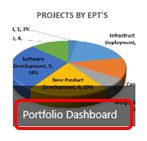
What happens when you select the project reports link from Project Web App (PWA)? Does your reports page look like either of these?
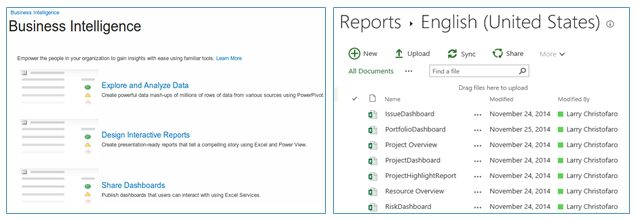
Worse yet, does it take multiple clicks just to select the report you really want?
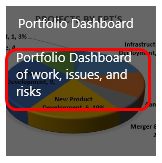
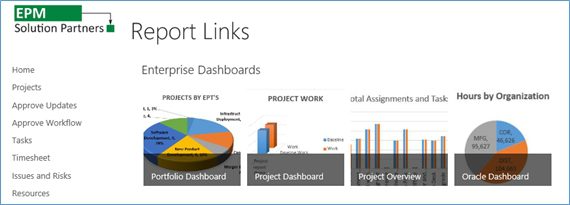
How would you like to let your users work with a reports home page that looks like this?
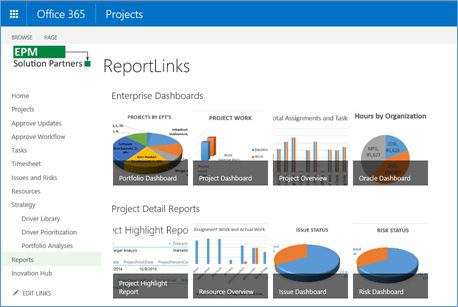
That’s right. You can incorporate Microsoft’s new, modern user interface look and feel to access your online reports. The simple three-step process I’m about to share works in Project Server 2013 and Project Online and will create a promoted link list that incorporates some real style into making your reports more accessible. The basic steps are to create the Promoted Links list, add Promoted Link entries and show the Promoted Links list on a web page.
Create the Promoted Links List
Creating a Promoted Links list is similar to creating any other app. Note that you must have permissions to edit the page and manage site contents to be able to perform all of the functions necessary. Follow these steps to create the Promoted Links app:
1. From the desired site, go to the setting (the gear in the upper right) and select Add an App.

2. Find and select the Promoted Links app. Note that the Team Collaboration Lists feature must be active in order to view the Promoted Links app.
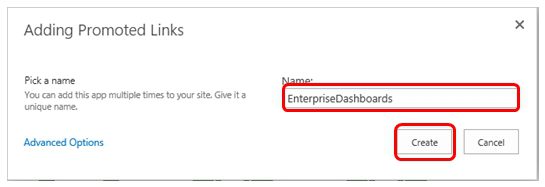
3. Enter the name based on the group of objects you want to show, for instance, “Enterprise Dashboards,” and select Create.
Your list is now ready to add promoted link entries.
Add Promoted Link Entries
A promoted list entry consists of a link to a report, a link to an image for that report and some descriptions. You need to have those items and links available when you create the list entry.
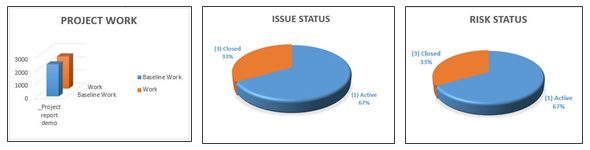
4. Assuming the report is already written, the next step is to create or find an existing image to use with your report. There are lots of options online, but I personally like to copy an image from the actual report that can identify this from other reports, like a chart or graph. You can use the snipping tool that comes with Windows or any other image editor to capture a snapshot of your display and save the image as a .jpg file. This figure shows examples of images from real reports.
Check to see if you have an image list for your site or add the Image app to store all your images. Follow the steps above that you used to create a Promoted Links list to create an image list using the Image app. Save your report images in that image list.
Now you’re ready. You should have the Promoted Links list, the Images list, and your Reports folder available on three separate tabs, as shown here:
![]()
Let’s create our promoted links.
5. Open the Promoted Link list and select to add a New Item.

6. Enter the title. The title appears at the bottom of the unselected link.
7. Go to the images folder, select the ellipsis (…), and then select and copy the link for the image.
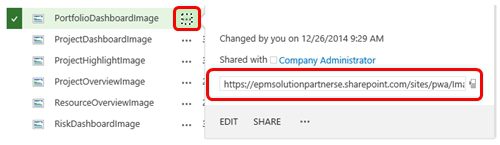
8. Paste the link in the Background Image Location of the Promoted List entry. You can label the image in the Type the Description, which I suggest to override the long URL when showing in the list.
9. Enter a description. That appears when you hover over the link.
10. Go to the folder where the report or other object is located, select the ellipsis (…), and then select and copy the link for the report. (See step 7.)
11. Paste the link in the Link Location. You can label the link in the Type the Description, which I suggest to override the long URL when showing in the list.
12. Select the Launch Behavior as you want. Valid options include:
- In page navigation (the suggested option)
- Dialog
- New tab
13. You can indicate an Order of the links as you wish; otherwise, they will appear in alphabetic order.
14. Select Save to save the entry.
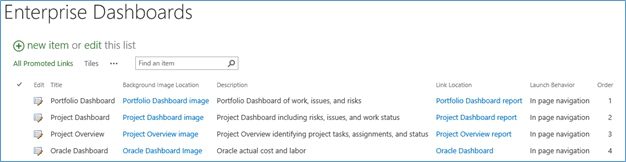
If you perform the previous steps for all entries, your Promoted Links list should now look something like this:
Show the Promoted Links List on a Web Page
Adding the Promoted Links list to a web page is similar to adding any other list to a page. Follow these steps to add the Promoted Links list to a web page.
15. From the page you want the promoted links, select the settings (the gear icon again) and pick Edit Page.
16. Select Add a Web Part.
17. From the Apps category, select the promoted links list you created, and then select Add.
18. You can modify the web part as needed. As an example, you can add a title to the web part by selecting the Edit the web part, and select the Title Only Chrome Type under the Appearance section.
19. When you’re finished, select Stop Editing from the Page ribbon.
20. Your promoted links web page is now ready to be shown off. Make sure you update the URL for the Reports link on the Edit Links list from the PWA home page to point to your new reports home page.
You can create and add multiple promoted links web parts if you have a large number of reports to show or want to group your reports.
Cover image of paperwork courtesy of Keith Williamson by virtue of a Creative Commons Attribution 2.0 Generic (CC BY 2.0) license.