
As I explained in my previous article, with all the updates Microsoft has made as of late, it’s no wonder people have misconceptions or don’t fully realize the strategy Microsoft has around growing and supporting tools for project management. In a series of articles, I am diving into some of the more common misconceptions that are out there about MS Project. This is the second in a series that explores the top five misconceptions that surface on a regular basis.
I hope you find this in depth look at these misconceptions helpful. Please reach out to me directly with questions, comments, or even to just check back in to see if some of the new feature releases address your needs. I am looking forward to my upcoming live webinar on the topic of these misconceptions and more. Check back soon for my details.
Misconception #2: “P4W Can’t Be Customized”
I hear this quite frequently from people who are starting to use Project for the web (P4W) and have come from the experience of using Microsoft Legacy PM tools (Project Professional or Project Online). In fact, there is a lot of buzz over Microsoft’s latest and easiest to use project scheduling tool!
Remember the goal of the MSP product team was to provide an easy way to start, edit, and build schedules and assign resources, without a lot of setup. Project for the web’s purpose is to be simple and not require a lot of customization, although the trade off, at least today, and until Microsoft continues to release new features, is a more limited level of customization options. That said, users do have some flexibility around local customizations, and you certainly can customize Project for the web.
Now I know that many of you love using Excel (infinitely customizable), but we are working with a scheduling engine that is available for connection with Power BI and Dynamics. P4W has a grid view that allows for Excel-like work. What’s nice about it is that you can easily move the way that you want to. While there aren’t too many columns available, custom columns (shown later) can be added, and the ability to organize what you see in the order you want is possible.
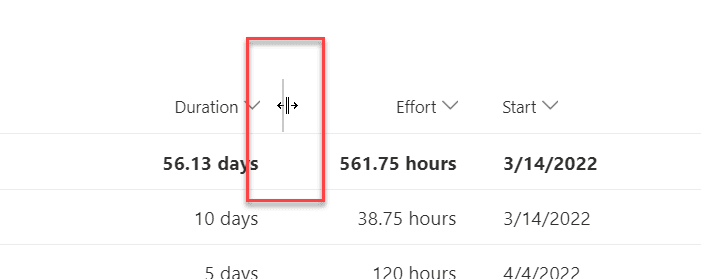
The key is to hover your mouse between the columns—a double line and the split arrows will appear. Just drag and drop, and this will widen, or if you want to move the column, put your mouse directly over the it and drag it to where you want it to go.
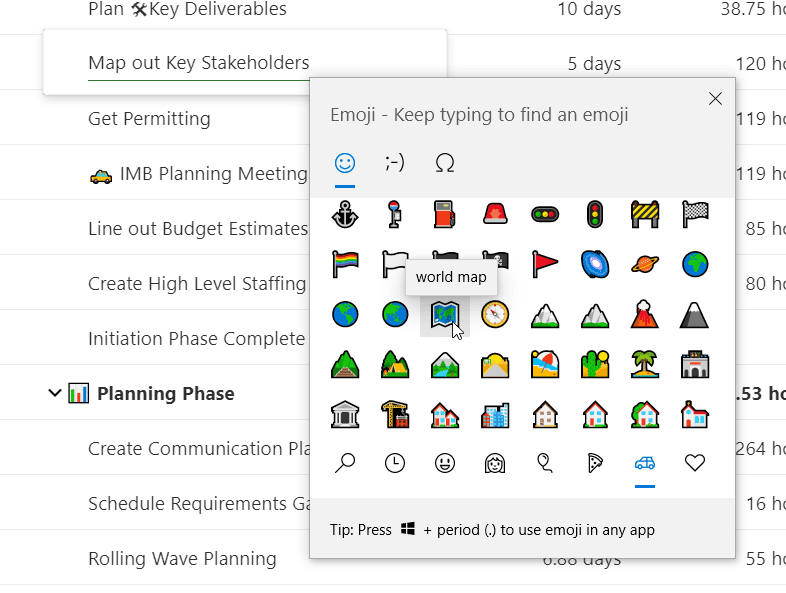
Another common trick for customizing and creating visualization in P4W is to insert symbols and icons to emphasize or draw attention to a particular grouping.
By making sure that you are in the right location (where text is entered), just press the Windows Key + the semicolon (;) or period (.) keys.
A list of options (different categories and symbols) to choose from will populate. This works great in most Windows 10 environments, and if you wanted to try this in your Office 365 browser view of Excel, Word, and PowerPoint, you’ll see they will show up there in the tabs or as other structured text objects.
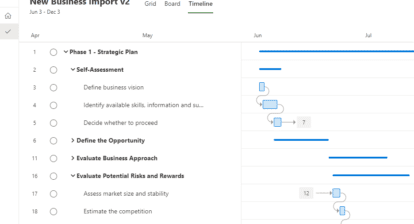
Customizing P4W in the Gantt View
Usually basic columns work just fine; however, there are times you want to add more information or structure to your project schedule. To “tell the story,” having the ability to add additional columns is very helpful.
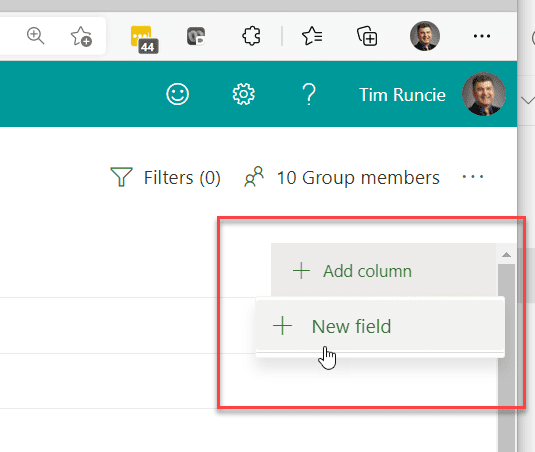
Just scroll to the end of any of the views (typically the Gantt View). Remember you can add custom columns to any view and have them show everywhere.
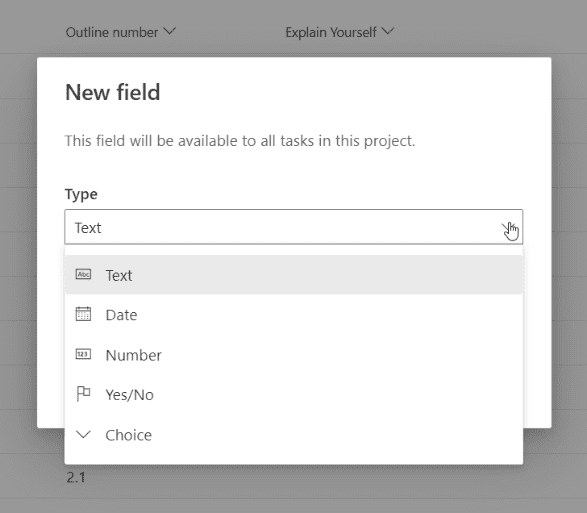
Find + Add Column and select + New field.
Once selected you will be prompted for what type of field you want to add:
- Text = free form text
- Date = a date field
- Number = for numbers
- Yes/No = A boolean field (only 2 choices—chicken bouillon or beef bouillon) Kidding, but try saying boolean and bouillon together… 😊
- Choice = lookup up or select choices you can add
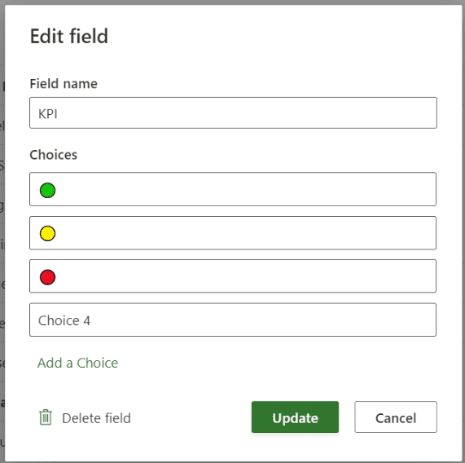
Once you select the type of field you want, you can go ahead and use it. A common option is to leverage a choice field to create a KPI view. Add your field choices, and then use the Windows Icon key to find the symbols you wish to utilize. In this case, Red, Yellow, and Green are common stoplight reporting selections, but you really aren’t limited to them. Just remember to erase the default text that Project puts in there.
Customizing P4W in the Board View
Think of each task as a “card” or a post-it-note. You may wish to visualize and organize these cards or notes and their connections to each other. Literally in the past, we used to use cork boards, 3” x 5” cards, and yarn with punch pins to create and show links to the tasks within a project. Now that’s old school!
For those who haven’t worked within Office 365 Planner, you may not know that you have the ability to customize the Board view by grouping the information similarly as that old school method (by the columns you have in your tasks).
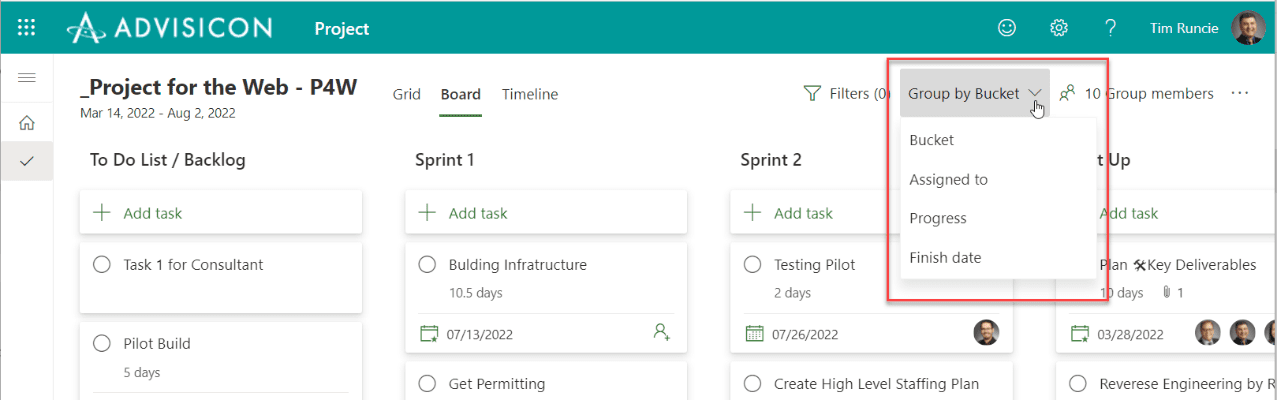
If you want to customize how you are looking at the Board view, find, to the right of your screen just past filters, the “Group by Bucket” option.
Click this, and select how you want to group or line up your tasks. From there, you can quickly organize or re-organize project work. Buckets commonly are organized by phase, priority, sprints, etc.
Custom Reporting Options for P4W
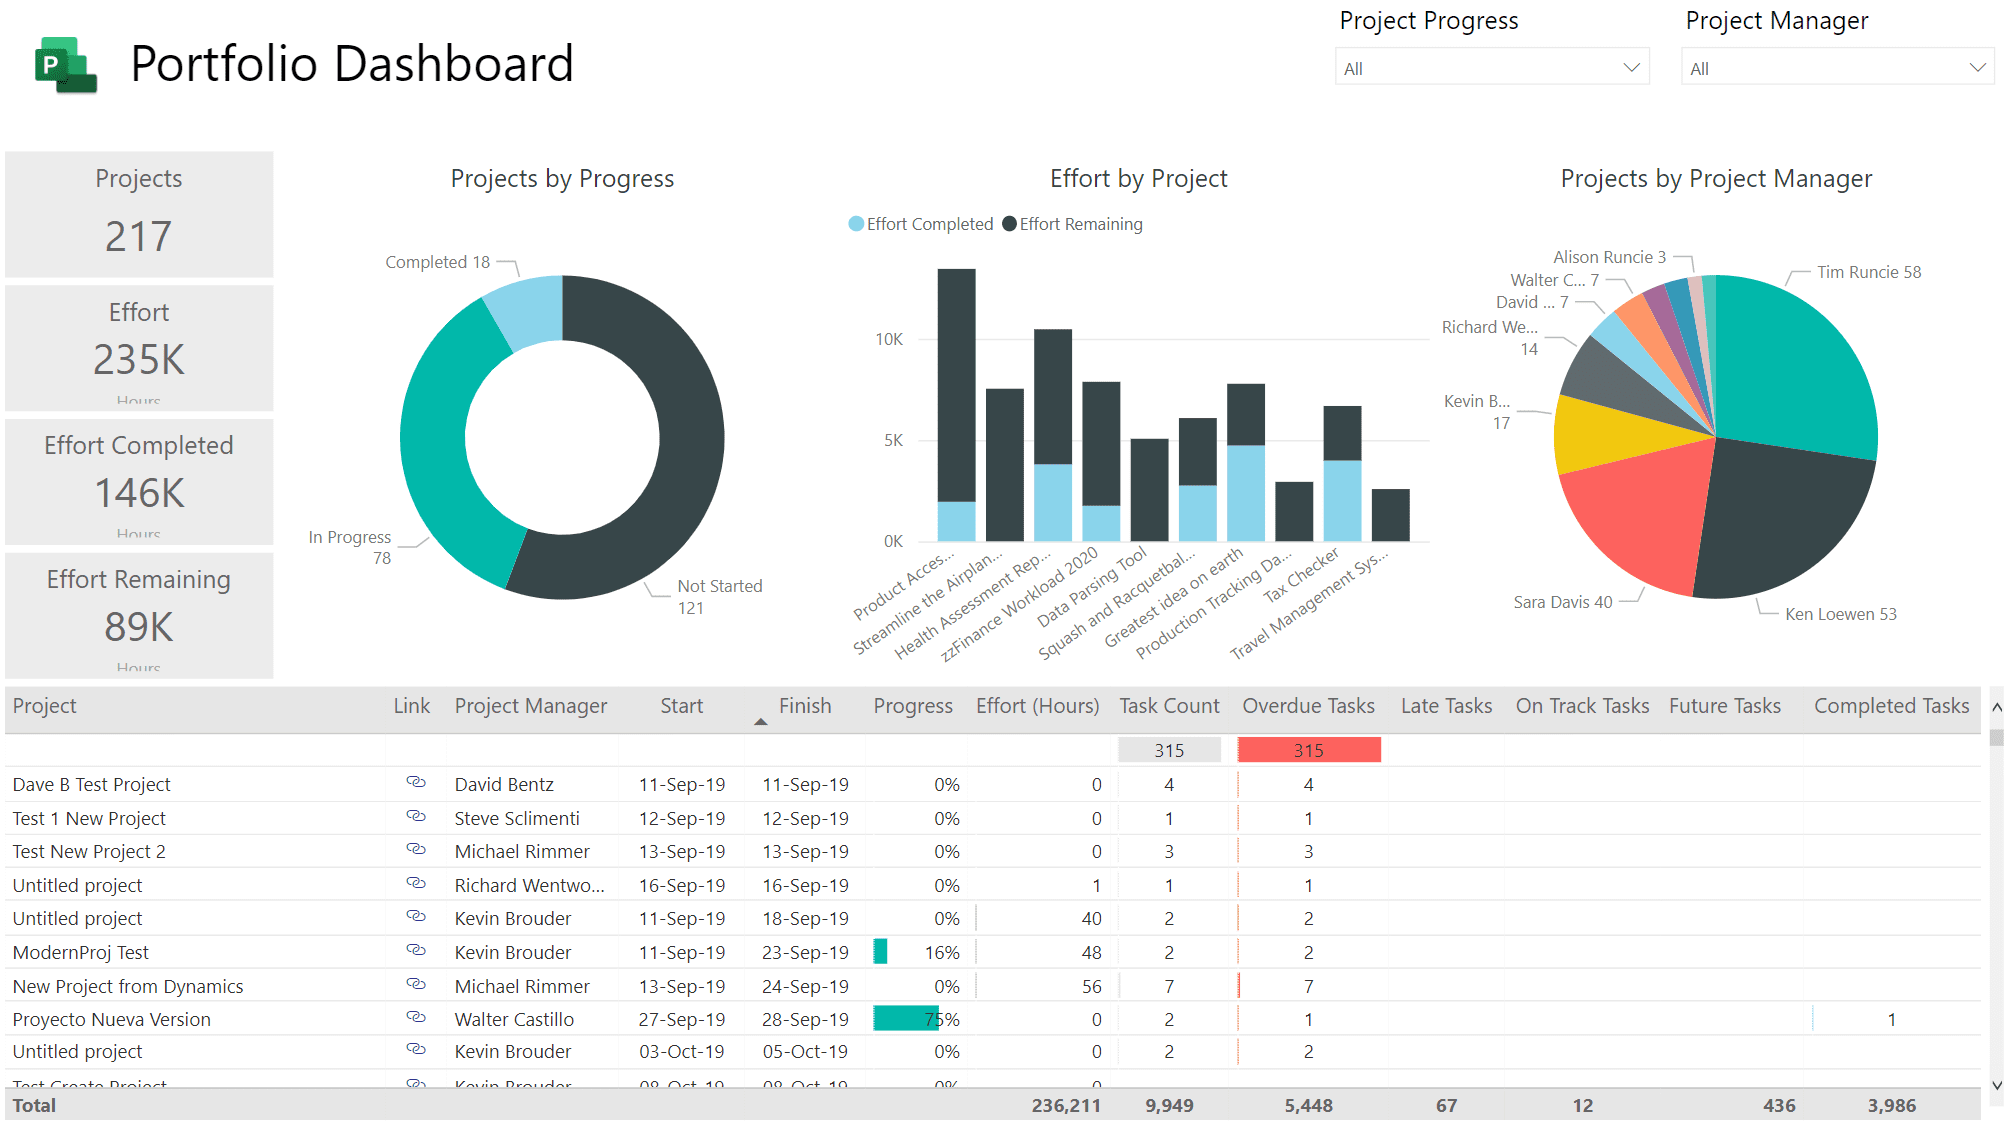
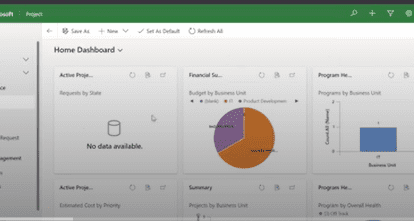
Many people ask, what about reports? Microsoft uses Power BI to connect to the data and provide a very rich environment to allow for reporting.
In fact, Microsoft has built, or pre-built, some Power BI Report Packs for you to use. It’s as simple as downloading and plugging them right against your Projects.
To get these, you will need to download them from GitHub, or reach out to me for the most updated and free versions (we keep them updated and have improved them for our customers).
Advanced Customizing or Creating Enterprise Level Structure for P4W
Many organizations are looking for the simplicity of Project for the web, but also need to book resources, do demand and capacity planning, and manage programs and portfolios.
To do this, Microsoft has provided the Power Platform to help you extend your P4W experience. Leverage both Power BI and Power Apps, possibly even Power Automate to help create workflows, customize columns, and establish a Project Lifecycle process around managing, starting, and delivering.
Microsoft has also deployed a quick custom app (Called the Project Accelerator or the Project App) for you to get started with. If you want to go beyond the basics, then build and customize with Power Apps. A couple of key points to remember:
- You will need a Power App license if you want to use the Accelerator or configure beyond five lookup fields/tables.
- If you get the Project Accelerator app and decide you want to customize it, you will need to do so in Power Apps.
- There are two types of Power App approaches:
- Canvass Apps (you design the layout—look, feel, and all the moving parts)
- Model Driven Apps (the application will actually generate the functional elements that you need to configure; you design where they will appear in the form interface). As a reference, Dynamics is a Model Drive Power App (very sophisticated, but a Power App, nonetheless)
- There are two types of Power App approaches:
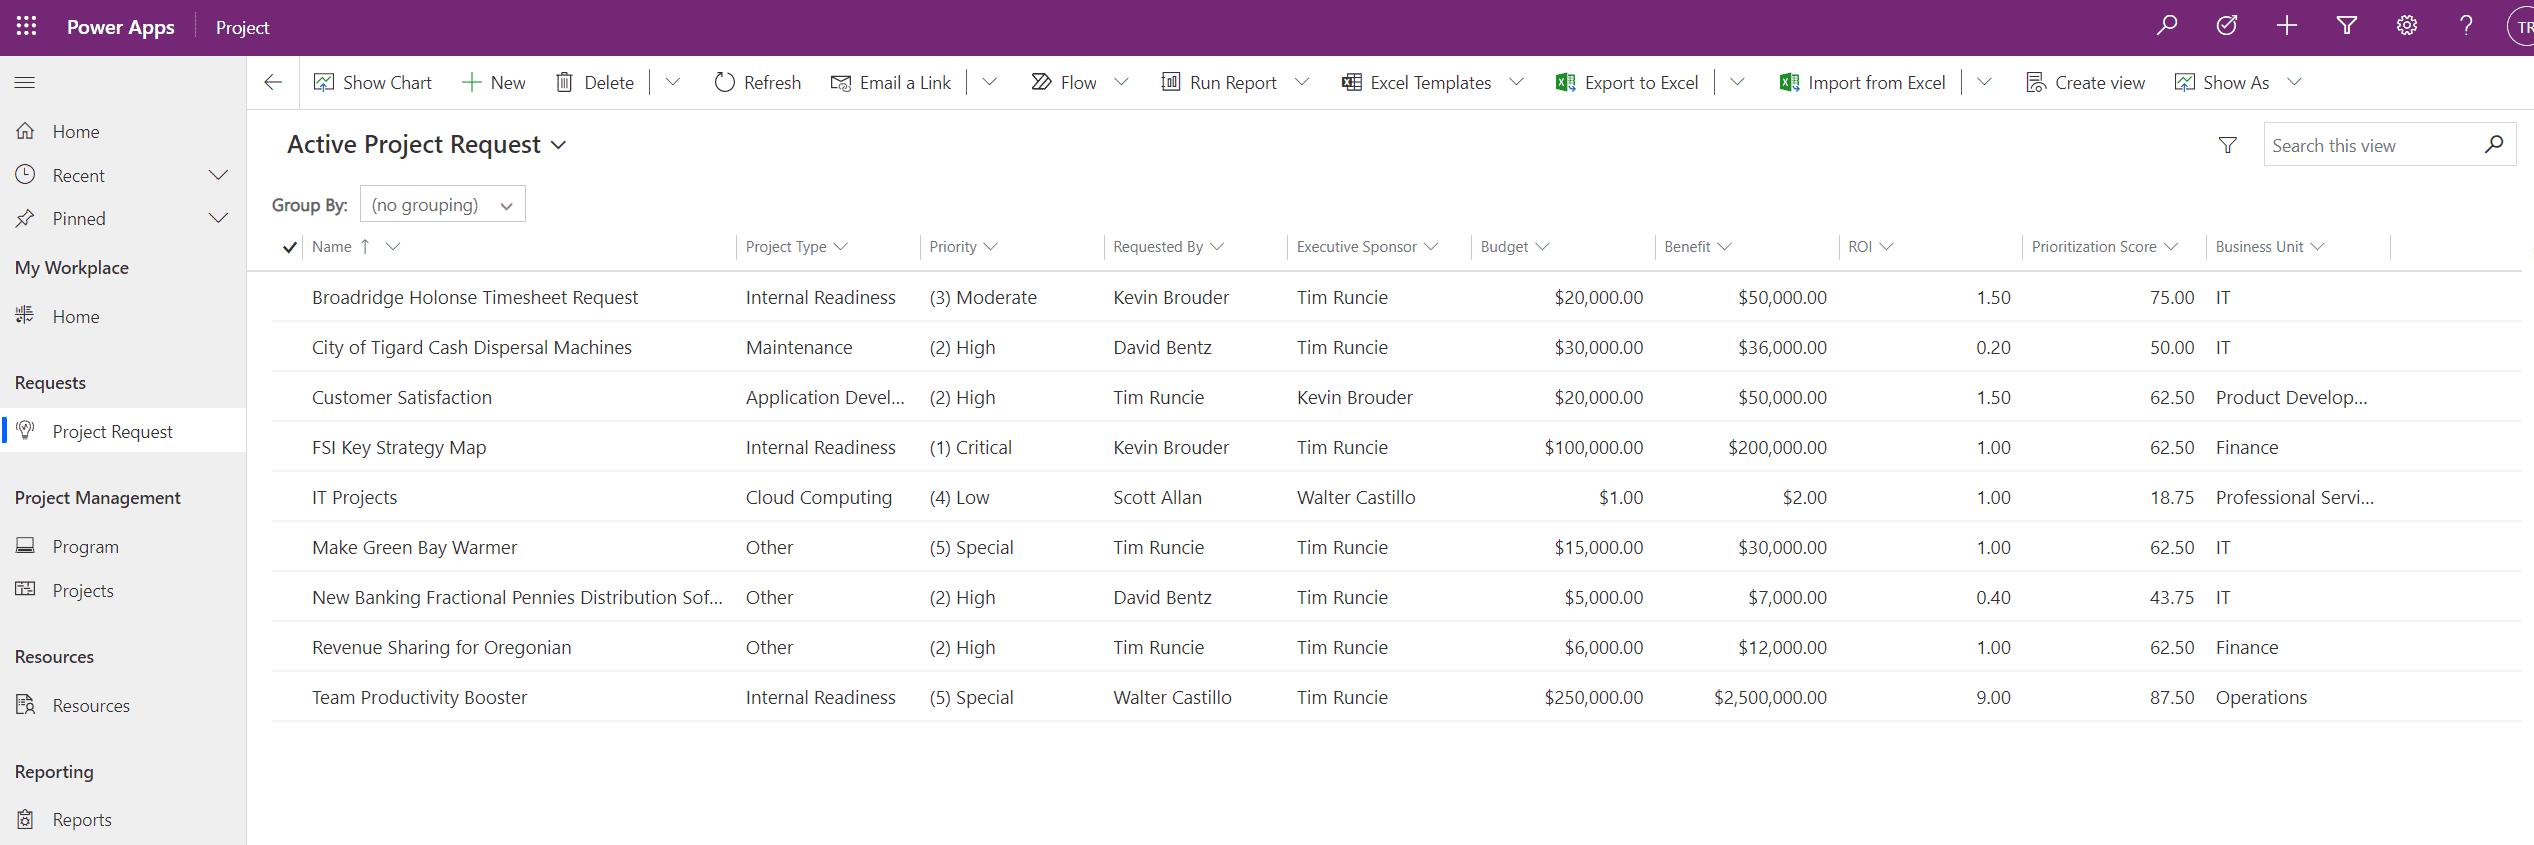
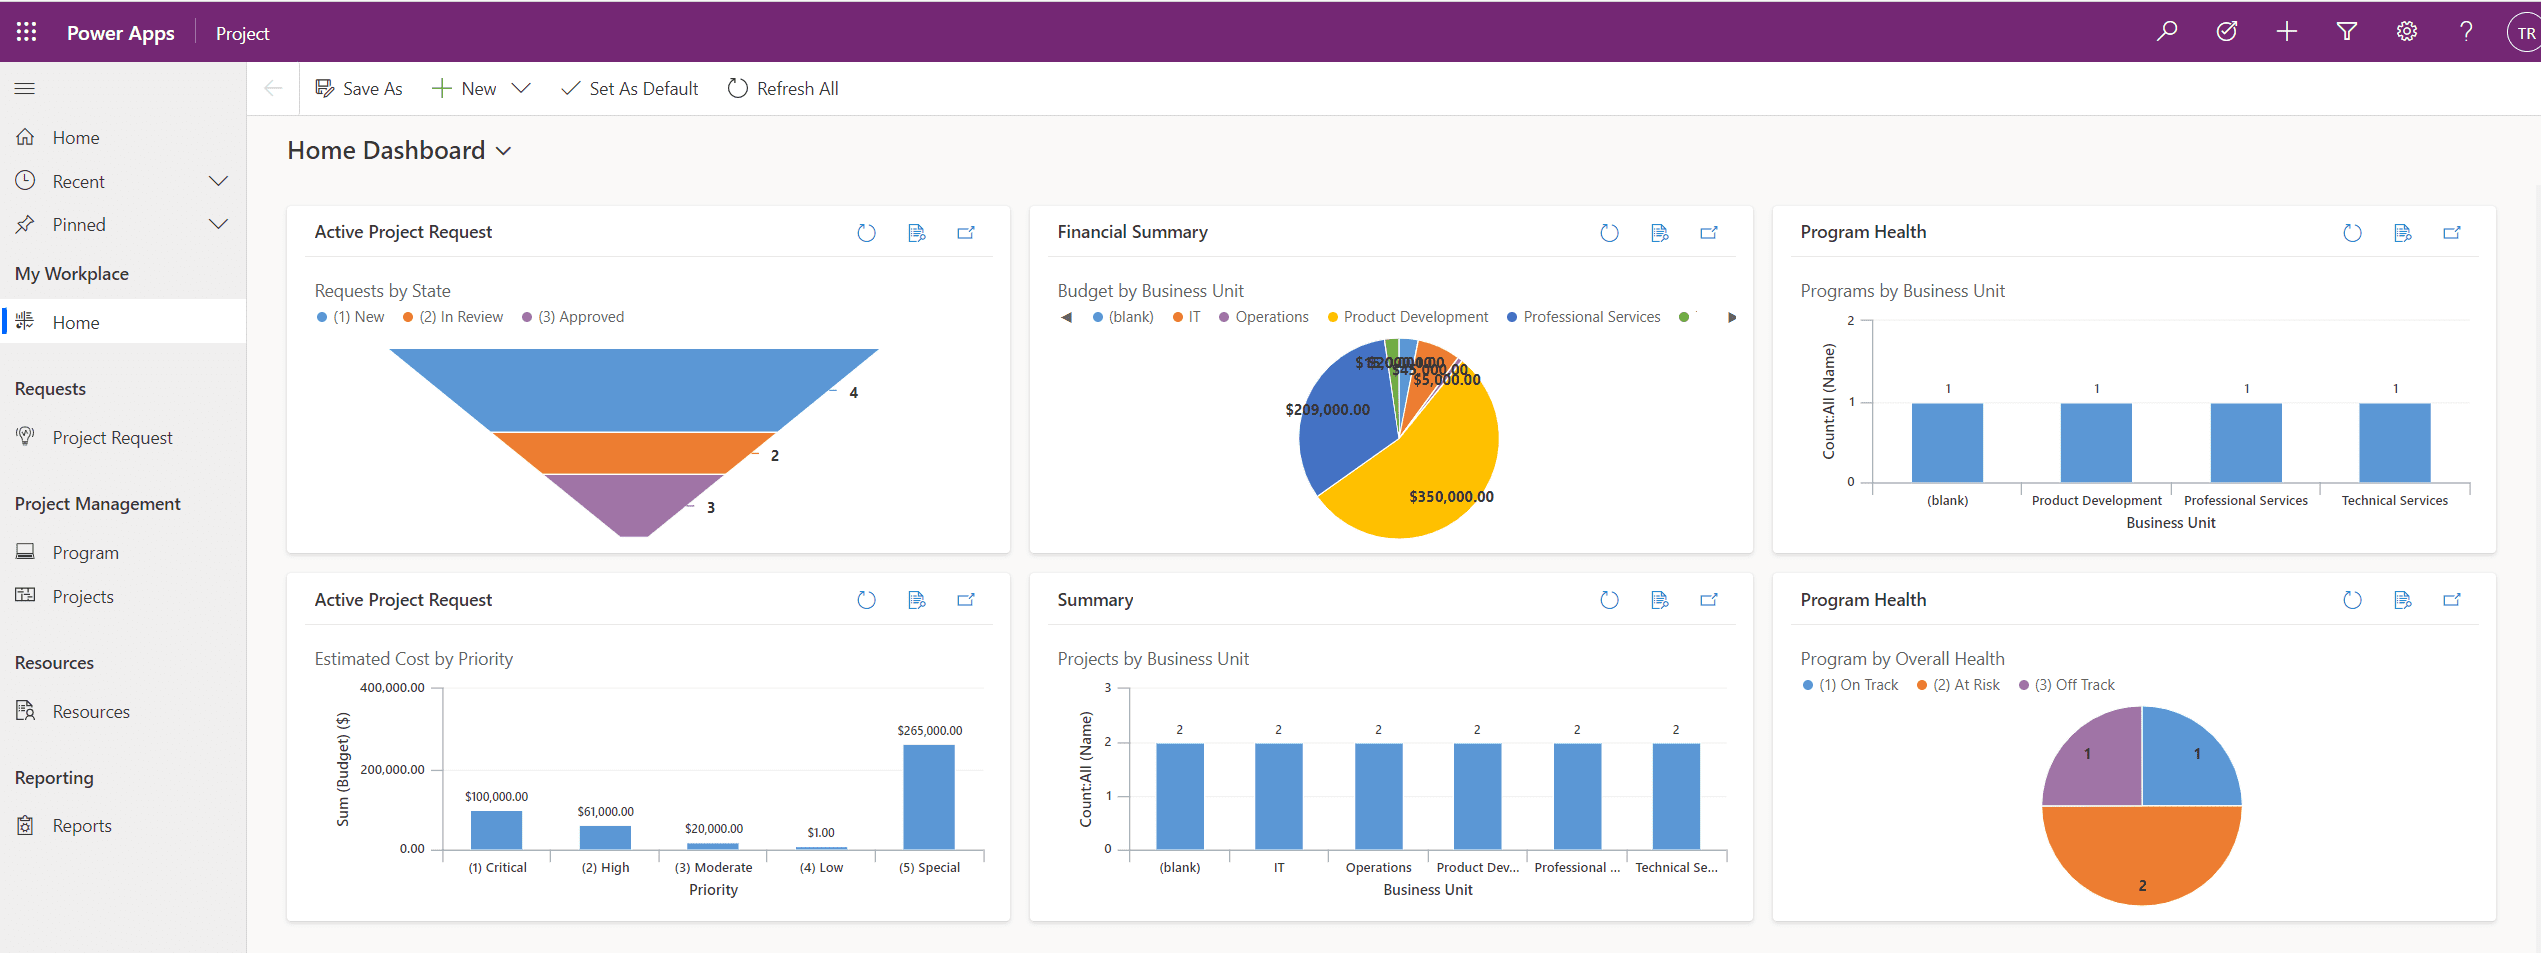
A model drive Power App allows you to start with an intake process and organize projects by programs. It extends the ability to organize costs, budget, resources, and bookings for projects.
Remember Microsoft still has Project Online (PWA), which is fully formed and has strong resource, costs, and portfolio selection and prioritization capabilities. However, its scheduling tool is much deeper and heavier, which may be more than you are looking for.
I’d love to hear from you in the comment section below. If you enjoyed this article, you may wish to read more about MS Project Misconceptions (listed) or join me for my upcoming live discussion on these misconceptions and more.

Ximo
While I do totally agree that P4tW is the way to go, in our case we will have to wait until a sort of RBS feature that filters projects based on the user’s RBS. This is must in an organization with multiple layers or management and locations.
Thanks you for the article!