Lisa from Charlotte, NC asks: I am managing a very large schedule. Is there a quick, easy way to see which tasks are late and which are running on schedule?
Answer: All Project versions have a task Status field, which could give you this information. It requires the use of the project Status Date, which is entered during project tracking and used in rescheduling uncompleted work. The task Status field is automatically calculated and carries the following information. The value in the field can’t be altered manually.

If you’re using Project 2010: Project | Status Date.To enter the Status Date field into an open project:
If you’re using an earlier version of Project: Project | Project Information | Status Date.
After you have completed a tracking cycle, use the Status field to filter and group tasks. Insert the Status column into any task table to view the column.
Grouping
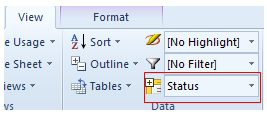
If you’re using Project 2010, apply the grouping Status:
Task | Gantt Chart.
View | Grouping | Status.
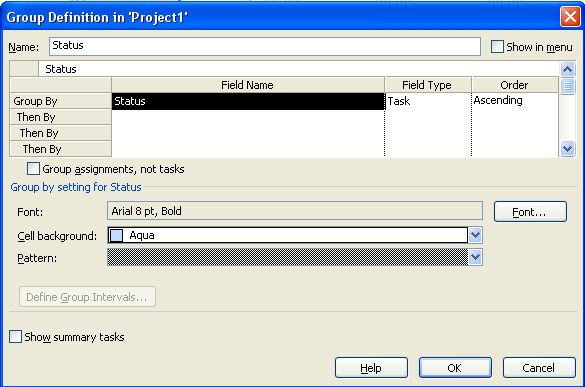
In Project 2007 and earlier versions a grouping wasn’t included as a feature of the software, so you’ll need to create it:
1. Project | Group by | More Groups | New.
2. Name: Status.
3. Group By: Status.
4. Click OK to close the box.
Here’s a sample of how the Gantt Chart looks with the Status grouping applied:

Selecting Outline Level 1 will roll up the detail into grouping summary values as shown in the figure below. Click on the plus sign + to the left of the Status grouping name to display task detail.
If using Project 2010, choose View | Outline | Outline Level 1.
If using an earlier version of Project, choose Format toolbar | Show | Outline Level 1.

Filter
If the Status column has been inserted into a table, use the autofilter to filter the column values.
If you’re using Project 2010, the autofilter is on by default. Click on the down arrow to the right of the column heading and select the values to view. Then click OK.
If you’re using an earlier level of Project, turn on the autofilter by clicking the autofilter icon on the Formatting toolbar (the little funnel with the equal sign next to it). A small arrow will appear to the right of the column names. Click on the down arrow for the Status column. Select a filter value.
Click the F3 key to remove the filter.
Tip! Autofilters can’t be applied to printed standard Reports in Project. You’ll need to create a custom filter for that purpose if you would like to filter using the Report function.
Also, note, if you’ll need to create a Status group, save it for future use by copying it into the Organizer:
To copy a Group object using Project 2010:
1. File | Info | Organizer | Groups
2.Click on Status on the right
3.Click “Copy” to copy the group into the Global.mpt
4.Click Cancel (in the center) to close the box
To copy a Group object using earlier versions ofProject:
1.Tools | Organizer | Groups
2. Click on Status on the right
3. Click Copy to copy the group into the Global.mpt
4. Click Cancel (in the center) to close the box