What
This article shares a few ideas on setting up Microsoft Project to ensure that it performs in a predictable manner. Please note that you may have different approaches based on your specific circumstances.
Why
This approach ensures that Microsoft Project behaves consistently for your current and future projects.
When
You should set up Microsoft Project before starting your schedules.
How
- Open MS Project and select the File tab. Note that you may want to consider saving your file on opening MS Project so that your changes are not lost.
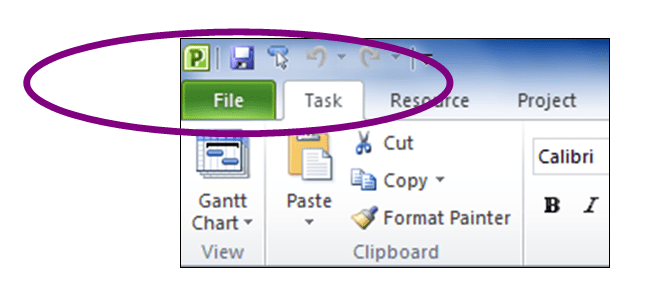
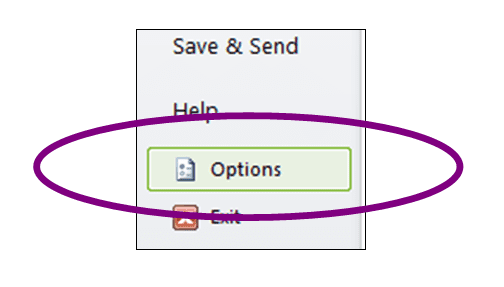
- On the File tab, select the Options icon to commence working on your settings.
- The Project Options Window appears. In this window, you may modify the default settings for MS Project and control how software behaves.
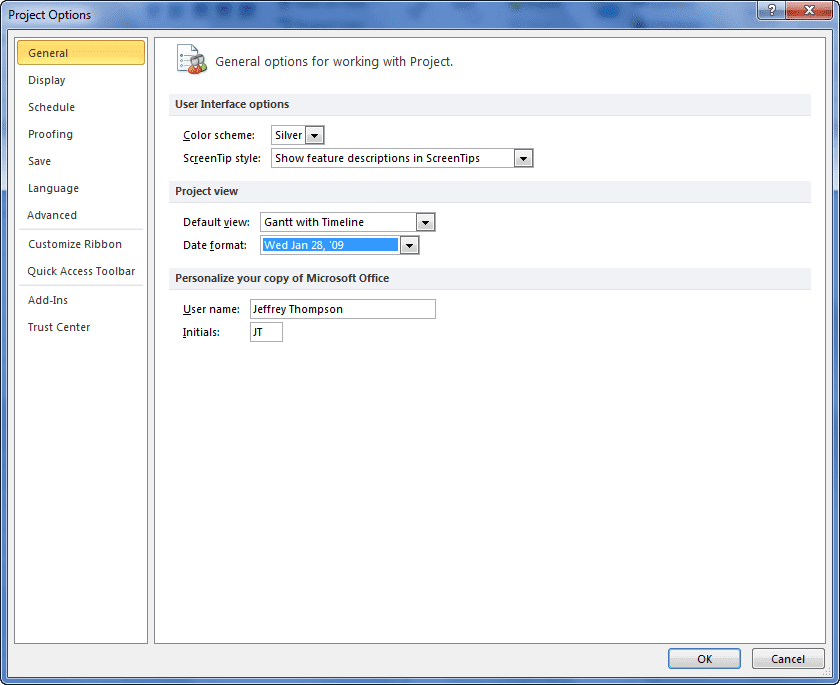
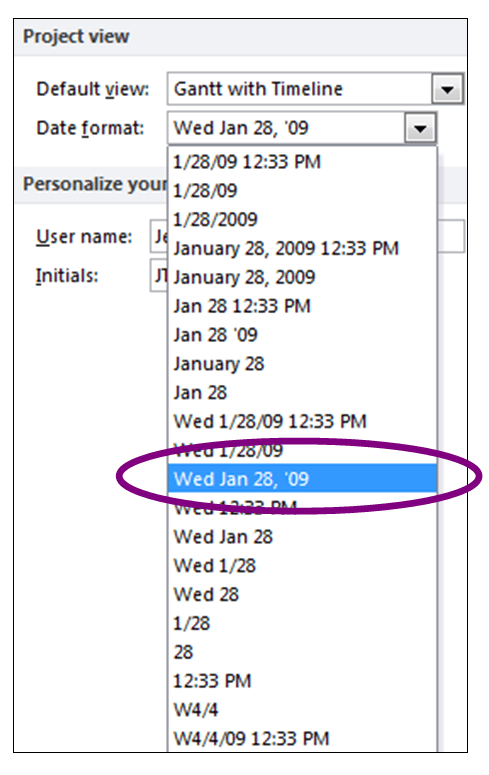
- We will start on the General tab and work down through the other tabs. The key fields to update on the General tab are the Date format, User name and the Initials fields.
- Select the date format that will display both month and day to avoid possible confusion when you use numbers only.
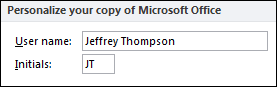
- Maintain your personal information so that these details are available or use on the reports and other printouts.
- Select the date format that will display both month and day to avoid possible confusion when you use numbers only.
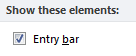
- Update the Currency selection (if appropriate) and activate the Entry bar tick box on the Display tab.
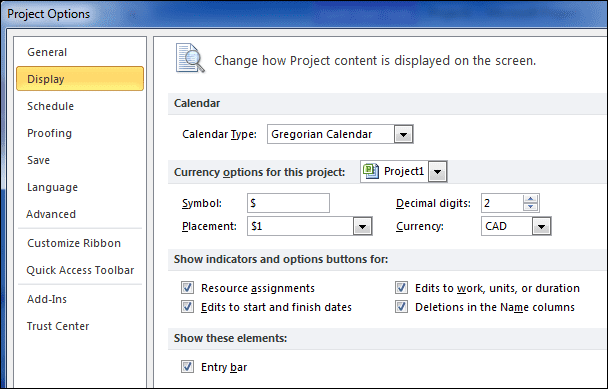
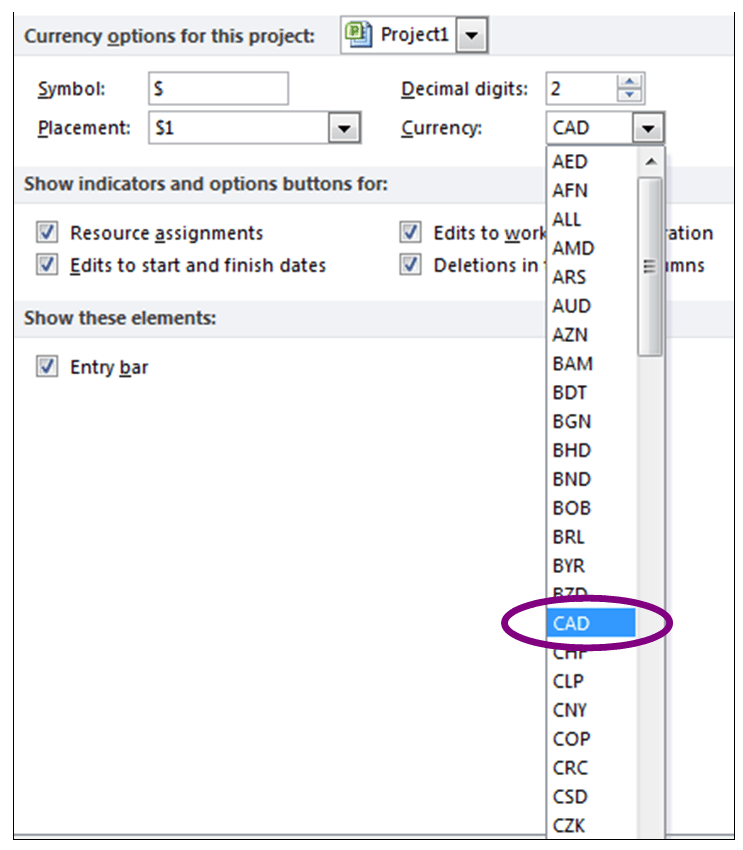
- Select the currency that is appropriate for your country. For example, CAD for Canadian dollars.
- Select the Entry bar tick box to have the same ability to view more field information that was available in MS Project 2007 and earlier versions. This option is useful when you have a number of columns being displayed.
- Select the currency that is appropriate for your country. For example, CAD for Canadian dollars.
- Use the Schedule tab to control the behaviour of your schedule. There are certain settings that will be more suited to your specific situation.
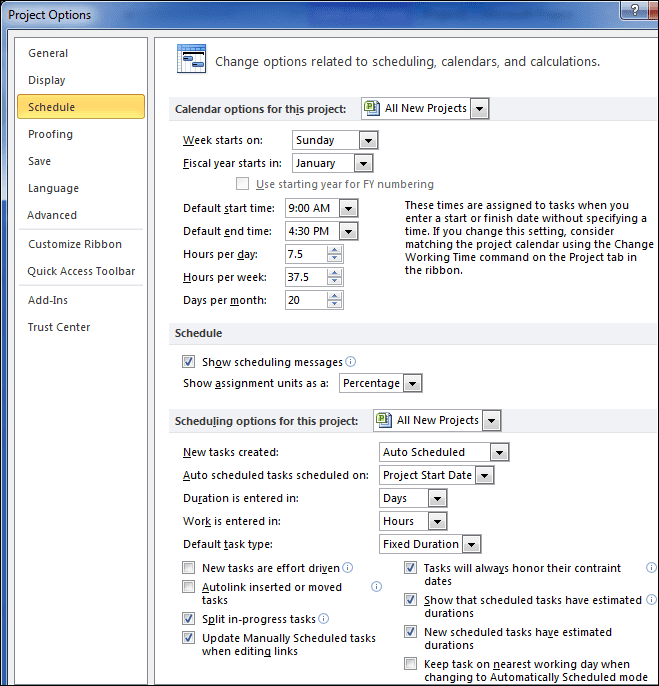
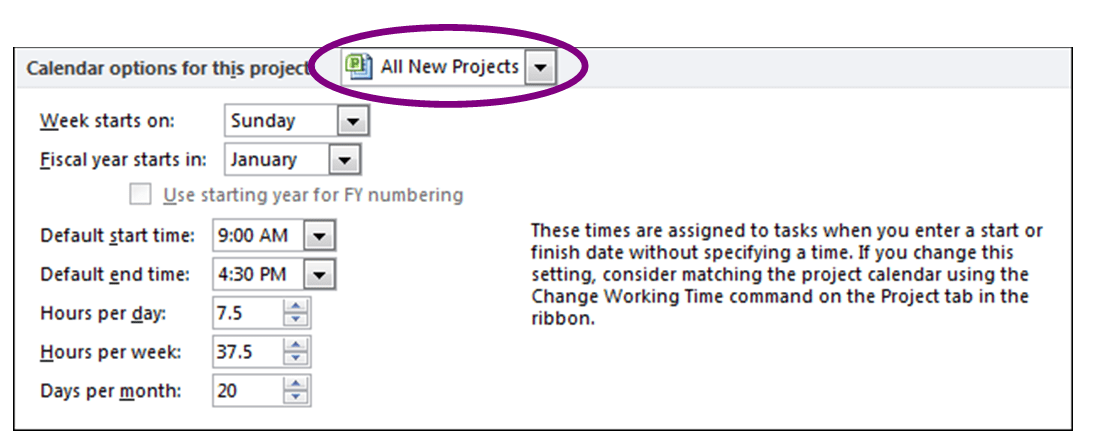
- Decide on the calendar options that work best for your situation. These selections are among those that may be set for All New Projects as opposed to only the current project. The image that follows shows the settings that are specific to how some companies view effective hours of work.
- Ensure that the tick box is selected for Show scheduling messages so that the software will alert you regarding certain inconsistencies.

- For the scheduling options, consider using the Auto Scheduled tasks and schedule from Project Start Date. This approach is closer to the classic MS Project rather than the Excel approach to scheduling.
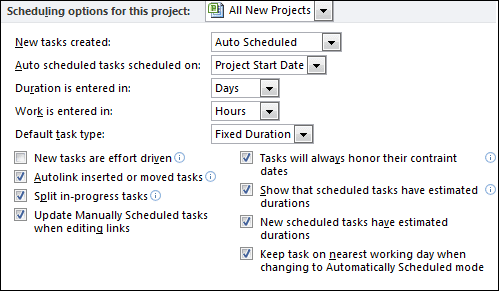
- The Default task type specifies the task type for any new tasks. The task type determines how Project recalculates the three related fields (Work, Duration, and Units) when one of them is edited. Fixed Duration specifies a fixed amount of time to complete. Fixed Units specify a set amount of resources to complete. Fixed Work sets the amount of work to complete. The default setting is Fixed Units.
- The following table summarises the behaviours when you select a default task type.
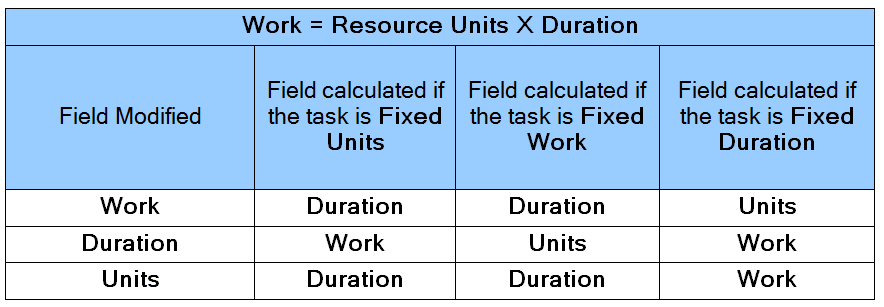
- Fixed Duration – Set the task to Fixed Duration if you want the task duration to remain constant, regardless of any change in assignment units or work for the task. For fixed-duration tasks:
- If you revise units, Project recalculates work.
- If you revise duration in a fixed-duration task, Project recalculates work.
- If you revise the amount of work, Project recalculates the units.
- Fixed Units – Set the task to Fixed Units if you want the number of assignment units to remain constant, regardless of any change in duration or work for the task. This is the default. For fixed-unit tasks:
- If you revise units in a fixed-unit task, Project recalculates duration.
- If you revise duration, Project recalculates work.
- If you revise the amount of work, Project recalculates the duration.
- Fixed Work – Set the task to Fixed Work if you want the amount of work to remain constant, regardless of any change in duration or resource assignment units for the task. Because fixed-work tasks are effort-driven by definition, the Effort driven check box is automatically selected for fixed-work tasks. For fixed-work tasks:
- If you revise units, Project recalculates duration.
- If you revise duration, Project recalculates units.
- If you revise the amount of work in a fixed-work task, Project recalculates the duration.
- Fixed Duration – Set the task to Fixed Duration if you want the task duration to remain constant, regardless of any change in assignment units or work for the task. For fixed-duration tasks:
- It is recommended to clear the New tasks are effort driven tick box. This tick box specifies that new tasks are scheduled such that the work on the task remains constant as you add or remove assignments. Assigning additional resources to a fixed-units effort-driven task, for example, shortens the task duration while removing resources lengthens it.
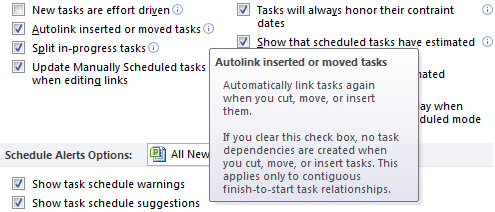
- The ‘i’ icon can provide you with more help information for each selection when you hover over it with your cursor. For example, you can find more information on the Autolink inserted or moved tasks tick box as per the following image.
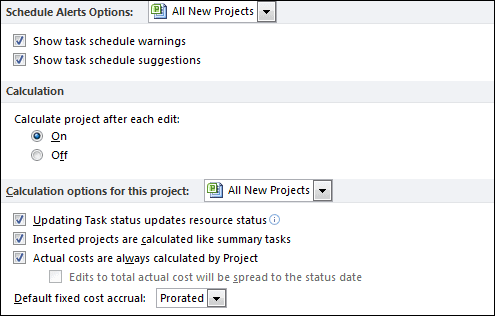
- The remaining options support scheduling by providing alerts and calculation options. Consider the following selections:
- Decide on the calendar options that work best for your situation. These selections are among those that may be set for All New Projects as opposed to only the current project. The image that follows shows the settings that are specific to how some companies view effective hours of work.
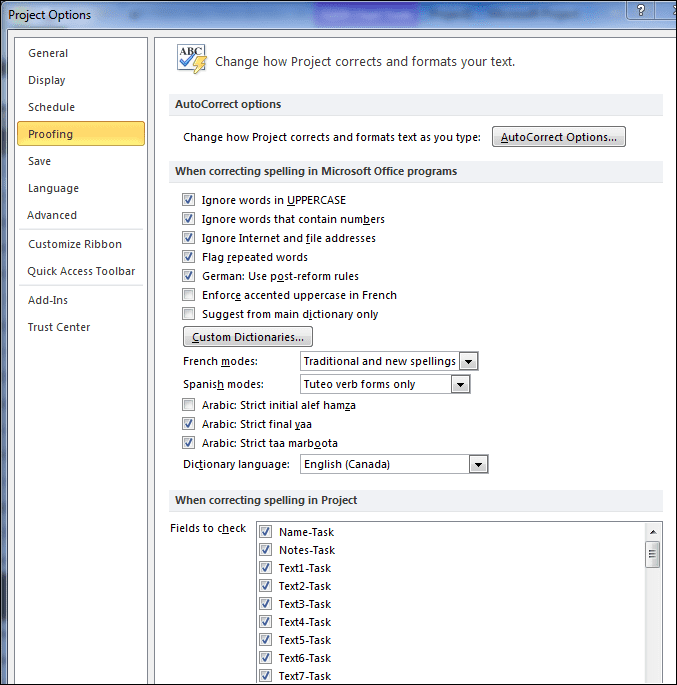
- You can accept the defaults for the Proofing tab unless you need to update the AutoCorrect Options, choose another Dictionary language, etc.
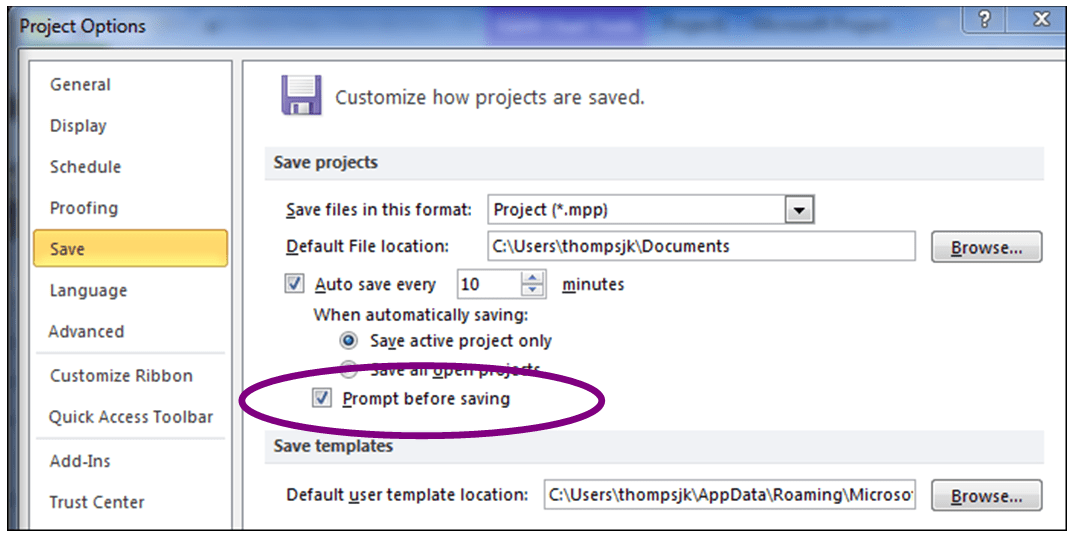
- On the Save tab, you can set the default for Save files in this format, the Default File location and the Auto save every fields. One watch-out to be mindful of is to ensure that the Prompt before saving tick box is active. This will prevent any unintended saves.
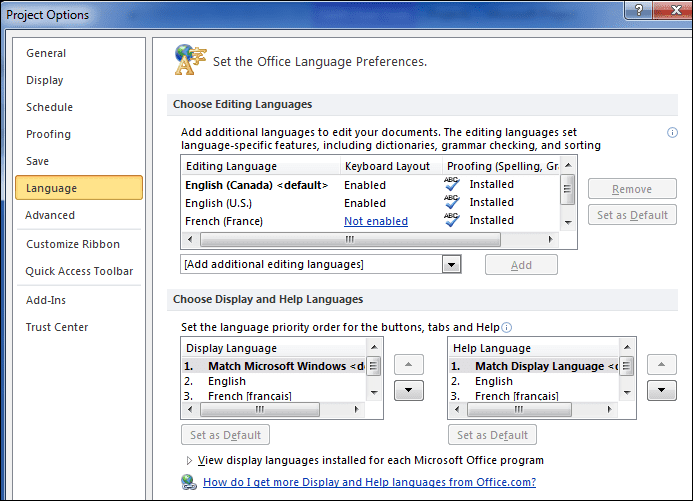
- Set your default Choose Editing Languages on the Language tab as well as the Choose Display and Help Languages.
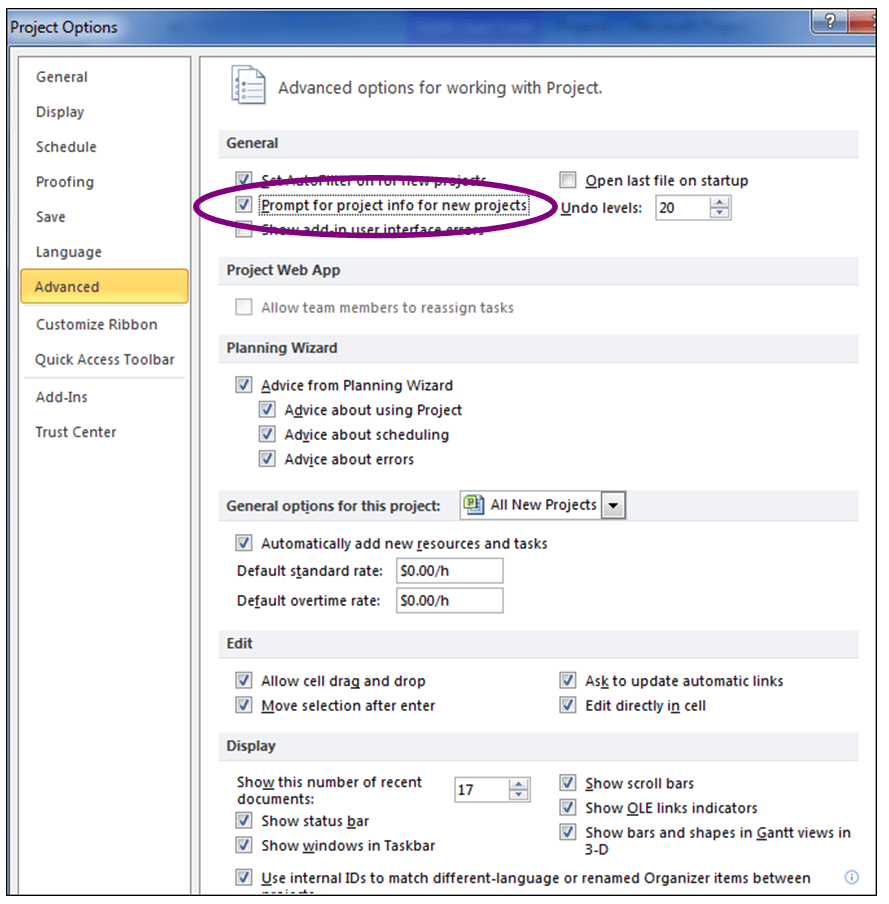
- The key field on the Advanced tab is the Prompt for project info for new projects tick box. It will allow you to modify the Project Information as you start a new project.
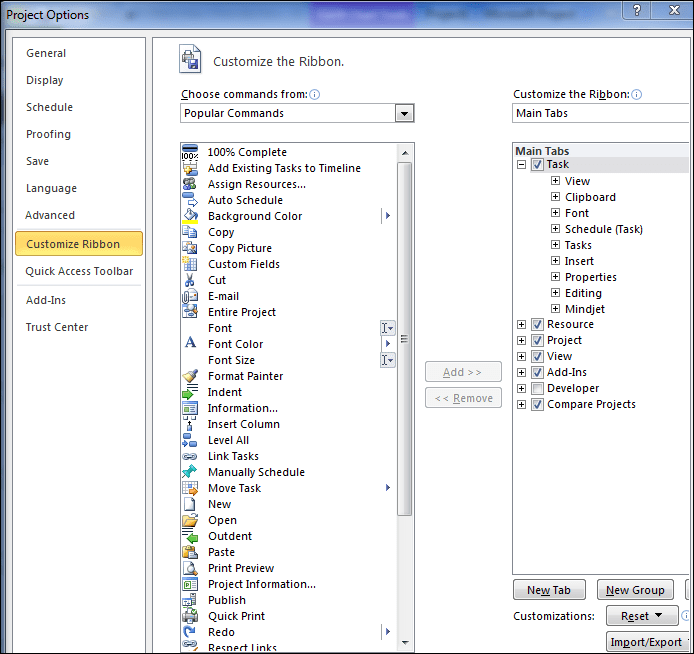
- The Customize Ribbon and Quick Access Toolbar tabs are used to modify the main MS Project menus. These options will be reviewed in other articles.
- Once you have completed all the configuration press the OK button in the bottom right hand corner of the screen and begin using MS Project to develop your schedule.


Jeffrey Thompson
Hi KdW,
Thank you for your comments. To address your specific question, I would recommend creating a new calendar (a copy of the standard) and configuring the days and times based on your requirements. You can then apply this calendar to entire project or to specific tasks as required.
I hope this helps.
Regards,
Jeffrey