
Every once in a while, I will see a question like this in one of the Microsoft Project user forums: “Why can’t I see all of the tasks in my project?” Inevitably, the source of the missing tasks is that the user has a filter applied to their project without realizing it. The filter in question is either applied using the Filter pick list in the View ribbon, or it is applied using the AutoFilter feature in one of the columns.
For example, take a look at the project shown in Figure 1. Notice that a number of tasks are missing, including task ID numbers 1-7, 10-11, 14-16, 19, 29-31, and 33-35. What is going on here? Where are the missing tasks?
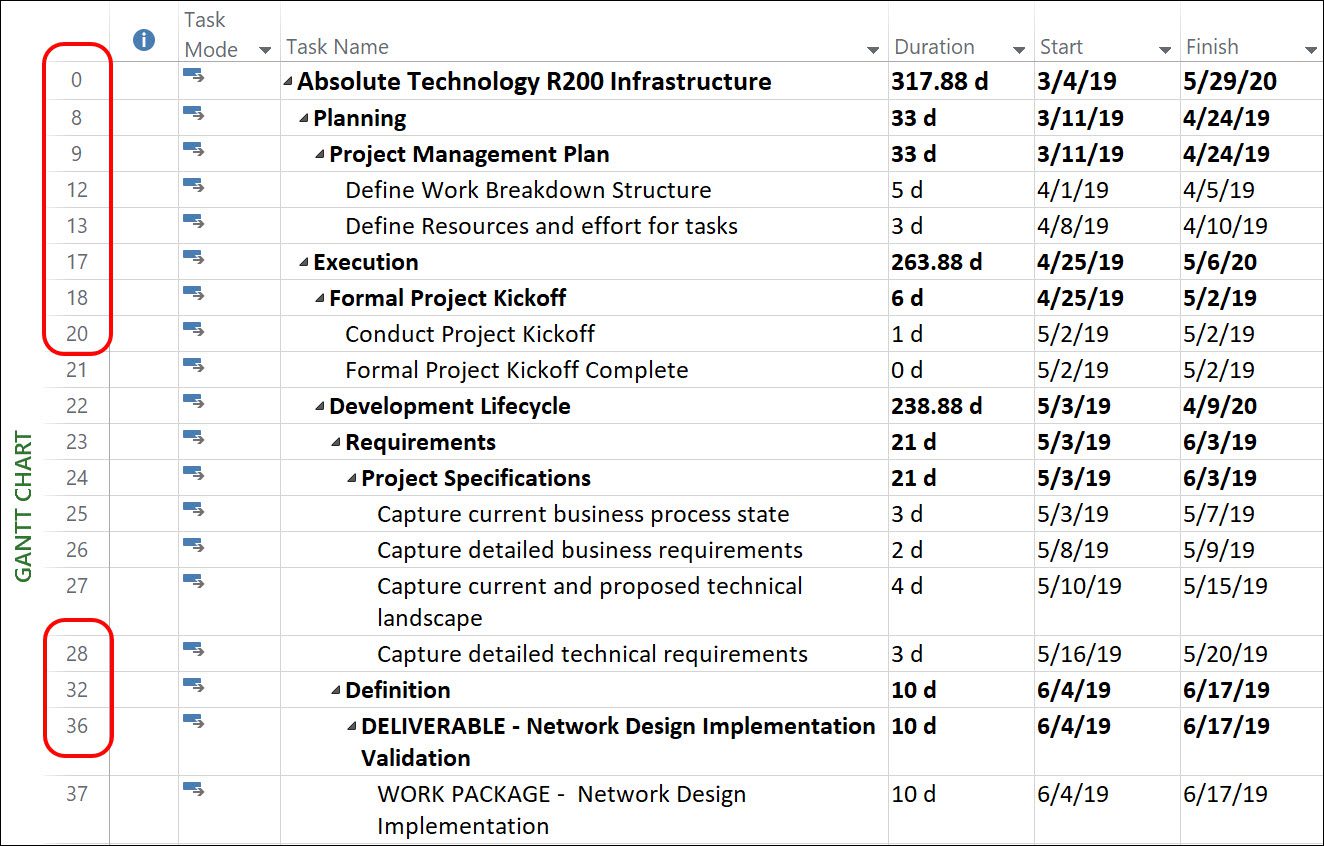
Figure 1: Many missing tasks in the project
To determine whether you have a filter applied to your project, the first place that you should look is in the Data section of your View ribbon. In that section of the View ribbon, you will find the Filter pick list, which will display the name of the current filter. If you see any value listed other than [No Filter], then this means you have a filter applied to your project. Notice in Figure 2 that the Filter pick list indicates that I do not currently have a filter applied to my project. So, where are my missing tasks?
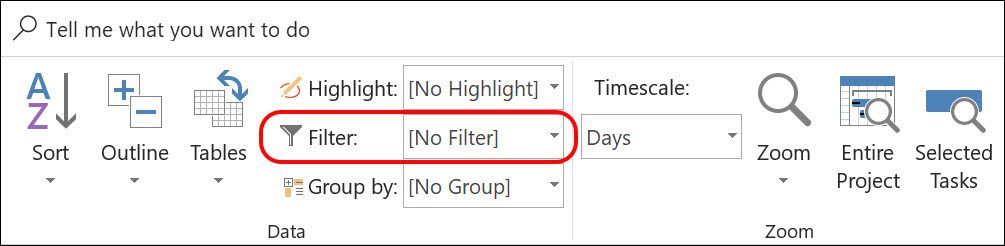
Figure 2: No filter currently applied
If the Filter pick list displays the [No Filter] value, then this means you have AutoFilter applied on one of the columns in your Microsoft Project schedule. Finding the column that is the source of the issue can be troublesome, especially if you do not have that column currently displayed. Fortunately for us, Microsoft Project makes it very easy to determine if you have AutoFilter applied, as well as the name of the column in which AutoFilter is applied. However, where you find this information is not very obvious.
At the far left end of the Status Bar at the bottom of your Microsoft Project application window, the software will tell you what type of filter you have applied. If you have AutoFilter applied to any column, you can float your mouse pointer over the message to determine the name of the column. Notice in Figure 3 that the software indicates that I have AutoFilter applied on the Resource Names column.
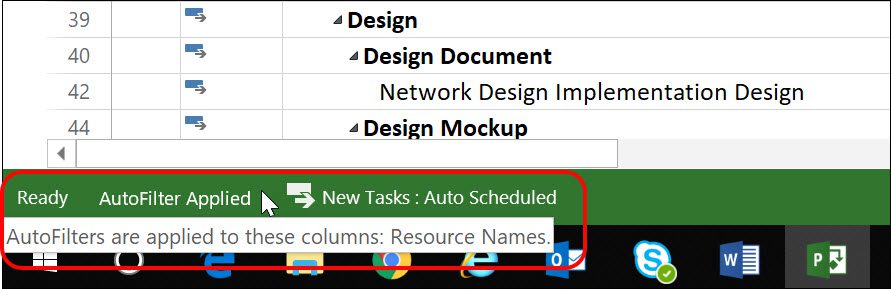
Figure 3: AutoFilter applied on the Resource Names column
The fastest way to clear any filter is to press the F3 function key. This keyboard shortcut will clear all types of filters, including Standard filters, Highlight filters, and AutoFilter.


Jim Aksel
I still think it would be sweet if they would just color the ID column blue like they do in Excel.
John Williamson
Thanks again Dale, good article. You can always identify a keyboard that has been used by a MS Project Scheduler: the F3 key shows signs of extreme wear.
Bruce Geiser
I did not know about the F3 shortcut, I customized my quick access toolbar by adding the Clear Filters command. This works really well in Excel too.