This article was originally published in MSProjectExperts’ blog. Reproduction of content on this site is strictly prohibited without the express permission of MSProjectExperts. Copyright (c) 2012 CHEFETZ LLC. All rights reserved.
Recently, a member of the Project Server forum asked how can you display a Go-Live calendar on PWA? After doing some investigation, here are the instructions on how to create your very own Enterprise Go-Live calendar. This technique should work for Project Server 2007 and 2010. This report will also work for Project Server 2013 if you add dbo. before all table and view names in the query. For example, MSP_TimeByDay becomes dbo. MSP_TimeByDay in Project Server 2013.
SCENARIO
In this scenario, the PMO has specific types of milestones that they would like to monitor. They are:
- Go Live
- Phase Boundary
- Major Deliverable
The desire is to have a view of the current month’s Go Live activities so that this can be easily visualized using a calendar display so that conflicts can be easily caught.
SETUP
This Go Live view requires metadata tagging of the requisite milestones to show in the report.
Setup will consist of three steps.
- Create the Lookup Table
- Create the Task level Custom Field
- Tag the requisite milestones in the project plan.
Lookup Table
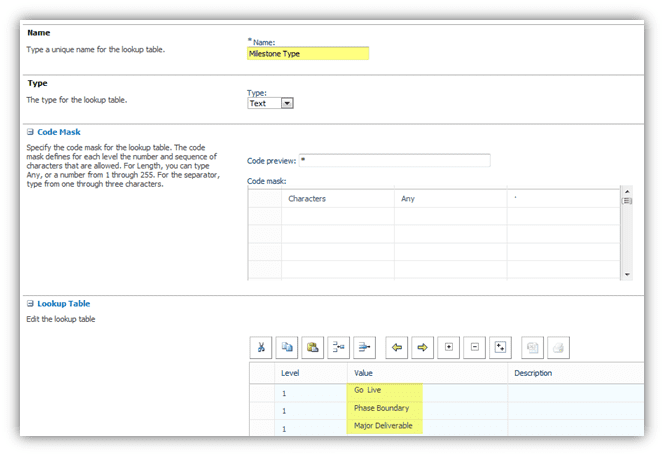
The first step is to create a Lookup Table for the three milestone types to track. The new Lookup Table name will be Milestone Type.
To create a new Lookup Table, complete the following steps from the Custom Fields and Lookup Tables page:
- Go to Server Settings
- Click Enterprise Custom Fields and Lookup Tables
- Click the New Lookup Table button.
- Enter Milestone Type in the Name field.
- The Lookup Table defaults to Type Text and provides a single level code mask. This meets our needs so scroll down to the
- Lookup Table section to enter the values.
- Enter data in the Lookup Table section of the page as follows
- Go Live
- Phase Boundary
- Major Deliverable
- Click the Save button to save your new Lookup Table.
Custom Field
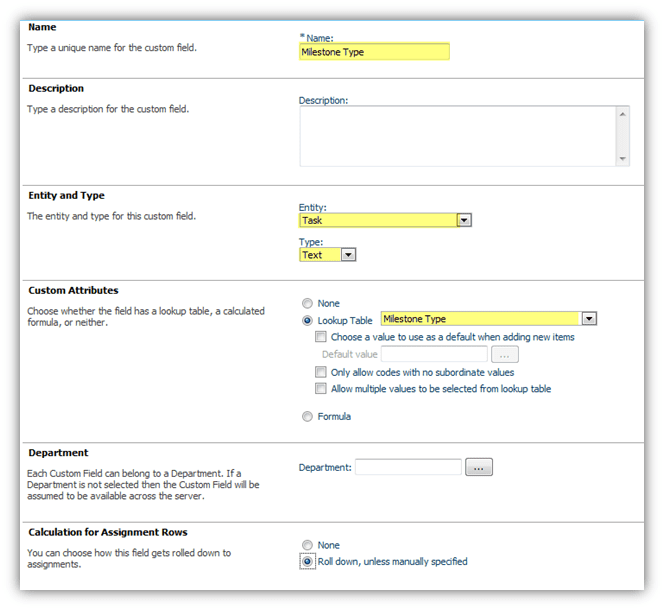
The next step is to create the Task level Custom Field that holds the metadata tag value.
- Go to Server Settings
- Click Enterprise Custom Fields and Lookup Tables
- Click the New Field button
- Enter Milestone Type as the name for your new Custom Field
- Click the Entity pick list and select the Task entity from the pick list.
- Click the Type pick list and select the Text type.
- In the Custom Attributes section, select the Lookup Table option and then select the Milestone Type Lookup Table from the Lookup Table pick list.
- Click the Save button to save your new Custom Field.
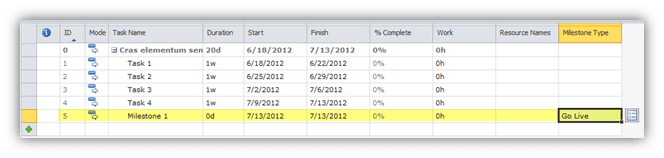
DATA TAGGING
In the picture below, the Milestone Type Custom Field is added to the Task Summary view. The Project Manager can tag the milestones with the milestone type value. Save and publish the project, making the data available for reporting. Repeat this process for all active projects.
SQL SERVER REPORTING SERVICES REPORT
The following query enables the creation of the dataset needed for this report. By default, only current month data is selected. This query takes advantage of the MSP_TimeByDay table to populate all of the calendar information. This data is joined to a subquery that retrieves the task milestones and related project information where they exist.
The report itself is inspired by the SSRS techniques presented in this blog post. Essentially, a matrix is used to create the calendar framework and an embedded table displays the daily information. The design can be printed or displayed online.
The date filtering uses a technique presented by Pinal Dave on the SQL Authority blog. I highly recommend subscribing to this blog if you regularly work with SQL . Here is the particular article.
This article provides a usable report for the outlined purpose but it is but a starting point. The query and report can be enhanced to meet the particular needs of your organization.
Query
The query that was outlined in the simple-talk.com blog post wasn’t designed to work with Project data. Also, Common Table Expressions weren’t necessary as the MSP_TimeByDay table already contains a record for every day that Project supports. Consequently, I rewrote the query to fit the Project data model.
The [Order] field uses the date to number the related records so that multiple records for the same date have the same order number. In the report, the calculation uses this number to determine the row record. This interesting technique may warrant further investigation on your part, for use in other reporting needs. Details of using DENSE_RANK operation can be found here.
One last note to those seeking to extend this query. If you add a Where clause condition for a secondary table, SQL will automatically convert the LEFT OUTER JOIN with the MSP_TimeByDay table to an INNER JOIN. Note, the WHERE clause selection for Milestone and Milestone Type fields, is performed to the subquery to prevent this change in join behavior. Otherwise, the only days returned were those that had milestones. This is not desirable behavior for creating a calendar.
SELECT [Order] = DENSE_RANK() OVER (ORDER BY MSP_TimeByDay.[TimeByDay])
, MSP_TimeByDay.TimeByDay AS [Date]
, MSP_TimeByDay.TimeDayOfTheWeek AS [Week Day]
, MSP_TimeByDay.TimeDayOfTheMonth AS [Day]
, MSP_TimeByDay.TimeMonthOfTheYear AS [Month]
, CAST(CONVERT(VARCHAR(10), TaskStartDate, 101) AS DATETIME) AS EventDate
, MSP_EpmTask_UserView.TaskName AS Note
, ProjectName
FROM MSP_TimeByDay LEFT OUTER JOIN
(SELECT ProjectName, TaskName, TaskStartDate
FROM MSP_EpmTask_UserView INNER JOIN
MSP_EpmProject_UserView ON MSP_EpmProject_UserView.ProjectUID = MSP_EpmTask_UserView.ProjectUID
WHERE MSP_EpmTask_UserView.TaskIsMilestone = 1 AND MSP_EpmTask_UserView.[Milestone Type] = ‘Go Live’) MSP_EpmTask_UserView ON
MSP_TimeByDay.TimeByDay = CAST(CONVERT(VARCHAR(10), TaskStartDate, 101) AS DATETIME)
WHERE MSP_TimeByDay.TimeByDay >= CONVERT(VARCHAR(25), DATEADD(dd, – (DAY(GETDATE()) – 1), GETDATE()), 101) AND
MSP_TimeByDay.TimeByDay <= CONVERT(VARCHAR(25), DATEADD(dd, – (DAY(DATEADD(mm, 1, GETDATE()))), DATEADD(mm, 1, GETDATE())), 101)
ORDER BY [Order]
Report
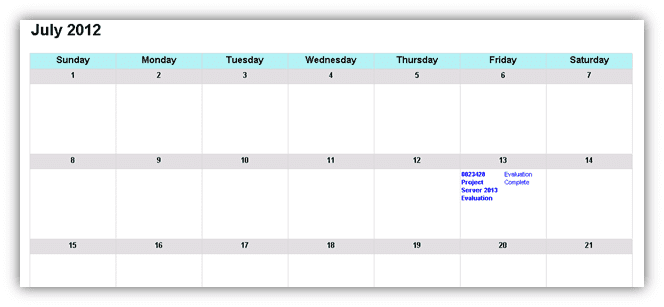
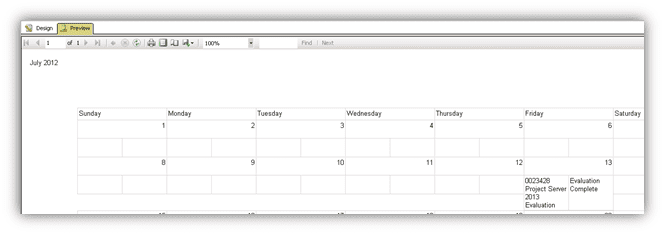
The report will take the data from the above query and generate a report that looks like this. It can either be printed or used online.
Basic Construction Steps
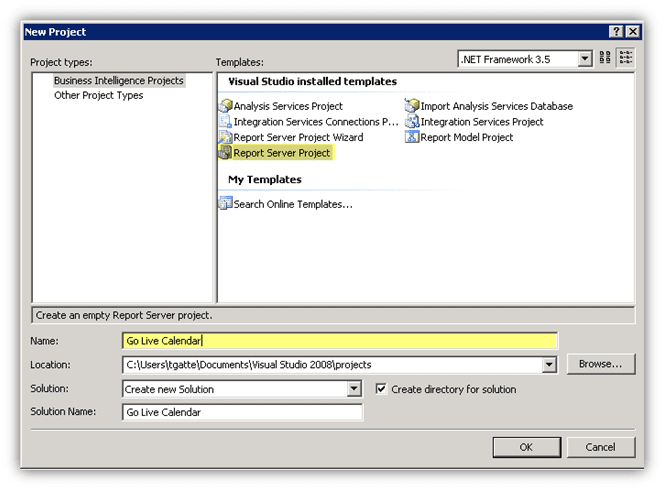
- Open the Business Intelligence Design Studio.
- Create a New Report Server Project by selecting Report Server Project and clicking OK.
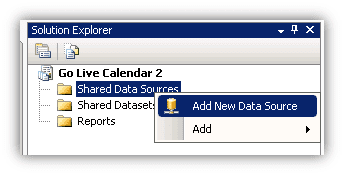
- Right-click Shared Data Sources and select Add New Data Source.
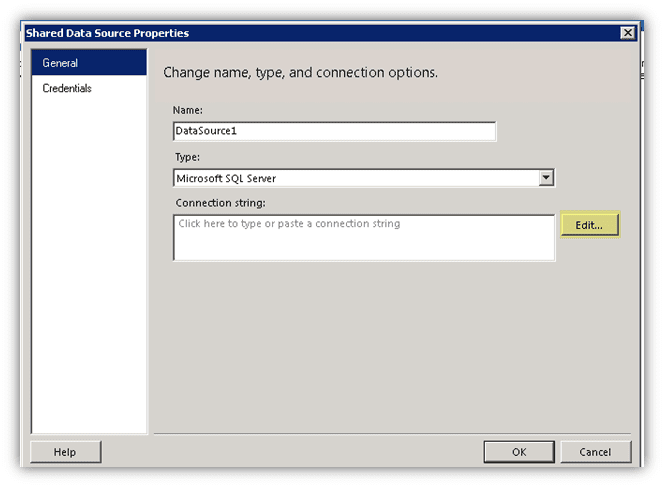
- Accept the default name and click the Edit button.
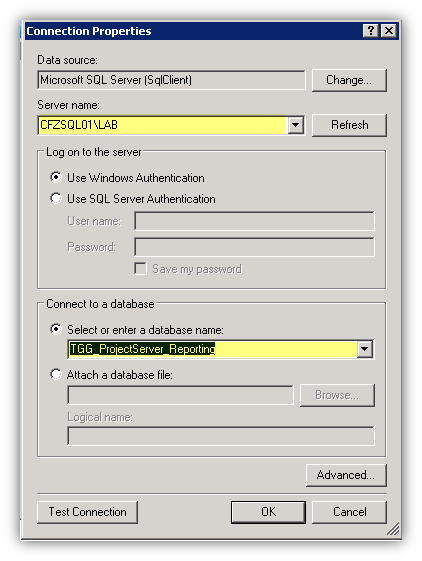
- Select the SQL Server and select the Reporting Database name, then click OK.
- Right-click Reports and select Add, New Item to add a new item to the Reports folder.
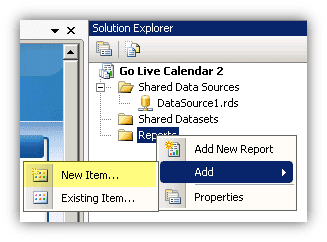
- Give the report a name and click Add.

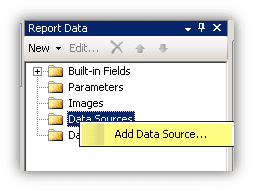
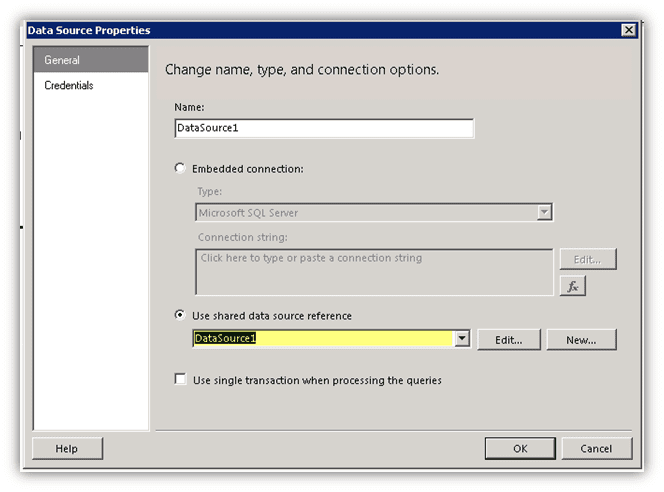
- Add the Shared Data Source to the report by right-clicking on Data Sources in the left pane and selecting Add Data Source.
- Select DataSource1 that was created above and click OK.
- Add an internal dataset by right-clicking Datasets in the left pane and selecting Add Dataset.
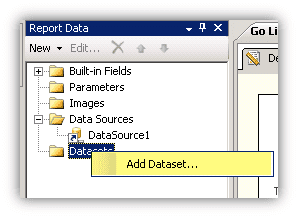
- Set the name, select Use a dataset embedded in my report, select the datasource from above and paste in the query from above. Then click OK.

- On the report design surface, right-click and add a page header.

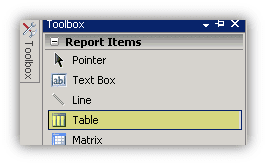
- Select a Textbox in the Toolbox.
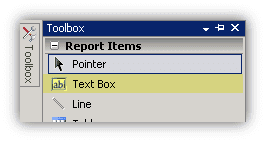
- Drag it to the report header.
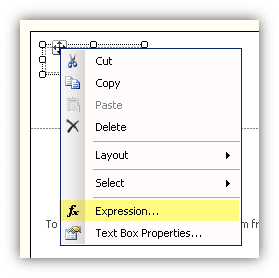
- Right-click on the text box and select Expression.
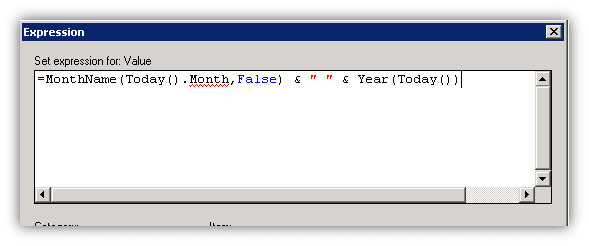
- Type in formula to get Month and Year =MonthName(Today().Month,False) & ” ” & Year(Today()) and click OK.
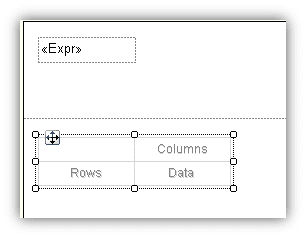
- Select a Matrix from the Toolbox.
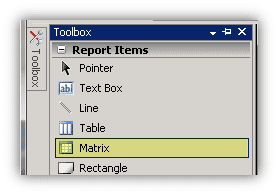
- Drag it to the report design surface body section.
- Right-click the matrix column header and select Tablix Properties.
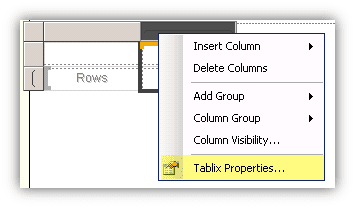
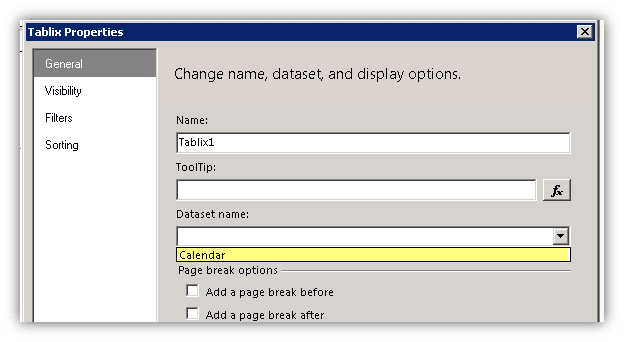
- Select the Calendar dataset and click OK.
- Set the row grouping for the matrix so that only 7 days appear by row. Select the default RowGroup dropdown and select Group Properties.
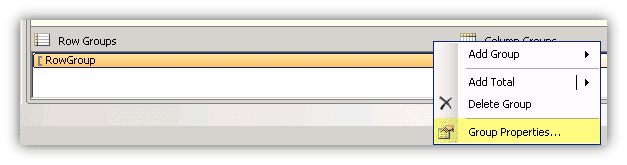
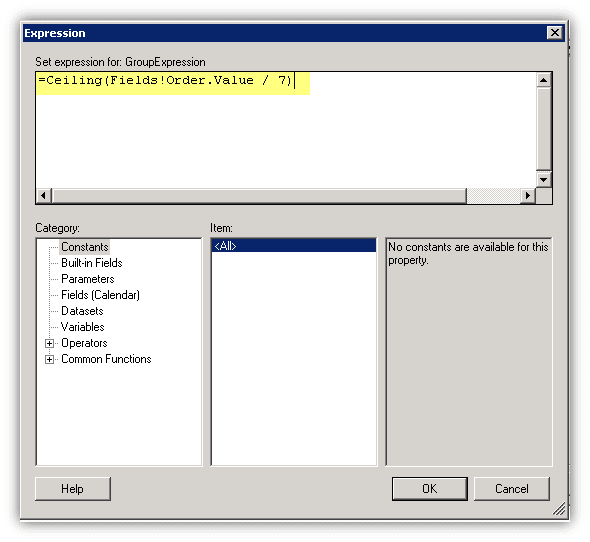
- Click the Function button.
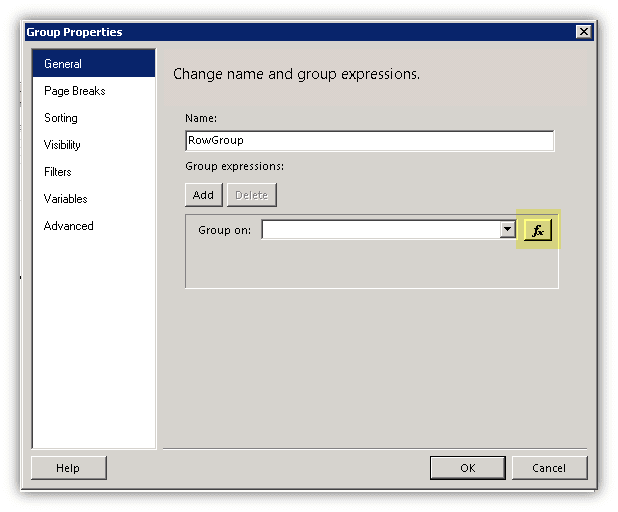
- Enter the following formula =Ceiling(Fields!Order.Value / 7) and select OK.
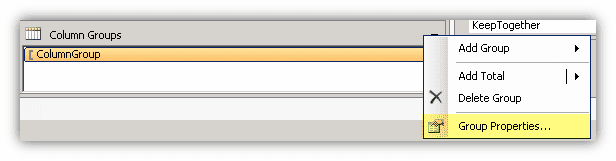
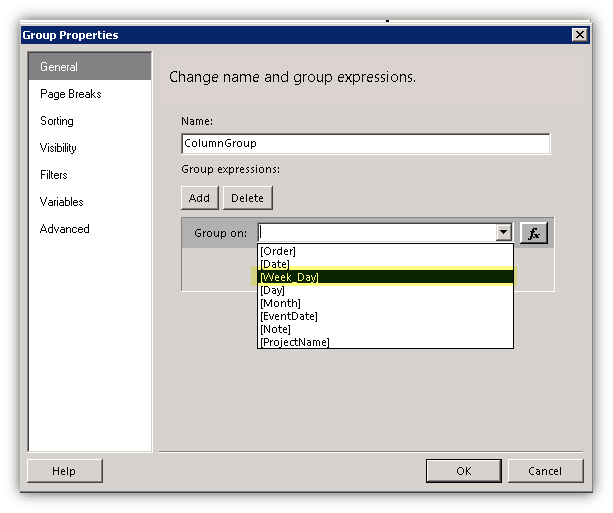
- Set the Column Group to group by WeekDay value so that all Monday items appear together. Select the default ColumnGroup dropdown and select Group Properties.
- Select Week_Day from the Group on Dropdown and select OK.
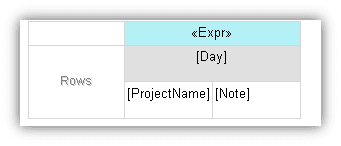
- Select a Table from the Toolbox.
- Drag and drop it into the matrix data cell.
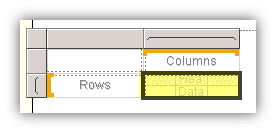
- Resize the matrix to make the column wider and the row taller.
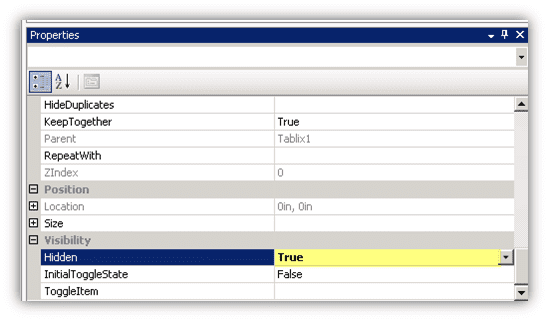
- Hide the left most Rows column of the matrix. Select the column header for Rows.
- In the Properties panel, change the Hidden property to True.
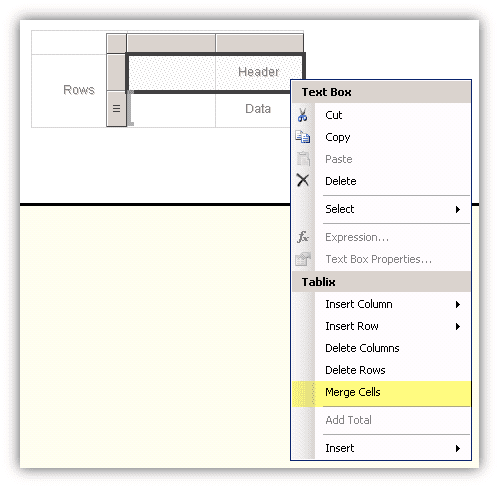
- Remove the rightmost column from the embedded table. Right-click the column header and selecting Delete Columns.

- Merge the Header cells together by selecting both header cells, right-click, and select Merge Cells.
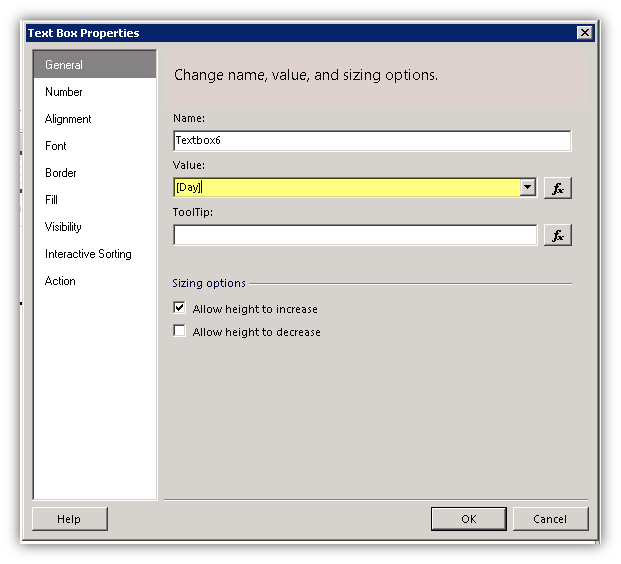
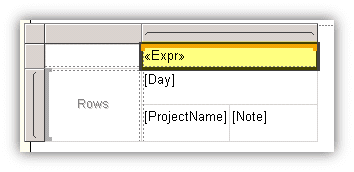
- Set the Header cell to show the Day value. Select the merged cell, right-click, and select Text Box Properties.
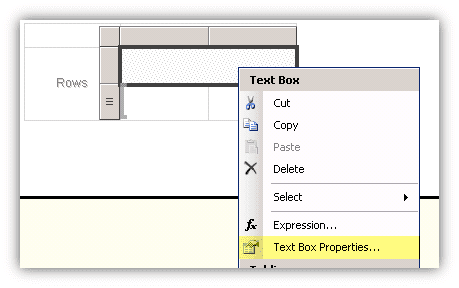
- Select [Day] in the Value field and click OK.
- Repeat step 22 for the left side Data cell, setting the field value to [ProjectName].
- Repeat step 22 for the right side Data cell, instead setting the Data field value to [Note].
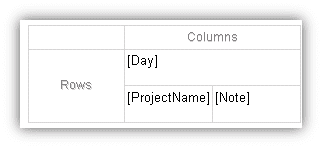
- Your completed steps 22-24 should appear as thus.
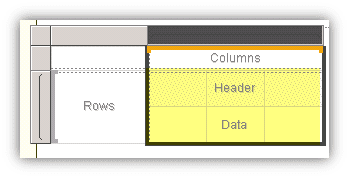
- Right-click the Columns cell and select Expression.
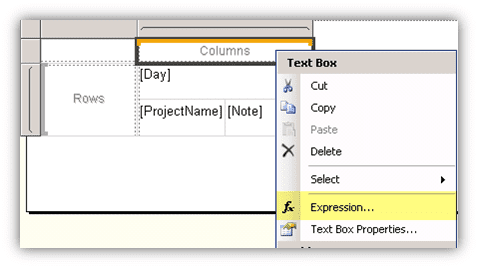
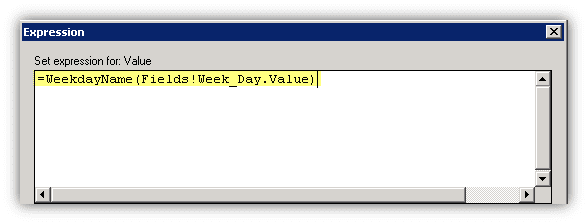
- Enter the following expression in the box =WeekdayName(Fields!Week_Day.Value) and click OK.
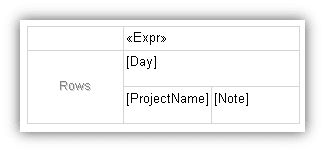
- The completed Matrix should appear as this.
- Click the Preview Tab to show the in progress Calendar.
Creating a Pleasant Appearance
The calendar that appears in step 29 is functional but not very pleasant to the eye. Let us apply a few changes to the calendar output to increase its visual appeal. To demonstrate how to do this, this part will apply some backgrounds to make the divisions a bit more apparent. You can continue to modify the look to meet your own needs.
- Select the Design tab.
- Select the Day of the Week cell.
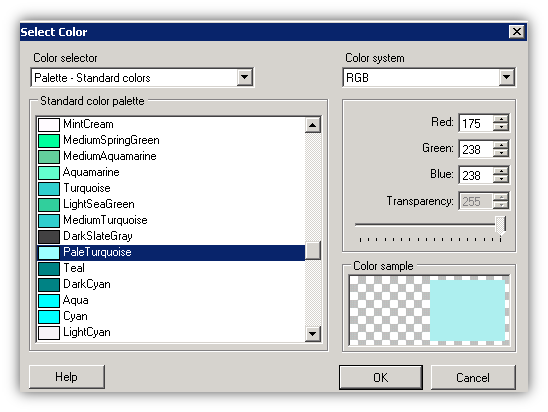
- In the Properties panel on the right, find the Background Color property, click the color dropdown and select More colors.
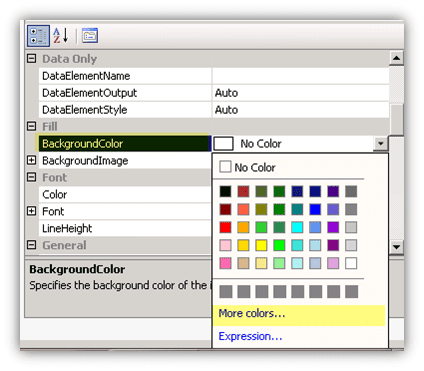
- Select PaleTurquoise and click OK.
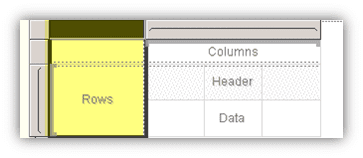
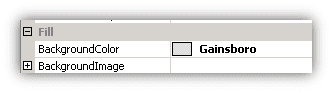
- Select the Day cell and repeat steps 3 and 4, selecting Gainsboro this time.
- Center both Day of the Week and Day cells. Your matrix should appear as this.
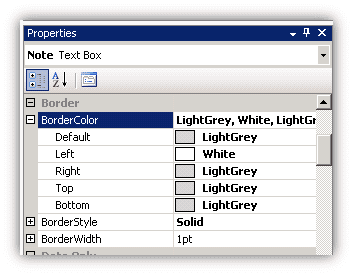
- Lastly, remove the middle border between the Project Name and the Task name. Select the Note cell and change the BorderColor for the Left border to White.
Your calendar will now appear as this. You can continue to adjust the visuals to your liking.
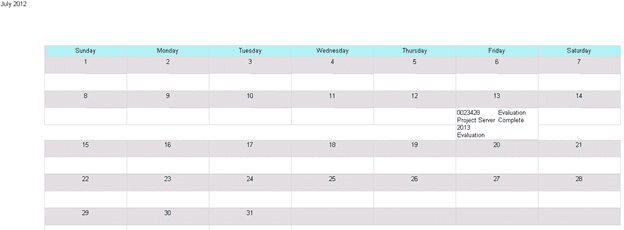
With a bit more tweaking, I collapsed the hidden Rows column and aligned the left side of the calendar with the heading. I also adjusted font sizes, colors and did bolding where necessary. The result looks like this. Again, this is intended to get you started so you can modify the visuals to meet your organization’s needs.