
In a recent Project for the web update, we were treated with a number of new features. For some of us, including me, it took a while before they showed up, but I’ve got them now! View all the December 2020 changes in Project for the Web here.
With the new rollout, we now have the option to add a link to a task, which can be very useful if you want to add some depth to your tasks. You might, for instance, want to include an instruction manual. There is also another new column called “Quick view,” which visualizes tasks that include notes and/or attachments.
This article will go into more detail on the third new feature, which is a way to import your MPP files into the software!
Prerequisites
Preparation is key for this import action, so make sure you take the actions I outline below.
Step 1)
In order to get started, you will have to download a zip file from the official release article. This download contains three files: two are DLL’s and one is a PowerShell file.
Step 2)
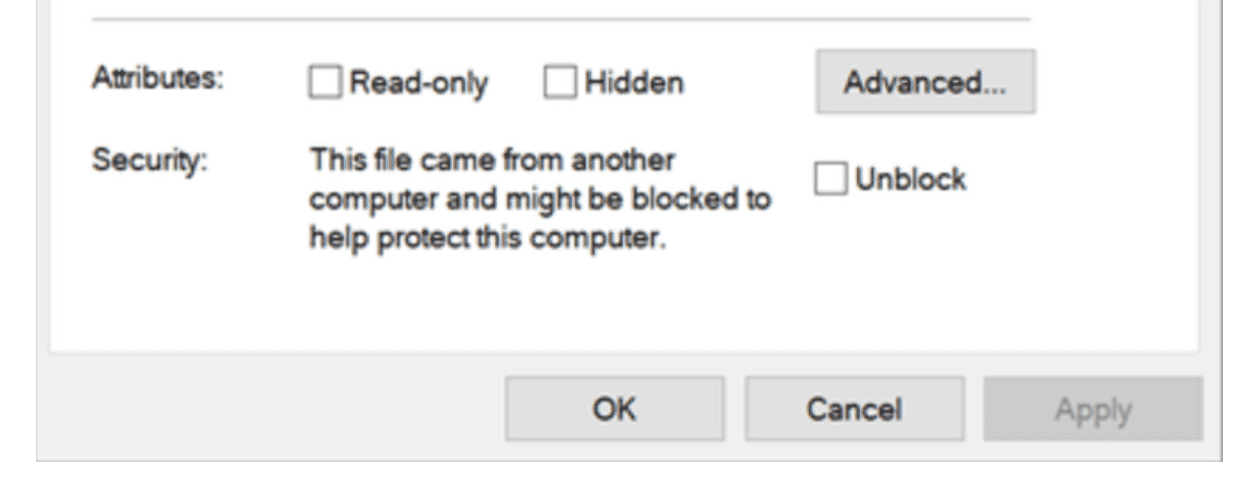
When downloading these files, they will probably be in a “blocked” state. This is a feature that Windows utilizes to protect users from malicious code files, but it also means that you will need to unblock the files before you can use them. If you don’t unblock the files, you will get an error message while running the code in PowerShell.
To unblock the files, right-click on them, open the properties window, and select the checkbox “unblock” on the bottom right. Do this for each of the three files, and you are almost ready to go!
Step 3)
You will also need to be able to run PowerShell on your machine. PowerShell is like MS.DOS for those who remember, but more powerful and modern.

The Actual Code
There are two “Cmdlets” that you will need to run. The first code will load the required DLL’s into the current PowerShell session, and the second will import the file to Project for the Web (also called P4W).
Cmdlet A (loading the libraries):
| Import-Module .\ProjectImport.psm1 |
Cmdlet B (importing the MPP file):
| ImportProject -InstanceId your instance ID -FilePath “Your full filepath” |
If you receive either of the following two messages, “Running Script is Disabled on this System” or “Execution of scripts is disabled on this system,” you’ve run into another error message related to a second security lock.
We do want to have our code run on the system, therefore we need to allow the current user to edit and run the code on his/her machine. To change the security setting and allow the current user to run code he/she trusts type in the following 2 cmdlet’s:
Cmdlet C (to get the required settings):
| Get-ExecutionPolicy -List |
Cmdlet D (to change the security for Current User):
| Set-ExecutionPolicy RemoteSigned -Scope CurrentUser |
Once you have the permission to run the code on your system, and you run Cmdlet A, you are good to go.
For Cmdlet B, there are two bold text sections: your instance ID and the “your full filepath.”
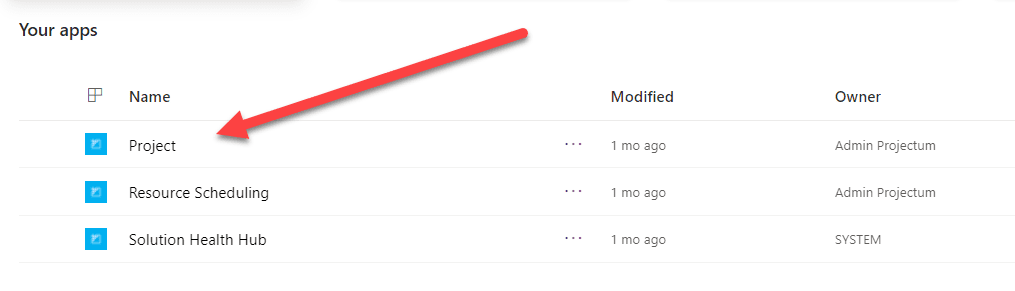
For the first one, you want to go to this website and find any model driven PowerApp, such as the default “Project” PowerApp. Once that page is loaded, you will see a link that looks similar to the one below. Grab that URL up until the “.com/” as I’ve shown.
The full file path is easier to get. Just navigate to the location where you have the Project. Note that it needs to be a file, so no Project Online location. Once you are there, get the text in the file explorer, and add the name of the file. Don’t forget to include .MPP at the end.
Your Cmdlet B code could look similar to this:
| ImportProject -InstanceId https://org36XXXXX.crm4.dynamics.com/ -FilePath C:\Users\elo\Documents\TPC\MPUG\MasteringProjectVisualisation.mpp |
Results
Once you gone through the steps above, you will be presented with a sign in request for the Project for the Web environment. This is most probably linked with your Office 365 account. After a short wait, there will be text similar to this displayed:
| Imported Project ID:
Guid —- bfacd959-ad75-4e77-80ea-cff8b821da4a Imported Project URL: https://project.microsoft.com/en-US/#/taskgrid?projectId=bfacd959-ad75-4e77-80ea-cff8b821da4a Import project done. |

And, you will find your newly imported project in your Project Home environment!
Not Everything from MS Project is Included
You might already know this, but just in case, I would be remiss if I didn’t state that Project for the Web isn’t as “complete” as big brother Microsoft Project. Some key functionalities are missing, such as deadlines and baselines. If you had them in your project’s schedule, they will not be there on the imported project. Here’s a current list.
Unsupported features include (but are not limited to):
- Baseline
- Project-level custom fields
- Cross-project dependencies
- Links
- Schedule from setting
- Sub Projects
- Constraints
- Deadlines
- Formulas
- Null tasks
- Inactive tasks
- Manual tasks
- Recurring tasks
- Resources
- Source
Need to Knows
You are not allowed spaces in the name of the project. It will return an error similar to this one:
| ImportProject : Cannot process argument transformation on parameter ‘Authentication’. Cannot convert the “Visualisation.mpp” value of type “System.String” to type
“Microsoft.IdentityModel.Clients.ActiveDirectory.AuthenticationResult”. At line:1 char:126 + … h C:\Users\elo\Documents\TPC\MPUG\Mastering Project Visualisation.mpp + ~~~~~~~~~~~~~~~~~ + CategoryInfo : InvalidData: (:) [ImportProject], ParameterBindingArgumentTransformationException + FullyQualifiedErrorId : ParameterArgumentTransformationError,ImportProject |
Take a close look at the yellow marked sections. The second highlight shows the full-length name, but the first only shows the last section linked to the *.mpp.
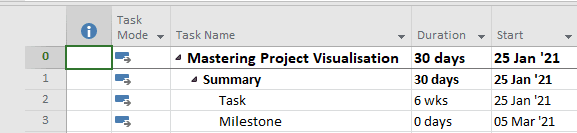
Secondly, note that ProjectSummaryRow name = Project name.
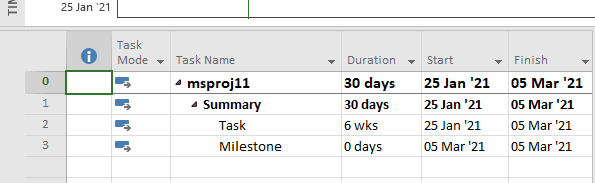
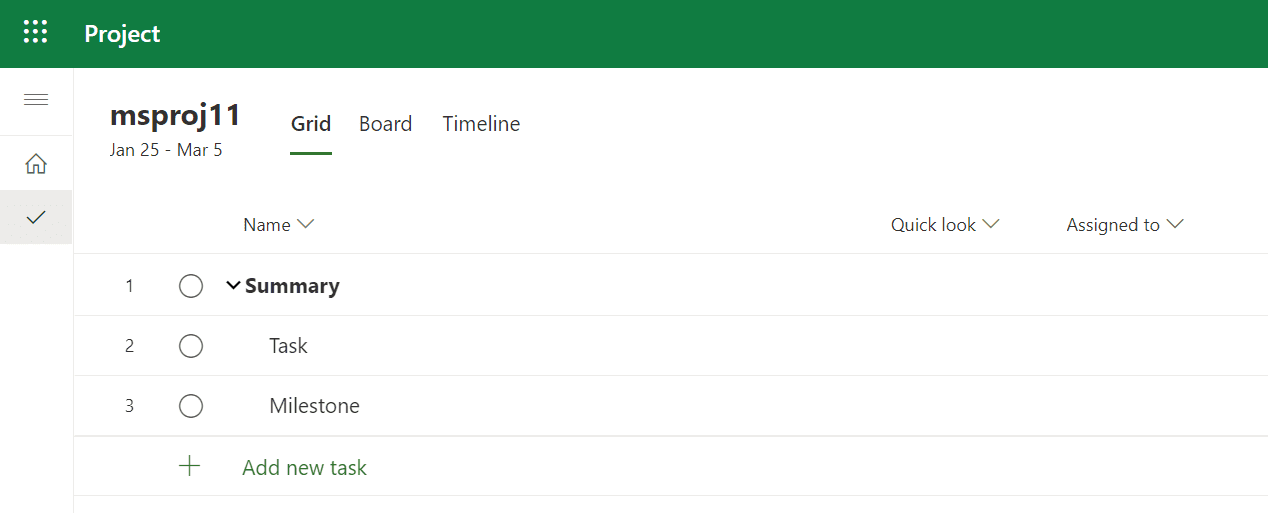
The Project in Project for the web will have the name that you fill in on the project summary row (Row 0). Here’s where to find that if you don’t have the row on your schedule:

That row could look something like this:
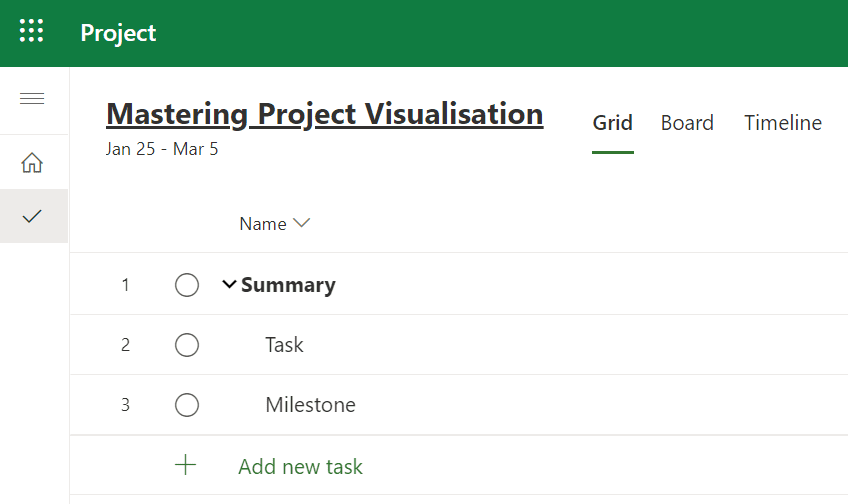
Resulting in:
While you want to have this:
Resulting in:
Another thing is that if you are unable to import, check your file path spelling. There might be some incorrect spelling on your file path in the code, this will result in this error:
| Unable to import at this time. Please try again later
At C:\Users\elo\Desktop\ProjectImport\ProjectImport.psm1:262 char:5 + throw “Unable to import at this time. Please try again later” + ~~~~~~~~~~~~~~~~~~~~~~~~~~~~~~~~~~~~~~~~~~~~~~~~~~~~~~~~~~~~~ + CategoryInfo : OperationStopped: (Unable to impor…try again later:String) [], RuntimeException + FullyQualifiedErrorId : Unable to import at this time. Please try again later |
Don’t try again later, just change the file path text to the correct value!
I’d love to hear if you’ve tried this method for importing MMP files into Project for the web. Leave a comment below.


Ronald B. Smith, PMP
Nice article!
I would of liked to have seen background requirements under Prerequisites. For example, do you need to have a MS Office 365 subscription? Which Plans are covered? For example, Plan 1($10/user/month), Plan 3 ($30/user/month) or Plan 3 ($55/user/month which includes access to BI functionality)? Any other unknowns or recommendations? Thanks – Ron
Erik van Hurck
Hi Ronald,
Thanks for reading and commenting on the article.
As for your question there’s a 2 part answer:
The licenses are as always a bit complex and there’s a bit of a tier what you can / can’t do:
With only office 365 you have read permissions to all schedules you are assigned to in Project for the Web. But you will not have the option to create new schedules, nor will you have a license for MS Project. So this is too limited.
With a P1 license you will have permissions to create new schedules in Project for the Web, but you aren’s licensed for Project Online Desktop client. So if you don’t have a license for MS Project in another way you will be limited in your options again. You can however grab current schedules from MS Project and import them under your user with a P1 license.
With a P3 and P5 license you have enough permissions and license level to also have permission to use Project Online Desktop client. Meaning that you are good to go and create schedules in both Project for the Web and MS Project.
For this scenario I show in the article a P1 license will be sufficient.
Part 2 answer: Unknowns or recommendations
I haven’t come accross any additional unknowns other then the article already stated. But there can always be unknown unknowns.
Recommendations: Keep an eye out for new articles on MPUG, the official blog (there’s already a January update available) and other community contributors obviously.
Thanks again for reading,
Erik