Last month I wrote an article about my old friend, the right-mouse button. In that article, I discussed the many locations in the Microsoft Project user interface where you can right-click and use a shortcut menu to access a feature. Today I want to show you more about my favorite right-clicking trick. This is the trick I have used the most in my career with Microsoft Project, which began with Microsoft Project 4.0 for Windows 95, by the way.
My favorite right mouse click trick is to right-click on the Select All button. You find the Select All button in the upper left corner of the task sheet portion of most task views or the resource sheet portion of most resource views. You can learn about this trick by simply floating your mouse pointer over the Select All button. When you do this, Microsoft Project displays the floating tooltip shown in the following figure.
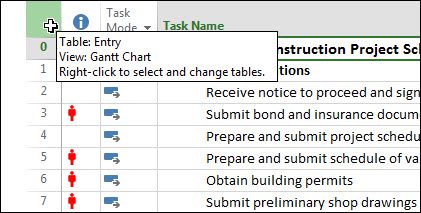
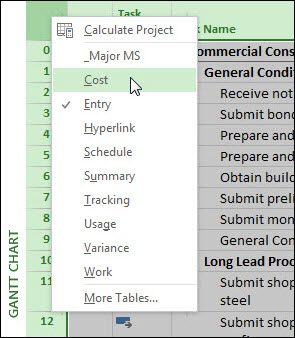
Notice that the floating tooltip reveals I have the Entry table applied in the Gantt Chart view. Notice the third line of the floating tooltip reveals the trick: Right-click to select and change tables. When you right-click on the Select All button, Microsoft Project displays the shortcut menu shown in the following figure.
Notice in the preceding figure that the shortcut menu contains the following items:
- At the top of the shortcut menu, the software offers the Calculate Project option. You can use this option to recalculate your project schedule if you have automatic calculation disabled, such as in a very large project.
- In the middle of the shortcut menu you see a list of custom and default tables. The software indicates which table is currently applied with a checkmark to the left of the table name. You can see in the preceding figure that the Entry table is currently applied.
- At the bottom of the shortcut menu, the software offers the More Tables option. You can use this option to display the More Tables dialog, which lists every custom and default table in Microsoft Project.
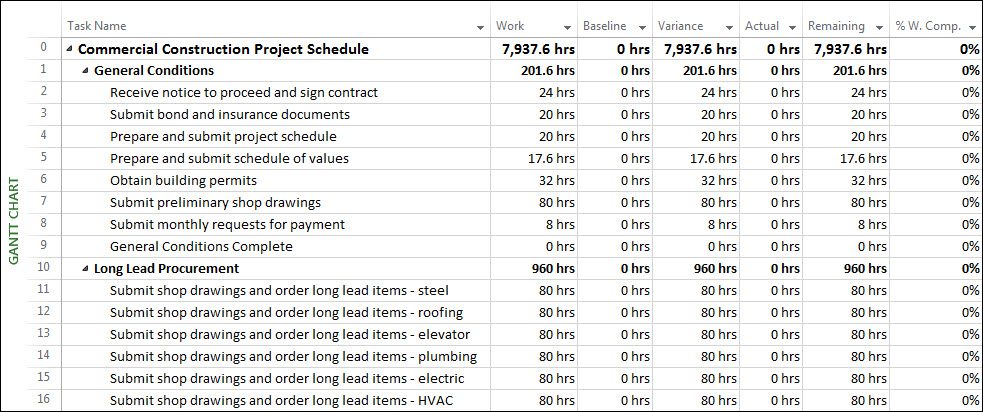
By the way, while we are talking about tables in Microsoft Project, what is a table exactly? A table is a collection of columns (also known as fields), and every collection of columns is given a name that describes the type of columns shown in the table. For example, if you select the Work item on the shortcut menu, the software displays the Work table, such as the one shown in the following figure. Notice that the Work table is a collection of work-related columns (as we might expect), including columns like Work, Baseline, Variance, % Work Complete, etc.
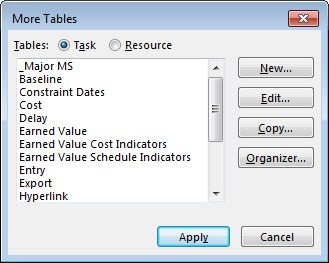
If you select the More Tables item on the shortcut menu, Microsoft Project displays the More Tables dialog shown in the following figure. This dialog lists every default and custom table in the software. Notice that there is a custom table named _Major MS at the top of the list. This table is used as a part of a custom view that displays only major milestones in the project. Notice in the middle of the list that there are three tables used for Earned Value Analysis (EVA). In the More Tables dialog, select any table and then click the Apply button.
A version of this article originally appeared on the Sensei Project Solutions blog.