
This is the second part of a two part series on using Microsoft Planner.
Using the Microsoft Planner App
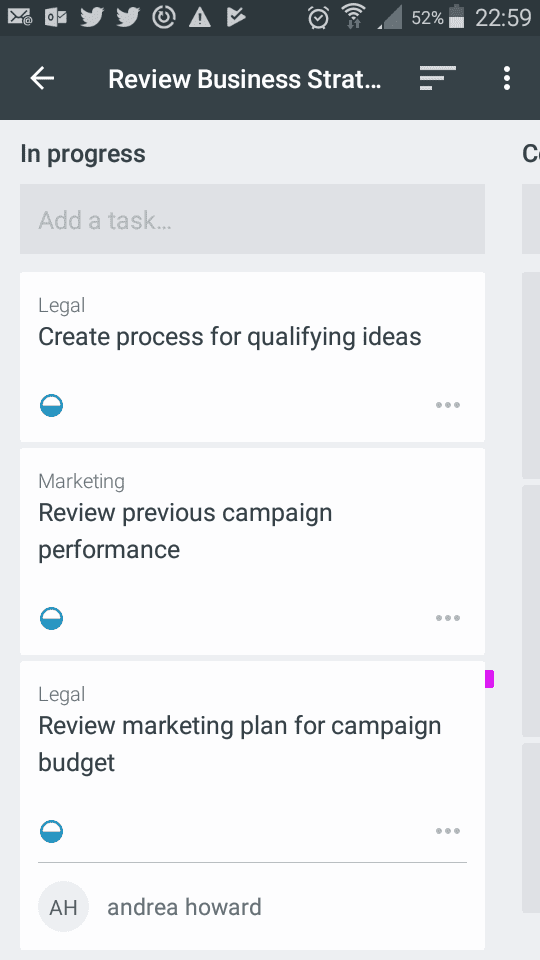
Because Planner is cloud based, there is an App for it that installs on mobile devices. The drag and swipe nature of Planner makes it ideal for use on touch screen devices (in fact, it has been designed and optimised for use on mobile devices), and so it’s a great tool for those of us who like to update tasks whilst on the go.
The Planner App allows users to create new tasks and update existing ones, but it does lack the filtering and reporting options of the browser client.
Security
When you’ve come from Project Online, Planner has a distinct lack of granularity when it comes to security. When one has access to an Office Group, he/she has full access to that group, and because Planner uses Office Groups as a core building block, that means users have full access to the plan. Due to this, you need to be careful regarding security. Team members are able to edit any task on the plan, and “edit” includes the ability to delete. This set up is best where trust between team members is high. It really is a collaborative suite.
Best practises
Now that we’ve covered the basics, let’s look at six best practises, which I hope will help you get the most out of your planner implementation in the fastest possible time.
1. Limit the number of tasks
In truth I keep my Planner plans to < 30 live* tasks, and whilst this isn’t a hard and fast rule, I find it easier to manage a larger number of tasks in Project, simply because each task is displayed as a card in Planner, and a lot of cards make it difficult to read them on a single screen, especially if it is a laptop. However, if you’re working on a 4K screen, I suspect it’ll be a little easier and you might get away with more tasks, especially if you categorise them into multiple buckets. It’s also worth noting that because this is an internet based application, you can always zoom the browser to <100% which will allow you to see more on the same sized screen.
*Why “live” tasks? Well, completed ones are automatically hidden, and don’t take up any space.
2. Associate Labels with tasks
Labels can be used to filter a view on a board, and can be useful when you just want to focus on a single area. For example, labels could easily be used to define the priority of the task. Labels also provide an easy visual cue to the category of the task. Think of a label as the equivalent of a little sticky note that categorizes pages in a notebook.
3. Associate Users with tasks
Not only does this provide the user with an email alert, but it also allows the user to see in a single place, all of the tasks assigned to them over multiple projects. That said, don’t underestimate the power of automated email to underwhelm users. Project Managers will still have to be proactive and follow up those emails with calls, etc. Good communication is at the heart of good people management and an essential part of good project management.
4. Drag tasks in the list to imply the order
Planner has no priority for tasks, so drag important tasks to the top of the list for that particular bucket. Planner remembers implicit order, so it’s a great way to tell people which tasks are most important–the ones at the top of the list, of course!
5. Keep Project task names and the Planner Plan name consistent
If you decide to link MS Project and Planner together, it’s best to have similar names for the linked tasks and plans–this is really just common sense!
6. Install the planner app
This really speaks for itself, but encourage your team members to install the Planner App. It serves as an easy way to keep everyone on the same page and on top of their tasks.
Let’s wrap it up
This has been a brief introduction from the point of view of creating a Plan in Planner. In summary, Planner is great for task management when tasks are loosely coupled and we’re not concerned about resource management or effort/hours. Planner has great drag and drop features and a simple and visual UI with an App for Android and iOS.
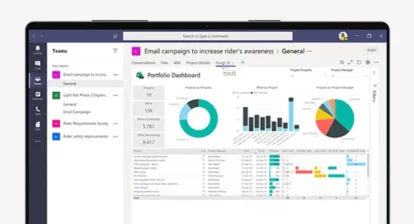
In my view planner’s sweet spot is for plans with 20-50 tasks. Any more and it’s best to use MS Project to define and organise tasks, although I think that if Planner provided a way to see a single task on a single line in the future, the Planner interface could easily lend itself to more than 50 tasks. Planner only comes with a limited set of reports, and it would be great to see a report API which could be linked with Power BI.
All in all it’s a great tool to have in the toolbox.
Related Content
Webinars (watch for free now!):
Task Planning using Microsoft Project
What’s the value of Schedule Risk Analysis?
Articles:
Levels of Project Scheduling Proficiency
Are You Using the Team Planner View Feature in Microsoft Project?
Resource Leveling: Scheduling vs. Leveling


Laura
Thanks, Ben! I have just started using Planner, and I’ve been unable to locate any reports for it at all. How do you access the ‘limited set’ you mentioned in your article?
Ben Howard
Hi Laura,
The ‘limited set’ of reports are basically the visuals you see when you log in. There is no report section per se – let’s hope Microsoft open Planner up so that Power BI can consume the data.