Please find below highlights from Dharmesh Patel’s session, Leveraging Office 365 and Microsoft Teams for Project Management, being provided by MPUG for the convenience of our members. You may wish to use this transcript for the purposes of self-paced learning, searching for specific information, and/or performing a quick review of webinar content. There may be exclusions, such as those steps included in product demonstrations. You may watch the live recording of this webinar at your convenience.In the previous article, we discussed how to use the Call and Video features of Microsoft Teams, to ensure effective communication within a project or organization. Teams and Channels is another feature of Microsoft Teams that can be used to facilitate not only better communication, but also better organization of projects, by grouping members and tasks into respective channels.
In the Microsoft Teams app, the word “Teams” is used in 3 different ways. Usually, when referring to the App, the term “Microsoft Teams” is used. When referring to the segments used to divide members, capitalized “Teams” is used, and when referring to the group of people, lowercase “teams” is used.
The interconnectedness of these three concepts makes it easy to get confused when someone is talking about these topics in the same context.
What is a Team in Microsoft Teams
A “Team” is a collaboration area for a group of colleagues. Teams can be comprised of internal or external colleagues depending on what parameters your organization has set up.
For example, a Team set up by a divisional manager may include colleagues from within one part of an organization. Whereas a Team that has been set up to manage a project may include individuals from outside of your division and may even include external organizations as well.
How do you create a Team?
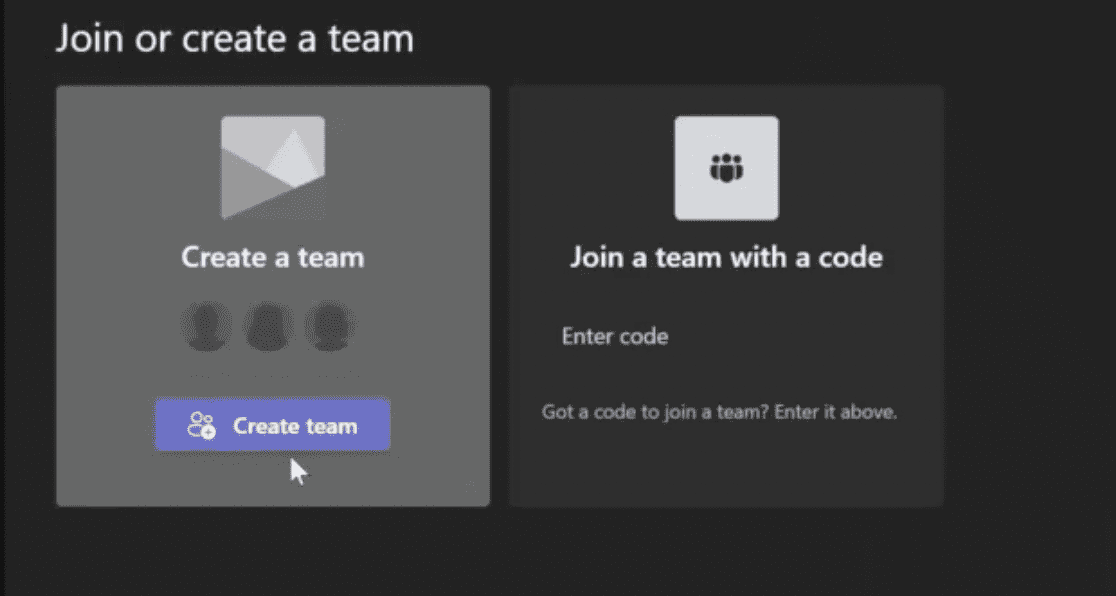
To create a team, click on the Teams icon located on the left side of your app, then navigate to the bottom of the panel, and click “Join or create team.” This will open a page where you can select to create a team from scratch, or use one of the templates.
Within Teams, you have something called “Channels”, which are channels, or threaded chats. This is where a dialogue takes place within a thread, inside a channel.
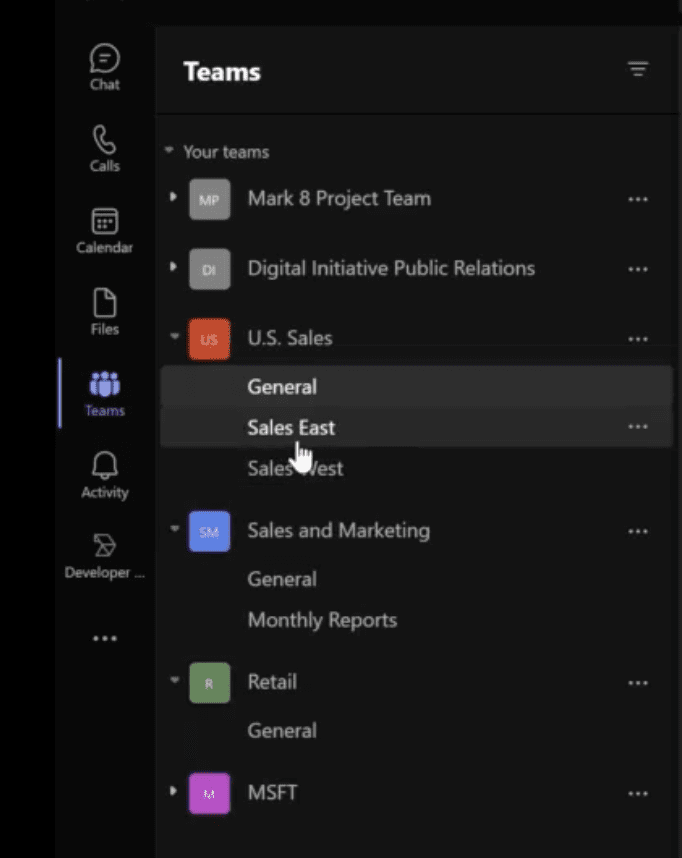
In the Microsoft Teams panel, on the left-hand side, you’ll see all the Teams that you are a member of, and you can expand and collapse those to help with your view. When you expand the collapsible list, it will expose threads underneath, known as channels. The channel selected in the example contains threatened conversations, regarding sales in the east, and consists of team members representing sales in the east.
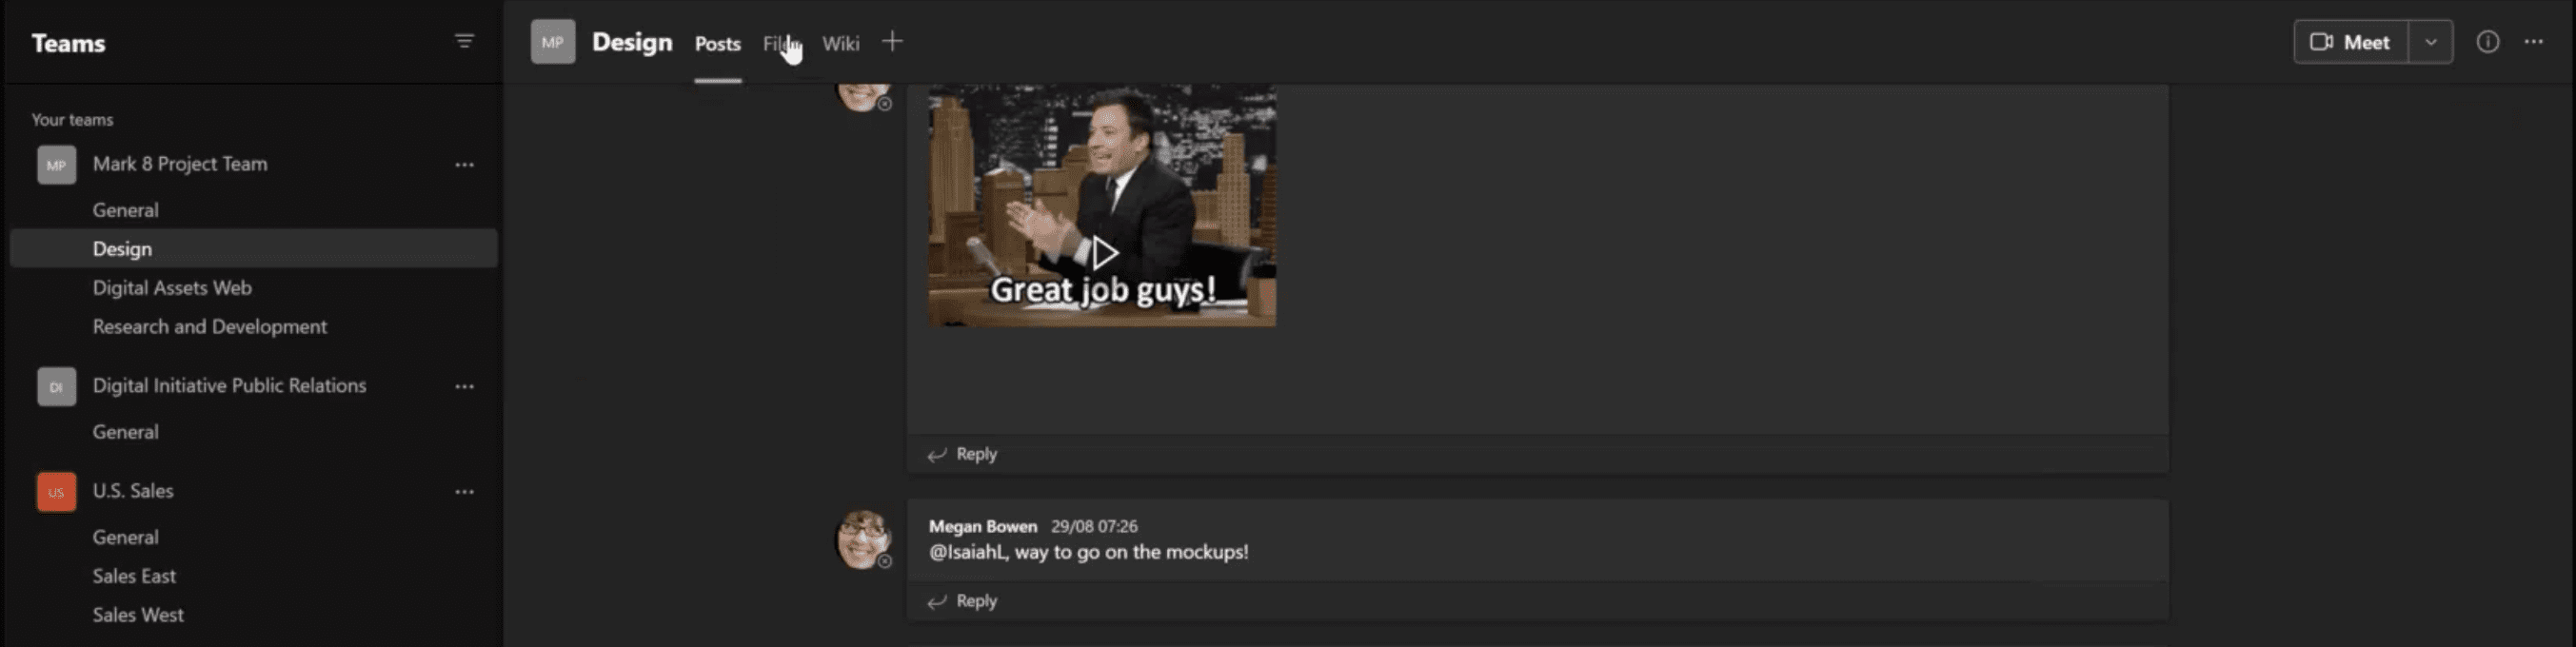
Once you click on a channel, you can see three key tabs along the top of your channel. In our example, within the design channel, under posts, you will find threaded (or grouped) conversations about the design, and documents relating to the design part of this project. From within posts, you can create a new conversation by clicking on the “new conversation” button found at the bottom of the thread.
The threaded chat is not the same as the chat found in the chats tab. Threaded chats group related messages together, instead of displaying them in chronological order. Threaded chat reduces the time spent scrolling through an endless thread of often unrelated messages, and conversations within conversations, to find what you are looking for. Threads make it easier to maintain and organize the flow of conversations.

Controlling access to existing Team
Access control is a fundamental aspect of any organization or project management. Ensuring team members only have access to information they need is crucial to ensuring an organization or project’s integrity. So how do I control who has access to my information within my Microsoft Teams?
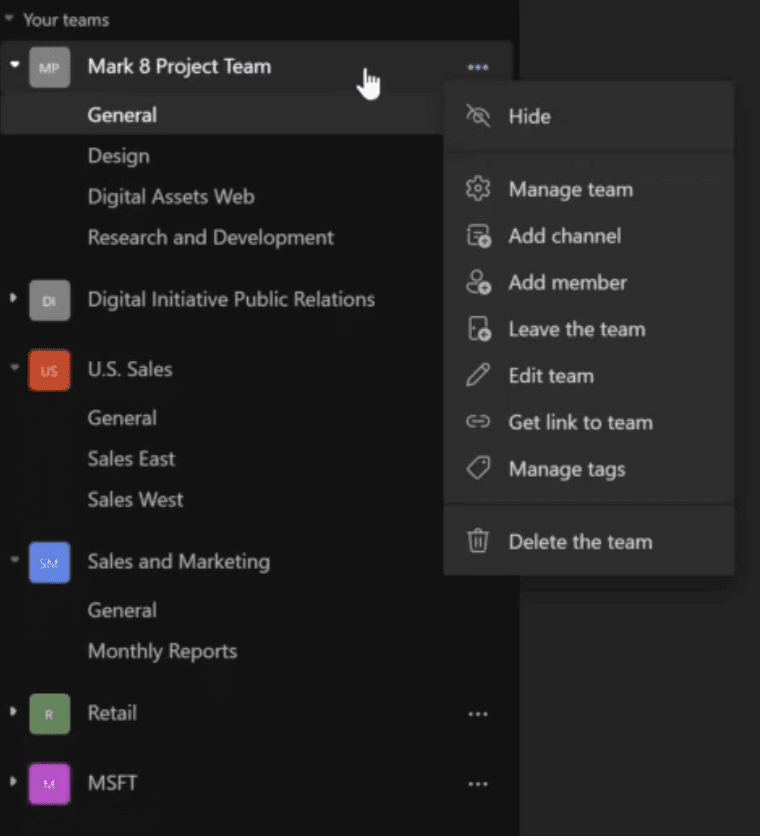
Navigate to the Team area, and click the three dots on the right side of the Team name. On the drop-down, you can select manage your Team. In the “Manage Team” dialogue box, you can add and remove Teams, by either clicking the X next to their name to remove them, or clicking add member and then searching for the desired member.
Setting Access Control when creating a Team
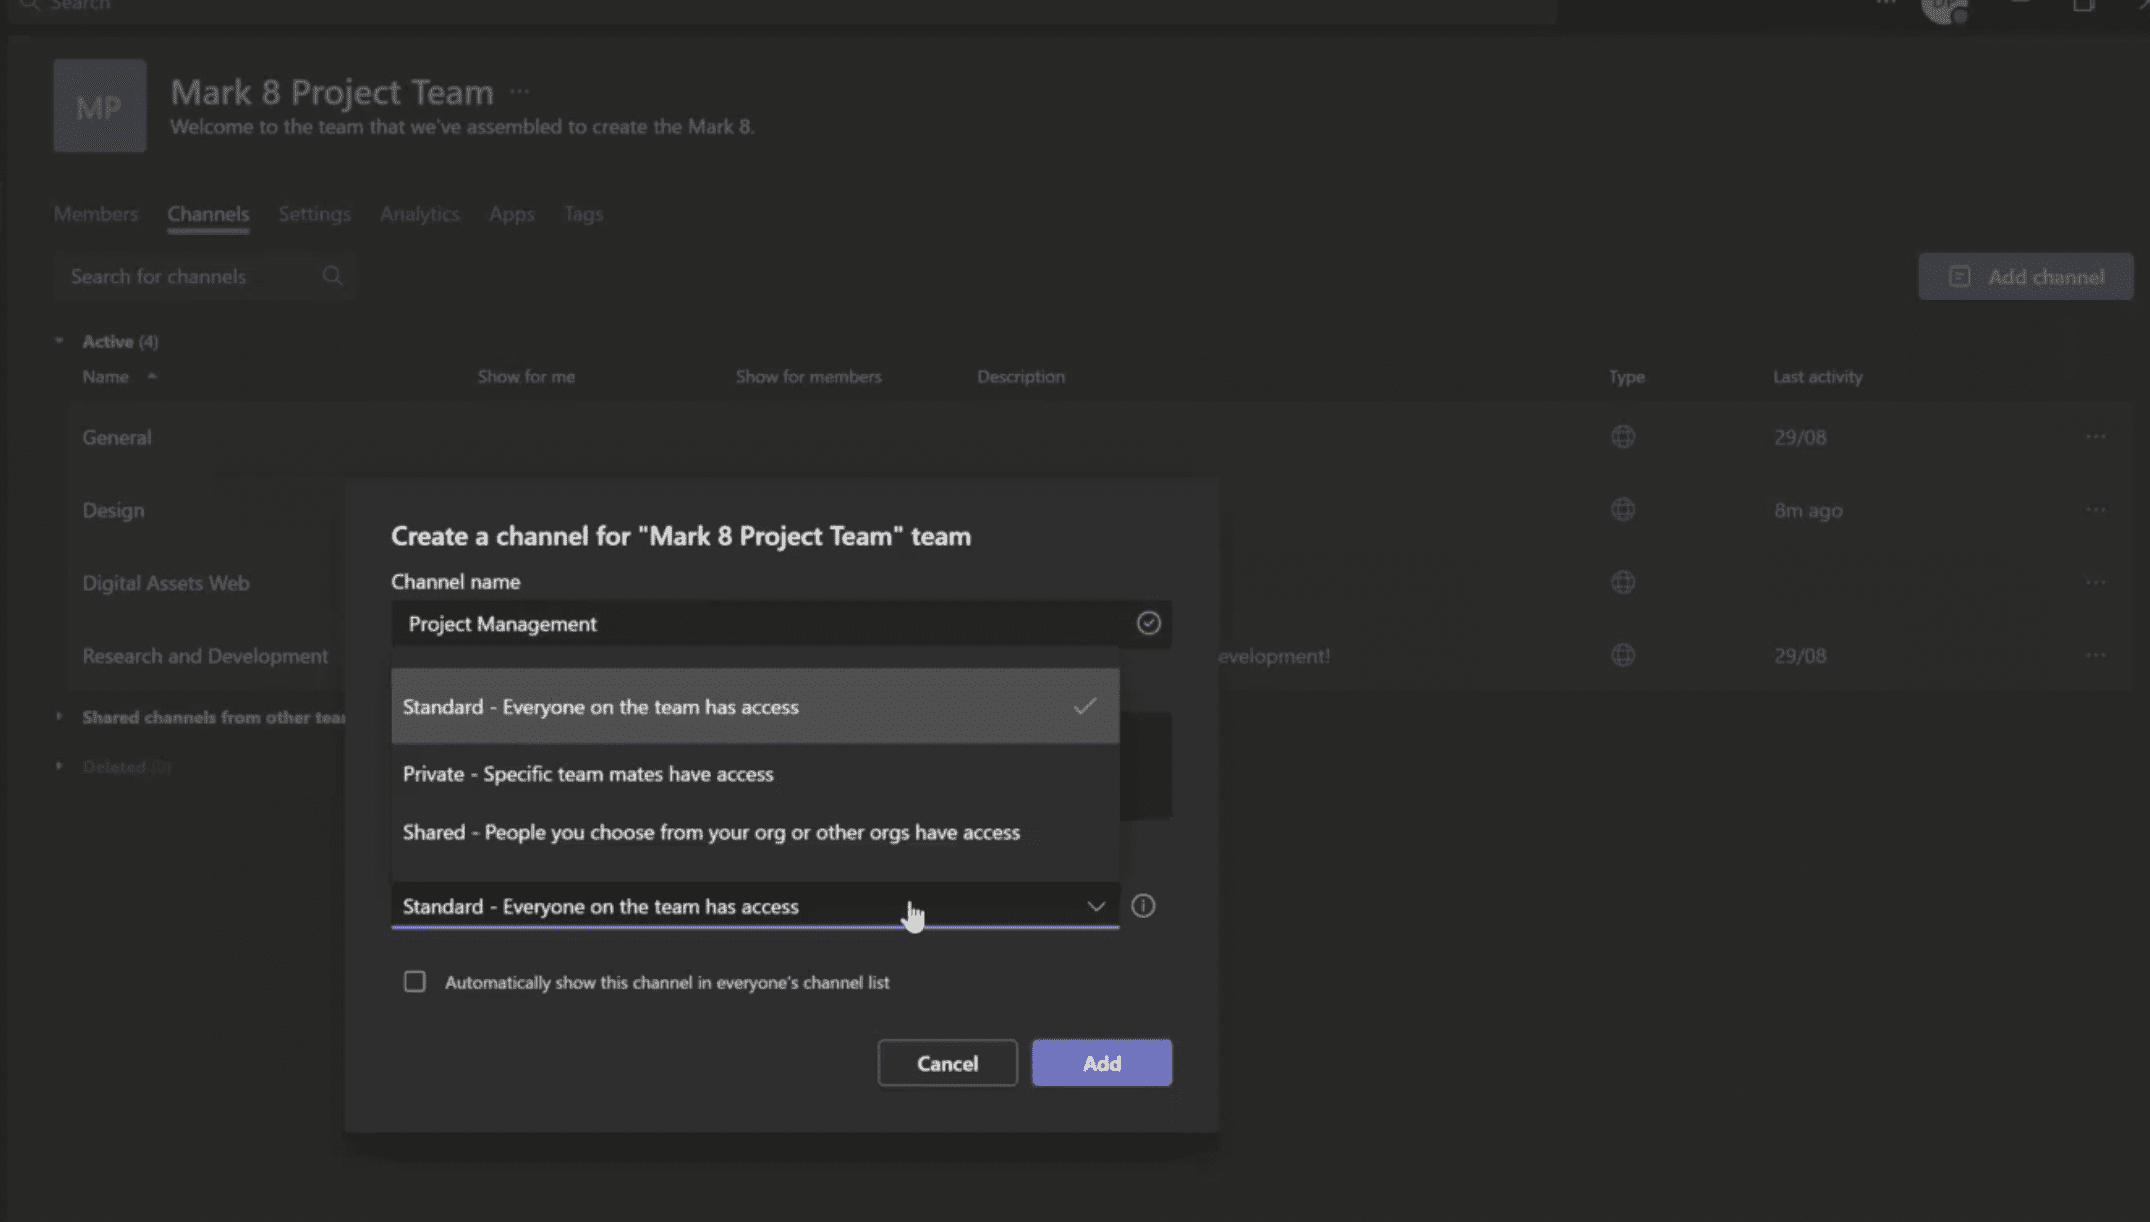
To create a channel within a Team, click on the 3 dots in the team panel next to its respective name. Then click on manage team. Within the dialog box, select channels on the top panel. Click on “add channel” and the dialogue box will open to add details for your new channel. You can add a general description for your group, and you can choose the privacy settings for your group, to determine who will have access to it.
Controlling Team Access
Next to the Channels tab you will find the settings tab which contains options to:
- Add a Team Image
- Change Members Permissions
- Setting guests permissions
- Choose who can use @ mentions
- Generate a code to share with external members
- Choose to allow emojis, memes, gifs or stickers
Using Tags to group members
On top of being able to group members in teams based on Team and channels, you can further group members based on a specific tag you have assigned to them. To add a tag to a member, follow the steps to manage a team. Here you can select a member under the tag column, and create a new tag, or assign an existing tag to them. You can tag these users, grouped under the same tag in the threaded chat area, by using the @ symbol. The message will alert all the members contained under the tag.

Collaboration in Microsoft Team
Next to posts, you will find Files, where documents related to threads can be found. Clicking on a file opens it in the compatible Microsoft 365 programs, where team members with access can collaborate in real time. Files are also version-controlled, which means that changes are recorded. You can also create a document via the files tab, by clicking on the “New File” tab, and selecting the type of document you would like to create.
Another option available in the files tab is the ability to download the files to your local PC, or you can add a shortcut to files in One Drive. To do this, click on the three dots, and select “Add Shortcut to One Drive.”
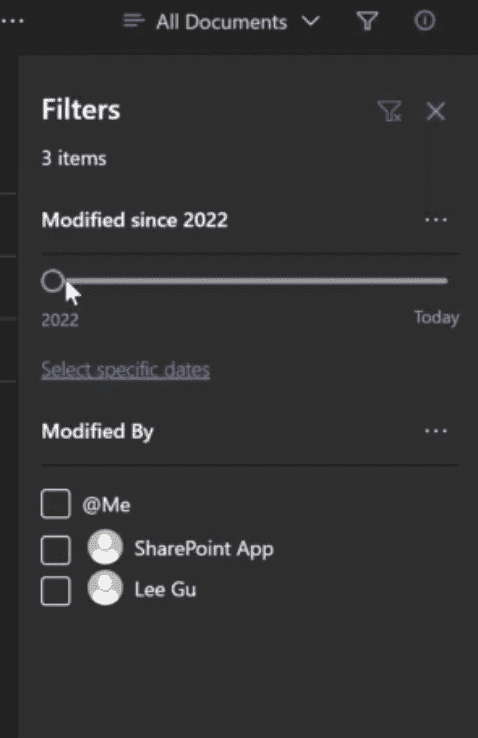
You can also change the view from lists to compact tiles, or tiles, by clicking on the “All Documents” dropdown. Next to that tab, you will find a filter icon that allows you to filter documents, by documents modified by a specific person, the document type, or the period last modified.
For more about how to use Office 365 Microsoft Teams to enhance Project Management, see our other article in this series: Webinar Highlights: Leveraging Office 365 and Microsoft Teams for Project Management – Microsoft Teams Chat and Webinar Highlights: Using Office 365 Microsoft Teams to enhance Project Management – Video and Audio calls