
Microsoft Project formulae are a powerful way to introduce custom calculations into your project plan. Many people who may be familiar with writing formulas in Excel find Microsoft Project’s formula editor a little less intuitive, so this article will give you a basic introduction to formulas in MS Project. I hope you can get started with the following steps and then view my on-demand webinar on the topic, which will provide more in-depth advice on how to write formulae in Microsoft Project.
Step One: Pick a Data Type
First, you’ll want to ensure that you pick the correct data type for the Microsoft Project field that will store the result of your formula. You can apply a Microsoft Project formula to any type of field, but some types of fields are more natural fits for formulae than others. In general, you want to pick a field type that matches the type of calculation that you are planning to perform. Good choices include:
- Numbers
- Dates
- Text (strings)
- Flag (Boolean)
These types of fields are well-suited to formulae because their results are easy for a formula to compute without any special formatting. Duration and cost fields, on the other hand, are not great choices because they require special formatting. For example, a duration field is formatted using a number and a unit (“3 days”), which can be hard to achieve when writing a formula compared to simply computing a plain “3” in a number field.
Step Two: Pick a Good Custom Field
When picking a destination field in Microsoft Project that will store the result of your calculation, you want to avoid special-purpose fields that are automatically calculated by Microsoft Project and can’t be edited. Examples of these read-only fields include Critical, Outline Level, Status, Overallocated, and WBS, though there are dozens more. To be safe, it’s best to select one of the generic Microsoft Project local custom fields, such as Number 1-20, Date 1-10, Text 1-30, and Flag 1-20.
Step Three: Don’t Step on Toes
You also want to make sure that your newly-created formula doesn’t inadvertently delete other information that has already been stored in same field. When you create a formula, any previous values in the target field will be overwritten, so it’s very important to make sure that the field that will hold your formula isn’t being used by you or someone else for another purpose. The easiest way to double-check this is to insert the field into Microsoft Project, and then click on the column header to filter the field as shown in the following screen shot.
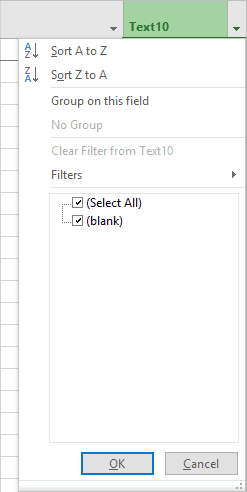
If you see lots of different values appear in the filter list, that’s a good indication that the field is already being used for something else, so it’s best to place your formula elsewhere. On the other hand, if you just see one value and it’s set to “(blank)” or something to that effect, you should be good to go.
Step Four: Write and Test
Once you have selected where the formula should reside, it’s time to write the formula itself. See below.
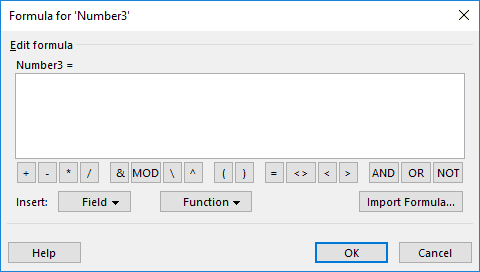
The Field dropdown will let you select available fields to use in your calculation. The Function dropdown is used to apply different calculations to the fields, though you can also use simple mathematical operators to do many of the same things without getting into the more advanced functions.
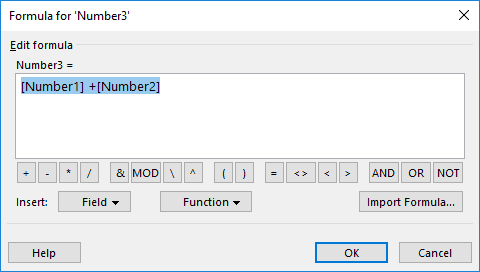
So, if you wanted add the values of “Number1” and “Number2” and display that sum in the “Number3” field, your formula would look like this:
It’s not uncommon for a formula to give an unexpected result or even fail completely the first few times, so don’t get discouraged. Start with small, simple formulae and then work your way up into more complex or nested logic. If needs be, you can break a formula up into smaller parts, where some portions of the formula are calculated in one field and other portions are calculated in a separate field. This lets you see the intermediate results before everything is combined. Once those separate components of the formula look correct, they can be combined into a single formula in a single field so as to not take up extra space.
For tips on how to write a Microsoft Project formula, including recommended functions, examples, and other best practices, I hope you will watch my on-demand webinar.
