
Background Information
If you are a user of the Microsoft Project desktop application, there is no built-in method for tracking change request activity in your project schedule. However, you can create a custom table that will address your change request tracking needs. For example, to track change requests in my Microsoft Project schedules, I might want to track the following information:
- Change request type
- Change request description
- Change requestor
- Date the change request was submitted
- Change request reviewer
- Change request impact
- Change request decision
- Change request decision date
Before I can create a custom table to track change requests, I would need to create a number of custom Task fields to track the preceding information. Following are the fields I would need to create, along with the custom field type for each of them:
- Change Request Type – Text field with a Lookup Table
- Change Request Description – Text field
- Change Requestor – Text field with a Lookup Table
- Change Request Date – Date field
- Change Request Reviewer – Text field
- Change Request Impact – Text field
- Change Request Decision – Text field with a Lookup Table
- Change Request Decision Date – Date field
Creating the Custom Fields
To begin the process of creating the preceding custom fields, open any project, and then click the Project tab to display the Project ribbon. In the Properties section of the Project ribbon, click the Custom Fields button. Microsoft Project displays the Custom Fields dialog. At the top of the dialog, leave the Task option selected, then click the Type pick list and select the type of field you want to create, such as shown in Figure 1. By default, Microsoft Project initially selects the Text field type each time you display the Custom Fields dialog.
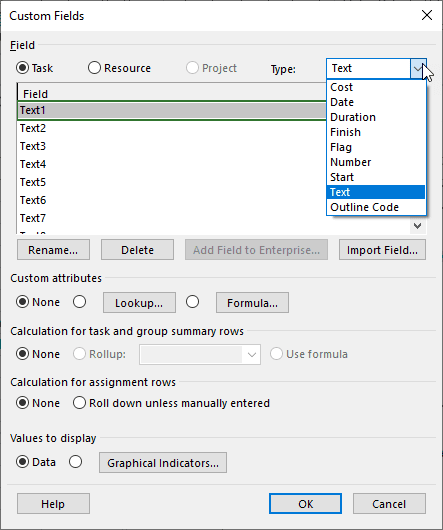
Figure 1: Custom Fields dialog
To create the Change Request Type field, select the Text field. Select the first available unused Text field and then click the Rename button. In the Rename Field dialog shown in Figure 2, enter the name, Change Request Type in the New name field, and then click the OK button.
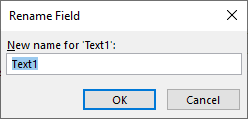
Figure 2: Rename Field dialog
After renaming the field, you need to set up the field so that it displays a pick list of acceptable values. To do this, click the Lookup button in the Custom attributes section of the dialog. Microsoft Project displays the Edit Lookup Table dialog for the selected field, such as shown in Figure 3.

Figure 3: Edit Lookup Table dialog
In the Edit Lookup Table dialog, enter the names of the possible types of change requests you might receive while managing a project. For example, for my project, I entered the list of change request types shown in Figure 4. When finished, click the OK button to return to the Custom Fields dialog.
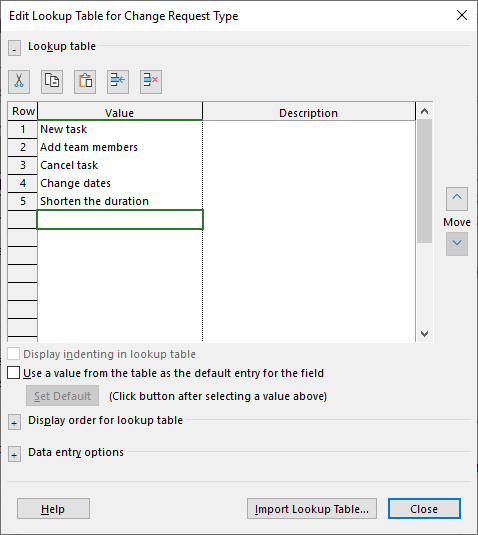
Figure 4: Edit Lookup Table dialog – values entered
After creating the Change Request Type custom field, you can use the same procedure to create the Change Requestor and Change Request Decision fields, since each of these fields requires a custom task Text field with a lookup table. When you create the Change Requestor field, in the lookup table, enter the roles that might request a change, such as the client or a project team member. When you create the Change Request Decision field, enter the values Approved and Not approved in the lookup table.
A free entry field is a field in which you can enter a string of alphanumeric characters of any length. To create a free entry Text field, leave the Text item selected in the Type pick list. Select the first unused Text field and then rename the field. You will need to use this process with the Change Request Description, Change Request Reviewer, and Change Request Impact fields. Figure 5 shows the Custom Fields dialog with all of my custom Text fields created.
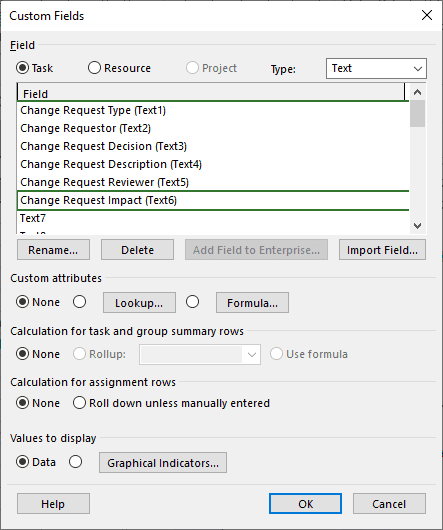
Figure 5: Custom Fields dialog – Text fields created
To create a custom Date field, click the Type pick list and select the Date item on the list. Select the first unused Date field and then rename the field. You will need to do this for the Change Request Date and Change Request Decision Date custom fields. Figure 6 shows the Custom Fields dialog with my two custom Date fields created.
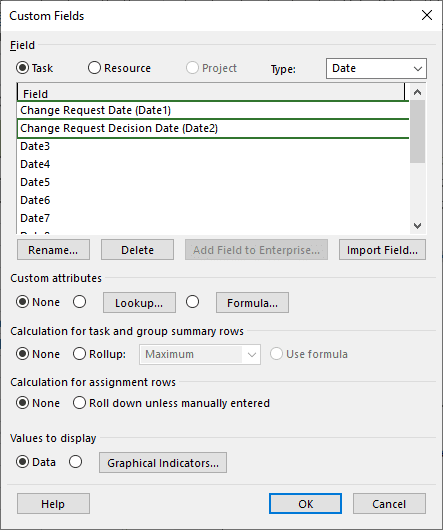
Figure 6: Customs Fields dialog – Date fields created
After you finish creating the change request custom fields, click the OK button to close the Custom Fields dialog. Be sure to save the latest changes to your project.
Creating the Custom Table
To create the custom table to display the change request custom fields, click the View tab to display the View ribbon. In the Data section of the View ribbon, click the Tables pick list and select the More Tables item. Microsoft Project displays the More Tables dialog shown in Figure 7.
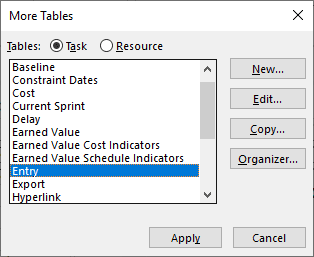
Figure 7: More Tables dialog
In the More Tables dialog, leave the Entry table selected, and then click the Copy button. Microsoft Project displays the Table Definition dialog for the new table, as shown in Figure 8.
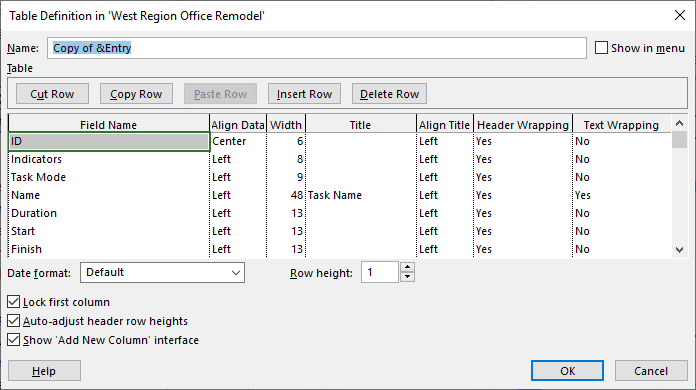
Figure 8: Table Definition dialog
In the Table Definition dialog, enter the name _Change Requests in the Name field, and then select the Show in menu checkbox.
Note: Using the underscore character as a prefix to the table name will force the table to the top of the list of tables when displayed alphabetically.
In the list of fields shown in the data grid, select the Task Mode field and then press the Delete key on your computer keyboard to delete this field. Also delete every field below the Name field, beginning with the Duration field. In the first blank row below the Name field, click the pick list button in the Field Name column and then select the Change Request Type field in the pick list. With the Change Request Type field still selected, specify the following settings for this field:
- Align Data = Left
- Width = 24
- Title = CR Type
- Align Title = Left
- Header Wrapping = Yes
- Text Wrapping = Yes
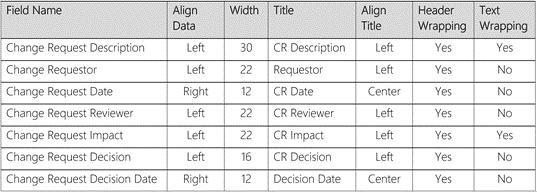
In the blank rows below the Change Request Type field, select the following fields and set up these fields according to the information in the following table:
When finished, click the OK button to close the Table Definition dialog. In the More Tables dialog, leave the _Change Requests table selected and then click the Apply button to display your new table. Each time you receive a change request for your project, you can populate each of the relevant fields in this table to capture and document the change request information in the project. For example, Figure 9 shows the _Change Requests table with data populated for three tasks added to the project as a result of an approved changed request.

Figure 9: Change Requests table with data populated
Post Table Creation Steps
After creating the custom change request fields and the custom _Change Requests table, you may need to copy the custom fields and custom table to your Global.mpt file. Doing so will make them available in every project that you manage. Complete the following post-creation steps to copy the custom fields and custom table into your Global.mpt file:
- Leave the project open in which you created the custom fields and table.
- Click the File tab and then click the Info tab in the Backstage.
- In the Organize Global Template section of the Info page, click the Organizer
- In the Organizer dialog, click the Fields tab, such as shown in Figure 10.
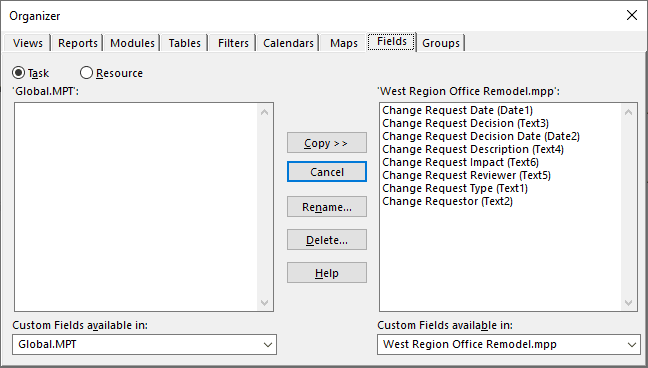
Figure 10: Organizer dialog, Fields page
- If you do not see your new custom fields displayed on the left side of the dialog (in the Global.mpt file), select all of your change request fields on the right side of the dialog (in the project) and then click the Copy button to copy the fields to the list on the left side of the dialog (into your Global.mpt file).
- In the Organizer dialog, click the Tables tab, such as shown in Figure 11.
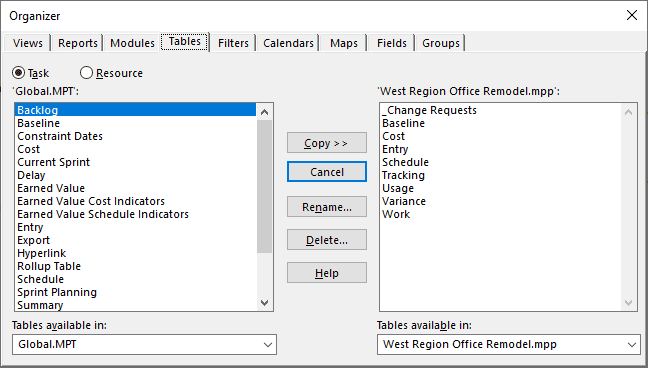
Figure 11: Organizer dialog, Tables page
Note: Because of the default settings in Microsoft Project, you may already see your new custom _Change Requests table in the left side of the dialog (in the Global.mpt file). If this is the case, skip step #7 and continue with step #8 instead.
- On the Tables page of the Organizer dialog, select the custom _Change Requests table on the right side of the dialog (in the project) and then click the Copy button to copy the custom table to the list on the left side of the dialog (into your Global.mpt file).
- Click the Close button to close the Organizer
- Save and close the project in which you created the custom fields and custom table.
- Exit Microsoft Project completely and then relaunch the software.
By completing the steps in this section, you will now be able to use your new custom fields and custom table in every new and existing project you manage. And by using the custom _Change Requests table, you will be able to track and manage change requests in your Microsoft Project schedule.


Oliver Gildersleeve
After impact analyses, change requests may be approved or discarded. If discarded, select the proposed task from the change request and in the Task ribbon click the “Inactivate” tool. For the predecessor of the Inactivated task, enter on them a successor(s) beyond the Inactivated task so that the schedule can continue. Retaining in the schedule the inactivated task shows that the change request occurred and was discarded. If approved, the added task is already in place. In views, include the filter, “Active tasks” if you want the discarded change request tasks to be hidden.