The Microsoft Project desktop certification exam, 70-632, has at least one question on each new feature in Project 2007, so you can expect some interrogation about new calendar features like work weeks and exceptions. Although these features take some getting used to, defining project work times is much easier than in earlier versions of Project.
Last month’s column covered the big picture for calendars and how to assign a calendar to a project, to specific resources, or to individual tasks. This month, you’ll learn how to create calendars and define the working days and times within them.
Creating and Copying Calendars
Regardless whether you’re defining a calendar for a project, a particular resource, or a task, the steps to create it are the same:
In the Change Working Time dialog box (Tools | Change Working Time), click Create New Calendar. (Despite the button label, Create New Calendar handles creating a brand new calendar or copying an existing one.) Then, in the Create New Base Calendar dialog box, type the name for the new calendar in the Name box. Because copying an existing calendar is usually faster than building a new calendar, Project selects the “Make a copy of” option. With this option selected, choose the calendar you want to copy in the drop-down list and click OK.
Note: To start a calendar from scratch, select the “Create a new base calendar” option. Base calendar is simply Project’s term for a calendar that acts as a template for other calendars.
When the Create New Base Calendar dialog box closes, the “For calendar” box sports the new calendar name. This new calendar is not the project calendar (see last month’s column for assigning a calendar to a project), so you see only the calendar name in the box. The “For calendar” box shows the calendar name followed by “(Project Calendar)” when the calendar is the project calendar.
You might run into an exam scenario such as: “You’ve built a calendar that reflects your company’s working times and you want to use it on all new projects.” As a Project maven, you know that the Organizer is where you copy components between one project file and your Project Global.mpt template file (or another Project file).
To make a calendar available to other project files, open the Organizer (Tools | Organizer), click the Calendars tab, and then copy the calendar from the current project file (on the right side of the dialog box) to the Global.mpt file on the left side of the dialog box. But this simply means that the calendar will then appear in the “For calendar” drop-down list in the Change Working Time dialog box for any project you open. If you want Project to assign your new calendar as the project calendar for every new project, you must name it Standard (in effect replacing Project’s built-in base calendar) and copy it to your Global.mpt file.
Defining Work Days and Times
In Project 2003 and earlier versions, you specified working and nonworking days in the Change Working Time dialog box’s calendar display. When you selected days in the calendar, you could specify work hours if they differed from the start and finish times set in calendar options.
Project 2007 uses work weeks to define the working and nonworking days and times in a seven-day week. You can set up different types of work weeks, for example, the standard work week your organization usually follows and perhaps a “fall harvest” work week when your team members spend half of each day bringing in the sheaves.
A work week is a real timesaver when a special set of work days and times lasts several weeks or longer. You define the working and nonworking days and times for the work week and then tell Project the start and end dates over which that work week applies. Suppose an exam question asks about the best way to reflect a team member’s half-time schedule during the summer. One answer the exam might offer is setting the resource’s units to 50 percent, but that’s not the best way. The right answer is to define a half-time work week and apply it to the resource from June 1 through August 31, say.
Note: You can’t apply a work week to disparate time periods. If you want a fall harvest work week for 2009 and then again for 2010, you have to define two different work weeks.
Exceptions are for nonworking time like company holidays or for working days with alternative working times like an afternoon off. Exceptions work similarly to Project 2003 modifications. One handy new twist is the recurring exception, which is ideal for something like a non-working day each month for everyone’s favorite — the all-hands corporate meeting.
The disadvantage to exceptions is that you must name each one and specify its date range. In Project 2003, you could quickly designate a holiday by selecting a day or two in the calendar and then select the “Non working time.”
Defining Work Weeks
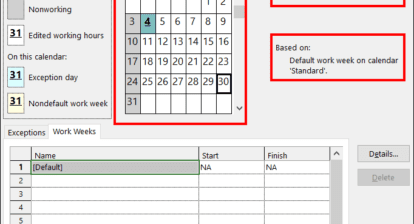
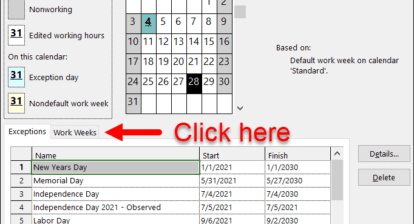
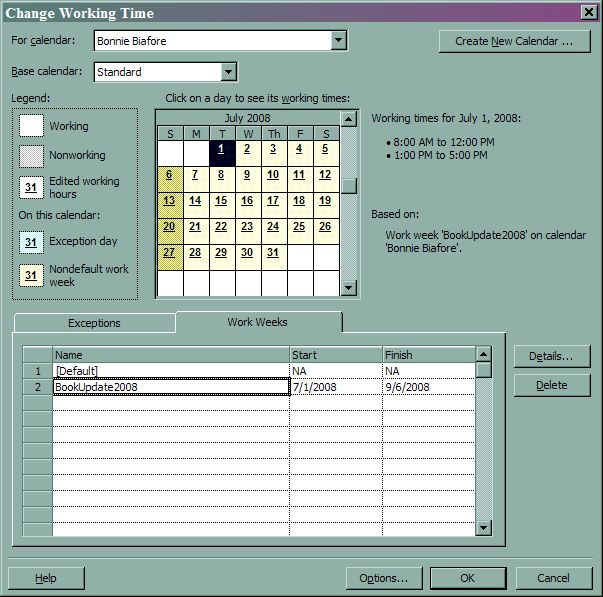
To tweak the working and non-working times on a calendar, in the Change Working Time dialog box, choose the calendar you want in the “For calendar” box. The Work Weeks tab always includes the [Default] work week. If the calendar has any existing work weeks or exceptions, they appear in the table at the bottom of the dialog box, as shown in Figure 1.
Figure 1: The Change Working Time dialog box.
Note: When you click a day in the calendar at the top of the dialog box, Project displays the working times for that day and the work week that applies to that day.
The built-in [Default] work week has NA in the Start and Finish cells, which means the work week spans all dates. The working and nonworking times come from the calendar options you set. To change the working and nonworking days for your standard work week or adjust the working time for one day of the work week, simply modify the [Default] work week.
To create a new work week, on the Work Weeks tab, click the first blank Name cell and type a name for the work week schedule. In the Start and Finish cells, choose the first date and last date to which the work week applies.
To modify a work week’s working and nonworking days and times, on the Work Weeks tab, click the work week you want to modify and then click Details. In the Details for dialog box, shown in Figure 2, select the day or days you want to modify. (All the usual selection suspects work including clicking a day, Shift-clicking, Ctrl-clicking, and dragging.)
Figure 2: The Details for dialog box for Work Weeks.
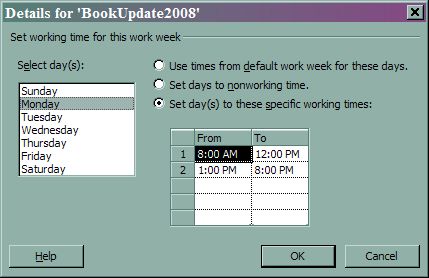
If all selected days use the same settings, Project selects the option and the work time table shows the common work times. Most of the time, you’ll see the “Use times from default work week for these days” option selected, which sets weekdays as work days and weekends as non-work days.
To change a work day to a non-working day (for example, to change Friday to a non-working day), select the “Set day(s) to nonworking time” option.
To change the work hours for days, select the “Set day(s) to these specific working times” option. This option makes the working time table editable, so you can change the work hours for the selected days. Use this option to change a non-work day to a work day.
To change the work hours in an existing entry, click the cell and type the new time. Project selects the entire cell contents, so you simply start typing to change the value. Be sure to press Tab or Enter to save the time before you move to another day or click OK to close the dialog box.
Note: To add a new row of working time, click the first blank From cell and type the starting time. For example, suppose you switch to 14-hour days for a late stage push. You can add a new row for the third set of work hours from 6:00 PM to 9:00 PM. To remove a row of work time, drag across both the From and To cells and then press Delete.
Setting up Holidays and Other Calendar Exceptions
Calendar exceptions are perfect for short-term changes to the calendar, such as a company holiday, a half-day for a corporate meeting, several days with afternoon training sessions, or a recurring exception like your company’s quarterly Project Manager Appreciation Day.
Defining an exception goes like this:
1. On the Exceptions tab, click the first blank Name cell and type a name for the exception, like Exec Intell Training.
2. In the row’s Start cell, choose the first date to which the exception applies. In the Finish cell, choose the last date. Start and finish dates can be the same day or any two dates no matter how far apart.
3. Click Details.
Because many exceptions are nonworking time, Project automatically selects the Nonworking option, as shown in the figure below. If the exception is for non-working time, just click OK.
When an exception is for one or more working days, select the “Working times:” option. The working times table fills in the standard working times from your Project calendar options. Fill in the From and To times for the exception days as you would for a work week.
4. Click OK when you’ve finished setting the working times in the working time table.
Recurring Exceptions
Recurring exceptions have settings like the ones for recurring tasks, but recurring exceptions and recurring tasks are two different animals. (One potential exam trap is a recurring task offered as the solution to designating nonworking days and times.) Recurring tasks represent project work that repeats, while recurring exceptions represent repeating special work times.
You name recurring exceptions like regular ones and specify the date range. Recurring exceptions tend to span long periods of time, for example, regular non-project meetings held without fail. In the Details for box (Figure 3), you specify the nonworking and working times as you do for a regular exception.
Figure 3: The Details for dialog box for setting working times for exceptions.
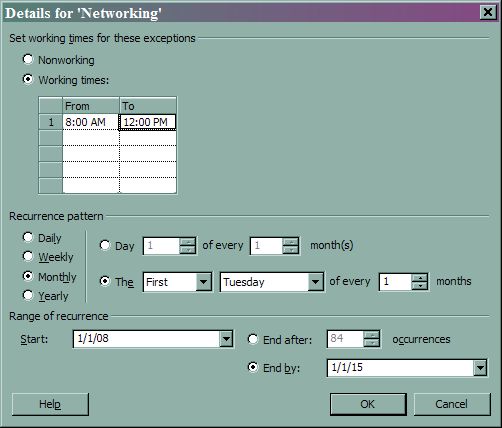
The lower part of an exception’s Details for dialog box has the recurrence options. You know the drill. In the Recurrence pattern section, select the frequency option and any ancillary options for it, such as a Monthly recurrence that takes place on the first Tuesday of every month.
Project fills in the Range of recurrence Start box with the start date you set on the Exceptions tab and the End by option with the Finish date from the Exceptions tab. To schedule the exception for a specific number of times, select the End after option and type the number of occurrences.
Think you know calendars? Test Yourself!
Your top Improbability Drive technician has earned eight weeks annual vacation time and you want to tell Project about her scheduled vacations to Betelgeuse. What’s the best way to schedule around her vacation time?
A: In the person’s resource calendar, create an exception that sets the days of her trip as nonworking days.
B: In the project calendar, create an exception that sets her vacation days as nonworking days.
C: In the person’s resource calendar, define a nonworking work week for her vacation days.
D: Edit the tasks assigned to the resource so they start after she returns from her trip.
Scroll below the book ordering information to read the answer! In the meantime, here’s last month’s certification quiz…
As part of a bank remodeling project, you want to schedule the installation of new ATM machines early Sunday mornings to minimize inconvenience to bank customers. How would you use a calendar to schedule this work?
A. Define a calendar with work hours from 2 a.m. to 6 a.m. Sunday and assign it to each ATM installation task.
B. Define a calendar with work hours from 2 a.m. to 6 a.m. Sunday and assign it to the ATM installer resources.
C. Change the project calendar to include Sunday 2 a.m. to 6 a.m. as working time.
D. Define a calendar with work hours from 2 a.m. to 6 a.m. Sunday and assign it to each ATM installation task and turn on the “Scheduling ignores resource calendars” checkbox.
Answer: The correct answer is D. Assigning the Sunday morning calendar to the task and turning on the “Scheduling ignores resource calendars” checkbox tells Project to schedule the work according to the task calendar even if the resources have calendars that specify different working days and times.
A is incorrect because this approach won’t work if the resources assigned to the tasks have calendars that don’t include Sunday mornings from 2 a.m. to 6 a.m. as working time. A warning message appears so you have to modify either the task calendar or the resource calendar.
B is incorrect because assigning a calendar to resources tells Project that the resources work only from 2 a.m. to 6 a.m. on Sundays.
C is incorrect because adding 2 a.m. to 6 a.m. on Sundays as working time will schedule all tasks and resources to work those hours.
Order the the MCTS Self-Paced Training Kit (Exam 70-632): Managing Projects with Microsoft Office Project 2007.
To learn more about Microsoft certification, read, “Microsoft Project Management Certification: How to Get Started.”
Correct answer: A
A is the best alternative. By defining an exception in the resource’s calendar, Project automatically schedules the person’s tasks to dates that she is available to work.
B is incorrect, because an exception in the project calendar applies to all resources.
C actually does work in this case, but it isn’t the best answer. Work weeks generally document combinations of working and nonworking days and times. Exceptions help differentiate nonworking days and times.
D is just so wrong. Editing the person’s assigned tasks means setting date constraints, which limits Project’s ability to automatically adjust your project schedule. New tasks that you assign to the resource would need date constraints, too.