
From the author of Microsoft Project Do’s and Don’ts. Check out the NEW Do’s and Don’ts Bootcamp, which delivers Microsoft Project Management proficiency (and credibility) in just three hours of training!
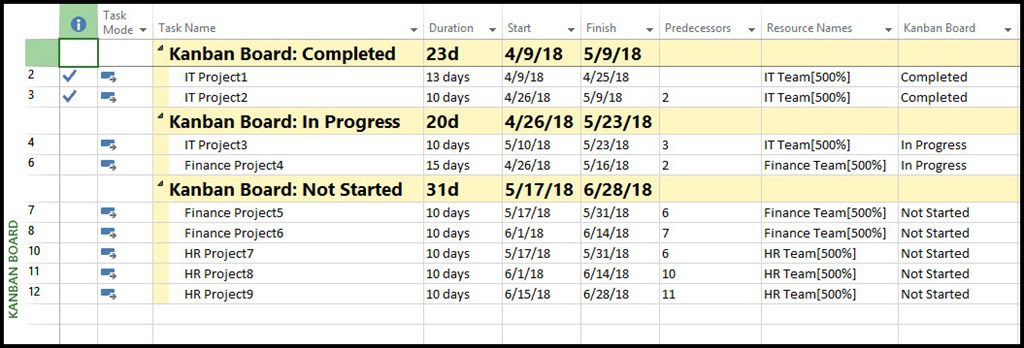
In Part 1 of this article, we saw that the “Kanban Board” clearly shows what is completed, what is in progress, and what is not started. We also discussed that if your organization uses Agile techniques in managing projects, you will recognize the “Kanban Board” as a tool to help you and your management team manage workflow in projects.
Here are the steps to create a “Kanban Board:”
- Select the “Project” tab and then click on “Custom Fields.”
- Select an open text field, then click on the “Rename…” button to give the text field a unique name. I chose “Kanban Board” for consistency.
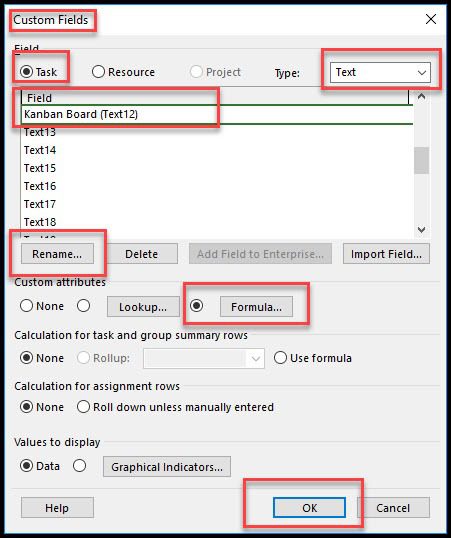
- Click on the “Formula…” button to enter the formula that will control the Kanban Board. Enter the formula as shown in the figure below. You may have to adjust the formula for your specific system. For example, some systems require a single quote rather than the double quote.
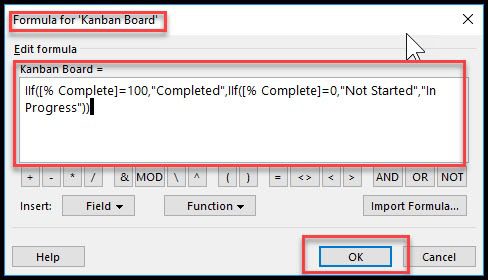
- Once the formula is entered, select “OK.” You now have the custom field needed for the “Kanban Board.”
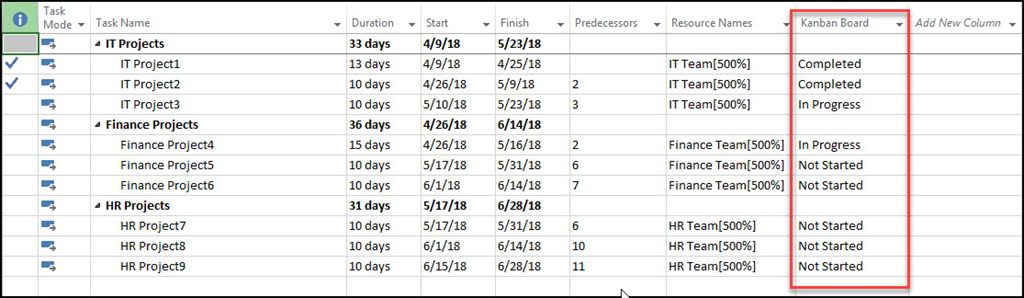
- Insert your new “Kanban Board” field into the table of your choice. Once inserted, the formula should populate the field indicating their completion state.
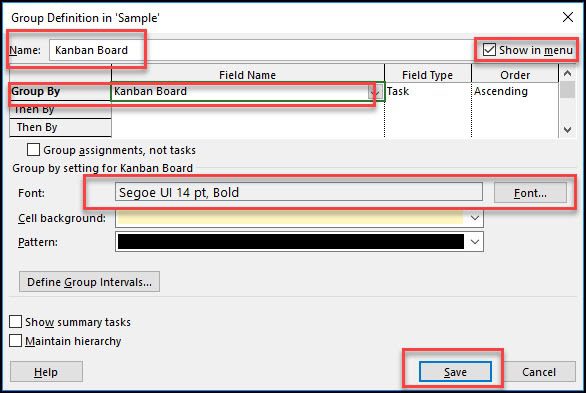
6. Prepare a Group to organize the project by completion state. Select the “View” tab then from the “Group by:” dropdown list choose “New Group By…” and enter the information below into the Group Definition dialog.
7. Click on the “Save” button to save your new custom group.
8. Create a new View to use the new field and group. Select the “View” tab and from the list of “Task Views” click on “More Views…”
9. Enter the information below into the new View Definition dialog.
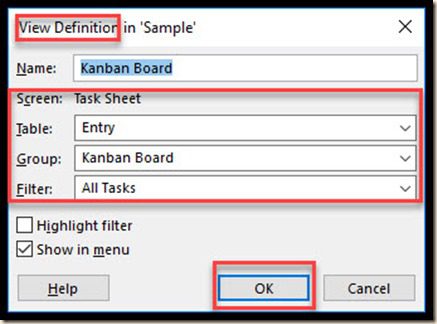
10. Finally, test your new view by selecting the “Task” tab, then selecting your “Kanban Board” from the list of custom task views. It should look similar to the figure below.
If you wish to create a report based on the view, simply create a new table report using the “New Report” wizard in the “Report” tab and apply the “Kanban Board” group in the report’s Field List. Show all tasks in the outline level and you have the complete tool in Project.
Congratulations! In ten steps you have created a custom field containing a formula, a custom Group and a custom View to show off your new “Kanban Board.”
This article was originally published at https://winprojblog.blogspot.com/2018/05/dos-and-donts-use-kanban-board.html. Used with permission.


Maxim Ivashkov
an interestiong idea , nevertheless this will help to manage simple cards or tasks not hanging on a userstory. Typically we have a userstory (a summary task) with subtasks onder. As soon as I finish a task it will go to Completed busket while the userstory will go to In progress and other tusks from the story will go to Not Started. So it is a compleet mess.
Sam Huffman
This can be accomplished by modifying the existing KanBan Group or by creating a new combination Grouping. I am currently working on this subject in a blog entry. (Coming Soon)
Sam