The Resource Usage view is a powerful view in Microsoft Project. The Usage table on the left side of the view displays each resource in your project team, along with the tasks to which each resource is assigned. The Usage table includes the Work column, which shows the total amount of Work assigned to each resource and to each task to which each resource is assigned. The timephased grid on the right side of the view displays the work assigned to each resource and to each task individually, timephased initially at the daily level. Figure 1 shows the default Resource Usage view for a project.
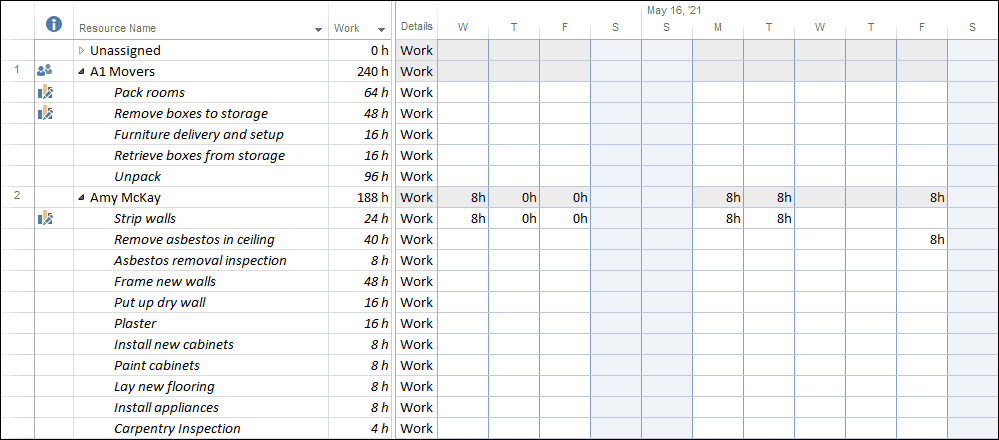
Figure 1: Default Resource Usage view
In spite of its power, the Resource Usage view has a couple of limitations, which include the following:
- The Resource Usage view does not display the Start date and Finish date of each task assignment.
- The Resource Usage view does not display the Work Breakdown Structure (WBS) for each task assignment. The WBS includes the summary tasks that give logical and meaningful organization to each task in the project, but the summary tasks are not displayed by default in the Resource Usage
Using a couple of tricks, I believe you can overcome these two limitations and extend the power of the Resource Usage view even further. To display the Start and Finish columns, complete the following steps:
1. Drag the split bar to the right side of the Add New Column virtual column so that you can see all of the columns in the table.
2. Right-click on the Work column header and select the Insert Column item on the shortcut menu, such as shown in Figure 2.
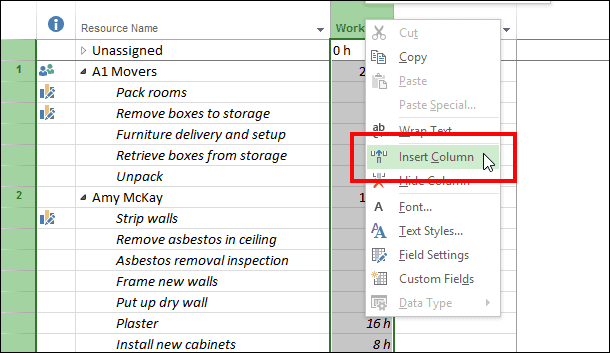
Figure 2: Select the Insert Column item
3. In the list of available fields, select the Start
4. Right-click on the Work column header again and select the Insert Column item on the shortcut menu.
5. In the list of available fields, select the Finish
6. Drag the split bar to the right edge of the Work
With this first set of customization steps, you have not extended the Resource Usage view so that you can see the Start date and Finish date for each task assignment, such as shown in Figure 3. Notice in the figure that you can see the Start date and Finish date for Amy McKay. Her Start date represents the Start date of her earliest starting task, while her Finish date represents the Finish date of her latest finishing task.

Figure 3: Start and Finish columns added to the Resource Usage view
The next step in extending the power of the Resource Usage view is to display the Work Breakdown Structure (WBS) of summary tasks for each task assignment. To do this, click the View tab to display the View ribbon. In the Data section of the View ribbon, click the Group By pick list button and select the Assignments Keeping Outline Structure item, such as shown in Figure 4.
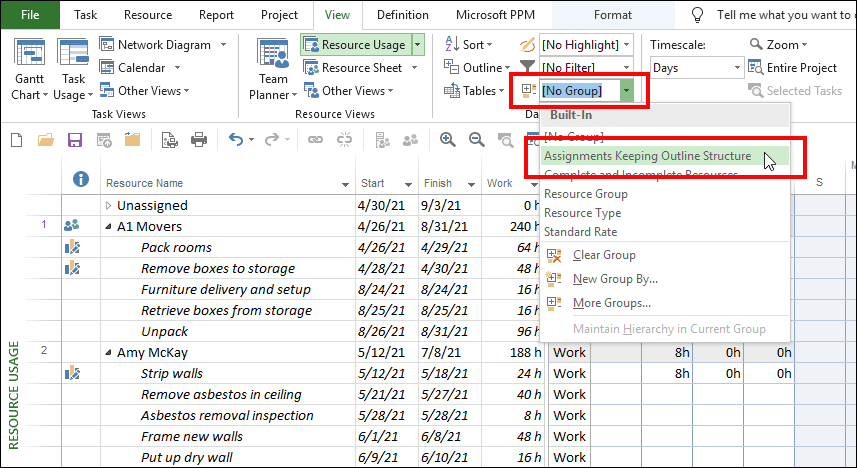
Figure 4: Select the Assignments Keeping Outline Structure group
Figure 5 shows the Resource Usage view after applying the Assignments Keeping Outline Structure group. The rows shaded with the light blue background color are the summary tasks to which each task belongs. Notice that the tasks assigned to Amy McKay belong in the Renovation phase section, the Construction deliverable section, and the Carpentry sub-deliverable section. Notice to the left of each summary task that Microsoft Project also displays a number, such as 3.1.1 for the Carpentry summary task. These numbers are the WBS number for each task in the project schedule, a bonus that the software displays when you apply the Assignments Keeping Outline Structure group in the Resource Usage view.

Figure 5: Work Breakdown Structure displayed
Using only a few steps, you have extended the power of the Resource Usage view. Before I conclude this blog post article, however, allow me to add a word of caution. If you use the Resource Usage view to analyze and resolve resource overallocations, the Assignments Keeping Outline Structure group will hide the red formatting of the resource name and the Work hours shown in the timephased grid for each overallocated resource. This means you must remove the Assignments Keeping Outline Structure group before you can analyze and resolve resource overallocations in the Resource Usage view. After completing the leveling process for your overallocated resources in your project, you can reapply the Assignments Keeping Outline Structure group.