
Manually Checking for Un-baselined Tasks
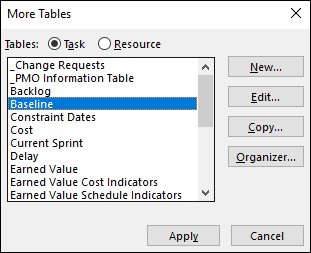
How do you know whether a task has been baselined in a Microsoft Project schedule? The direct way to determine if a task has been baselined is to apply any task view, such as the Gantt Chart view, and then to apply the Baseline table. To apply the Baseline table, click the View tab to display the View ribbon. In the Data section of the View ribbon, click the Tables pick list button and select the More Tables item on the pick list. In the More Tables dialog, such as shown in Figure 1, select the Baseline table and click the Apply button.
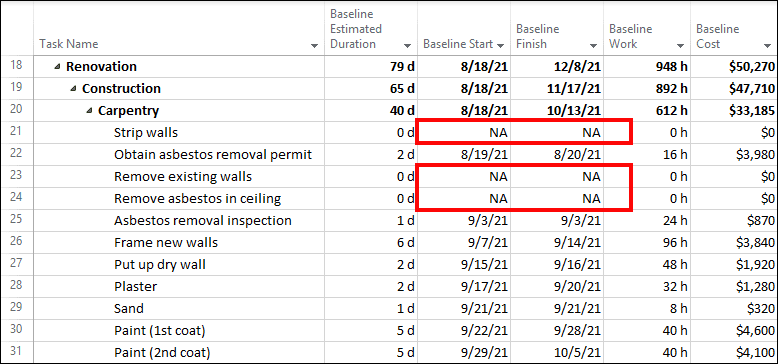
Drag the split bar to the right edge of the last column in the Baseline table and look for any task that displays an NA value in either the Baseline Start or Baseline Finish column. An NA value in either of these columns indicates that the task has not been baselined. For example, notice that three of the tasks shown in Figure 2 display an NA value, indicating that these three tasks have not been baselined. These tasks were added to the project as a result of a change control process, but the project manager neglected to baseline these three tasks.
Using a Formula to Locate Un-baselined Tasks
In a large project that has undergone multiple change control procedures which added dozens of new tasks to the project, manually searching for NA values in the Baseline table can be a very tedious procedure. Is there any way to speed up the process and make it obvious which tasks have not been baselined yet? The answer is yes.
One of the methods I like to use for locating tasks that have not been baselined is to create a custom field with a formula that detects un-baselined tasks, and then displays an indicator that quickly shows which tasks have not been baselined. To create a field like this in your own projects, complete the following steps:
- Open any project.
- Click the Project tab to display the Project
- In the Properties section of the Project ribbon, click the Custom Fields
- In the Custom Fields dialog, leave the Task option selected.
- In the Custom Fields dialog, click the Type pick list and select the Flag item, such as shown in Figure 3.

- Select the first available unused Flag field and then click the Rename
- In the Rename Field dialog, enter a name for the custom Flag field, such as shown in Figure 4.
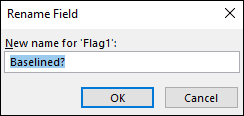
- In the Rename Field dialog, click the OK
- Leave the custom field selected and then click the Formula button in the Custom Attributes section of the Custom Fields
- In the Formula dialog, enter the formula shown in Figure 5.
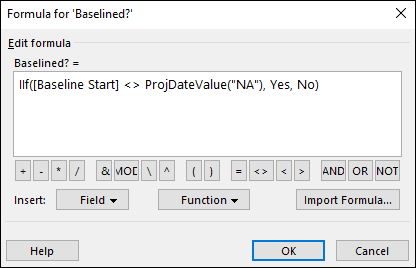
In the Formula dialog, the preceding formula tests whether the Baseline Start field contains an NA value. The proper way to test for the NA value is to use the ProjDateValue function, by the way, as shown previously in Figure 5. If the Baseline Start field contains a date, the formula returns a Yes value. If the Baseline Start field contains an NA value, the formula returns a No value. Because the custom field in question is a Flag field, there are only two possible results for this formula: Yes or No.
- In the Formula dialog, click the OK
- In the Calculation for task and group summary rows section of the Custom Fields dialog, select the Use formula Doing so applies the formula to summary tasks and to the Project Summary Task (Row 0 or Task 0).
- At the bottom of the Custom Fields dialog, click the Graphical Indicators
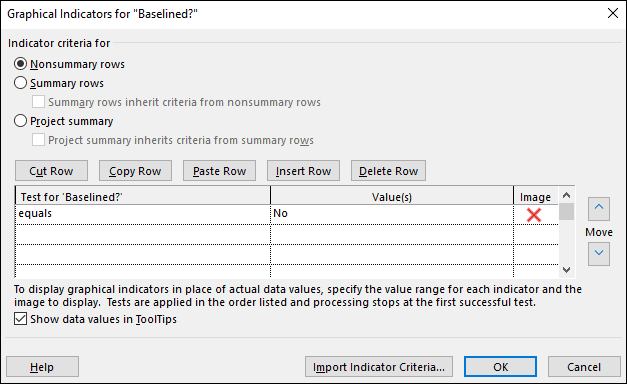
- In the Graphical Indicators dialog, leave the Nonsummary rows option selected, and then build the graphical indicator criteria shown in Figure 6.
- In the Graphical Indicators dialog, select the Summary rows option and then select the Summary rows inherit criteria from nonsummary rows
- When prompted in a confirmation dialog, click the Yes
- In the Graphical Indicators dialog, select the Project summary option and then select the Project summary inherits criteria from summary rows
- When prompted in a confirmation dialog, click the Yes
- In the Graphical Indicators dialog, click the OK
- In the Custom Fields dialog, click the OK
Saving the Custom Field to the Global.mpt File
After creating the custom field in the open project, you will probably want to be able to use the custom field in all of your projects. To make the field available to every project you manage, complete the following additional steps:
- Click the File tab and then click the Info tab in the Backstage.
- In the Organize Global Template section of the Info page, click the Organizer
- In the Organizer dialog, click the Fields tab, and then select your custom field in the list on the right side of the dialog, as shown in Figure 7.
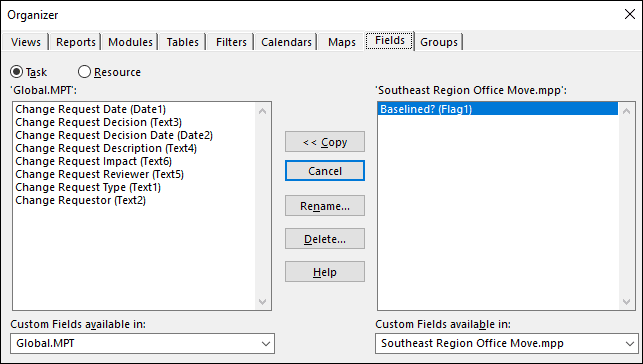
- With your custom field selected on the right side of the dialog, click the << Copy button to copy the custom field to your Global.mpt file.
- Click the Close button to close the Organizer dialog and then press the Escape key on your computer keyboard to exit the Backstage.
After copying your custom field to the Global.mpt file, your custom field will now be available for use in every project you open in Microsoft Project.
Using the Custom Field in Your Projects
To use the new custom field to easy locate un-baselined tasks, I personally recommend that you add the custom field to the task Entry table. In fact, if you do not use Manually Scheduled tasks in your projects, I recommend that you hide the Task Mode column and insert the custom field in its place. By the way, adding the custom field to the task Entry table will make the custom field visible in both the Gantt Chart view and the Tracking Gantt view, since both views share the task Entry table in common.
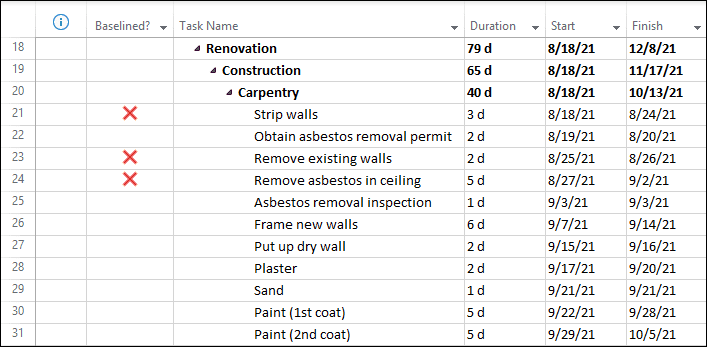
Figure 8 shows my new custom field inserted in the task Entry table of my project. Notice that the three un-baselined tasks now display the red X indicator, which quickly reveals that these three tasks have not been baselined, and reminds the project manager to baseline these tasks.
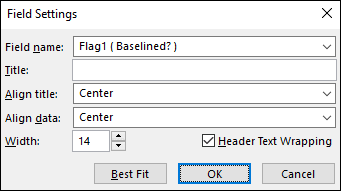
By the way, notice in Figure 8 shown previously that I centered the values in my new custom field. If you want to do this with your own custom field, right-click in the column header of the custom field and then select the Field Settings item on the shortcut menu. In the Field Settings dialog, set the Align title value to Center and set the Align data value to Center, as shown in Figure 9. Click the OK button when finished.


Daryl Deffler
While this method will work, I’ve found it much easier to simply create a custom view (showing specific relevant fields) along with a custom filter that selects only rows with no value in a specific field. These views only show those tasks meeting the criteria and eliminate the need for the PM to scroll thru hundreds/thousands of rows.
We used this technique to create a series of EPMO standard views that could be used to identify and correct what we found were the most common reasons for down stream schedule issues.
For example, we had views used to check project “integrity”, or basic construction. These included views checking for tasks with no predecessors, tasks with no successors, tasks with no baselines and so on.
We also had views used to identify and analyze tasks not generally following EPMO task configuration recommendations. These identified task configurations that could impact scheduling and leveling and included views showing tasks with a task type different from the EPMO “recommended”, manually scheduled tasks, tasks with no assigned resources, and so on.
Bottom line, these views helped the PMs correct many of the problems they didn’t know existed within their schedule before the schedule was published live.
Jill Baird
Nice write up of a very helpful view.
BTW: I use the [Estimated Baseline Start] field rather than the [Baseline Start] for this type of view. I’ve seen people manually type date into the [Baseline Start] field, instead of using the baseline feature.