Please find below highlights from Nenad Trajkovski’s session “Project for the web – Project creation through Scheduling” being provided by MPUG for the convenience of our members. You may wish to use this transcript for the purposes of self-paced learning, searching for specific information, and/or performing a quick review of webinar content. There may be exclusions, such as those steps included in product demonstrations. You may watch the live recording of this webinar at your convenience.
First, let me tell you what Microsoft Project for the web is not. It is not a copy of the Microsoft Project Desktop version, nor will it replace Microsoft Project online or Microsoft Project desktop in the future. Currently, there are many functionalities that are only available in Microsoft Projects Online, or on desktop. So, if you think about switching from Microsoft Project to Microsoft Project for the web, be aware that there are many things still missing.
Now, Microsoft Project Portal Web is part of Office 365, if you purchase a Project Plan 1 license with an Office 365 license.
How to Create a Project in Project for the Web
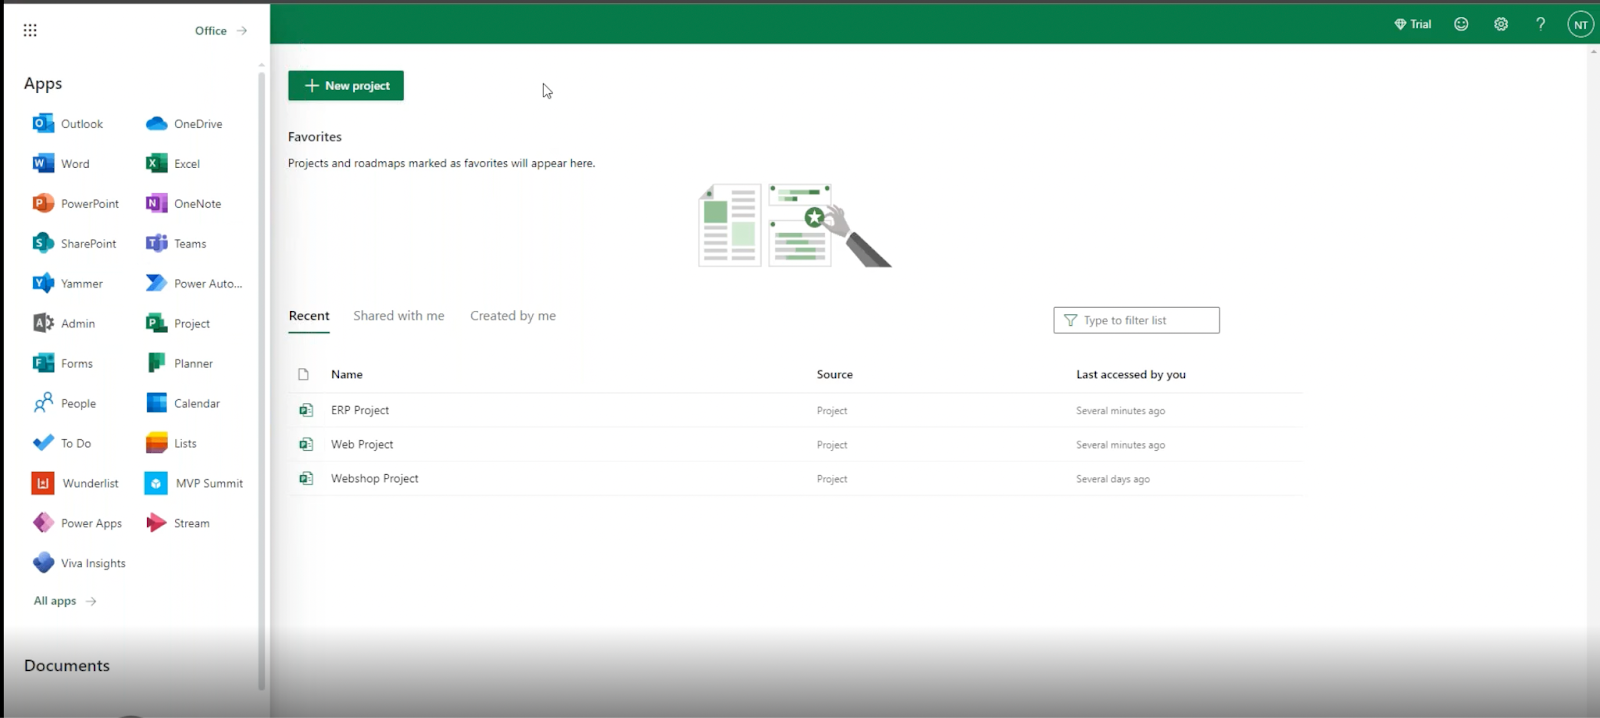
To create a new project, click on New Project, click on Office 365 Apps, then click on Project. This will bring up a page with a button that says, “New Project.” You can choose to Create Blank Project or use some available templates.

I will use software development. You will see that I have some tasks already defined in this template.
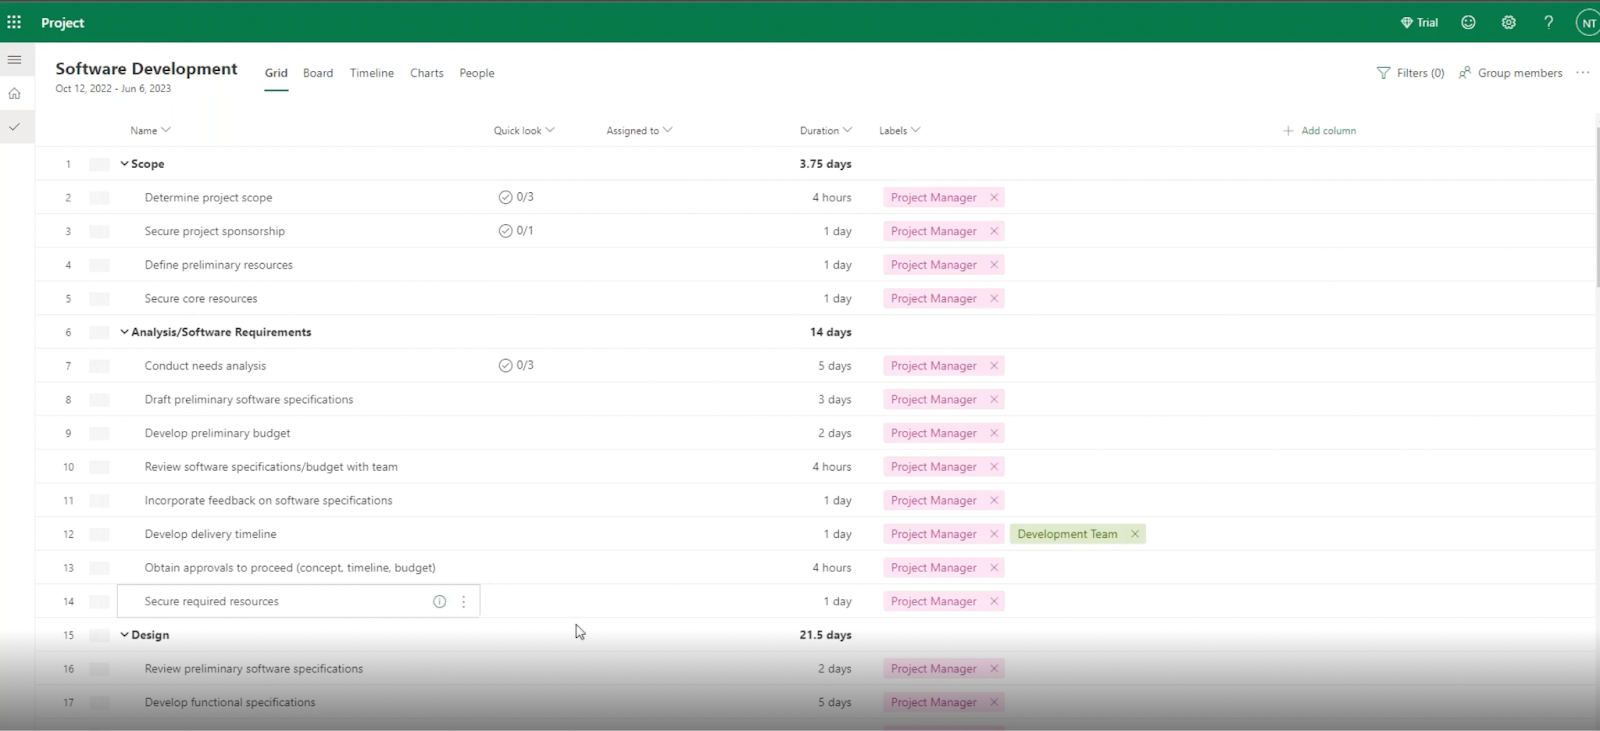
After I click on Use Template, Project for the web will create my new project, which in my example is called “Software Development.” You will see that I have tasks, boards, a timeline with dependencies, and charts.
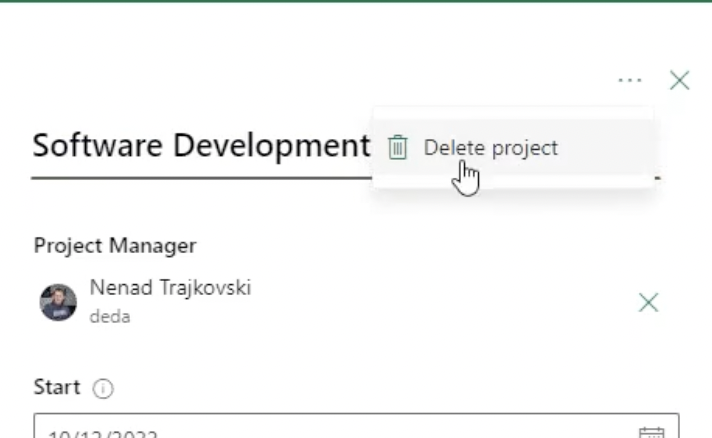
If at any stage you don’t want your project, you can delete it. So, I used a template here, but I don’t want to use it anymore. How can you delete it? First click on the project name, and it will bring up a dialogue box on the left side of your screen. In this box, click on the 3 dots to bring up the prompt, and click Delete Project. Beware that after you choose to delete the project, your project is gone forever.
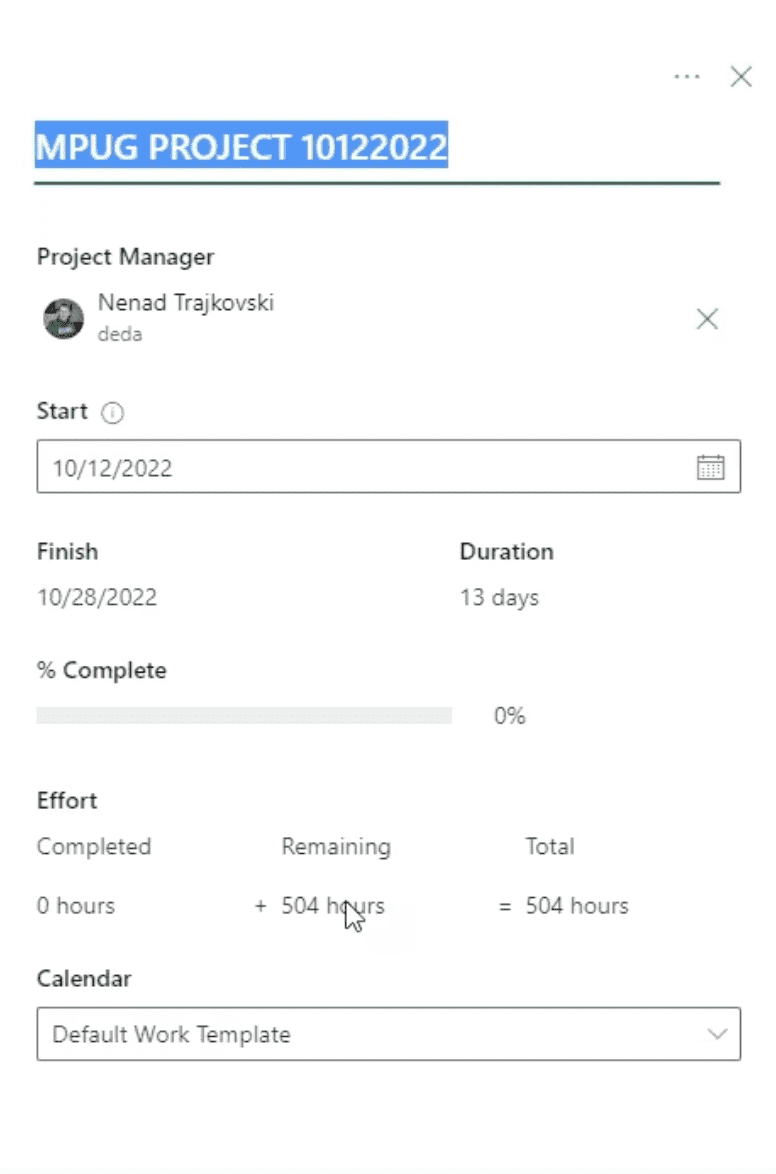
The second way to create a project is to create a blank project, and the third is to import a project from Project Online or desktop. Once you have created a project, you might want to change the name of the project. In our example our project is named “Untitled Project.” You can change the name of the project by clicking on the project title, or you can click on the ellipsis in the right corner and click project details.
.

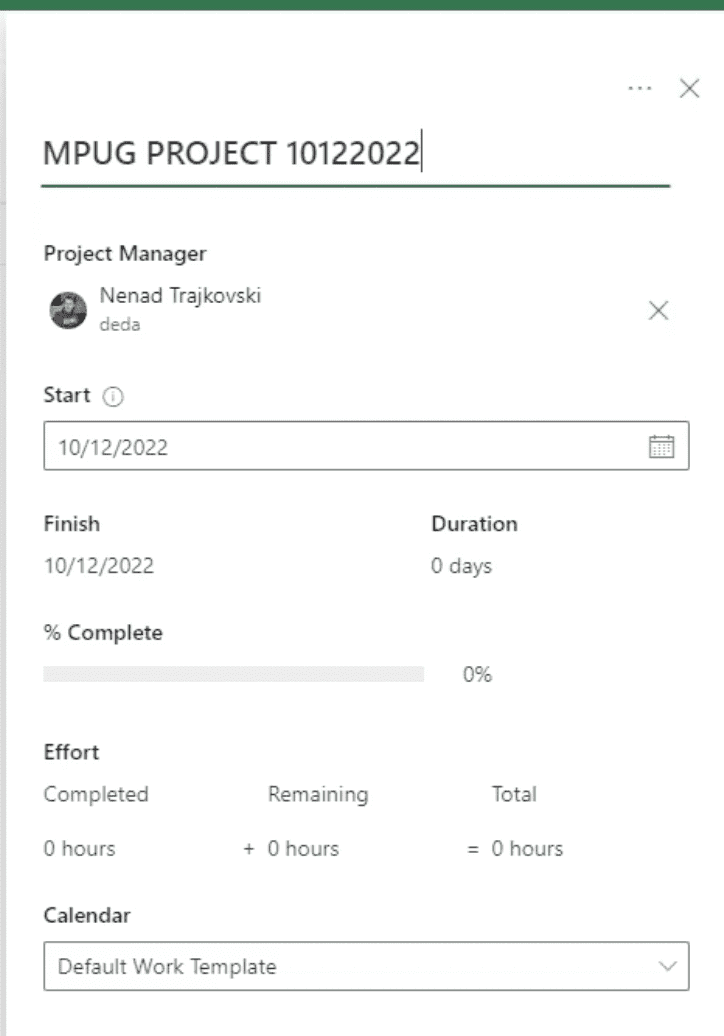
Enter the name of your new project. When you are done, you can close the window, as the information is automatically stored.
Creating Project Tasks in Project for the Web
Once you have created your project, you will notice that you have some default tabs, including Grid, Board, Timeline, Charts and People. In the Grid tab, you can find the option to “Create Task.” You will also find some default columns. In our example, these are “Quick Look,” “Assign To” and “Duration”.
You can rearrange these columns by dragging them in the desired order, or you can hide them by clicking on them and selecting hide. You can also add additional columns by clicking on Add Column.
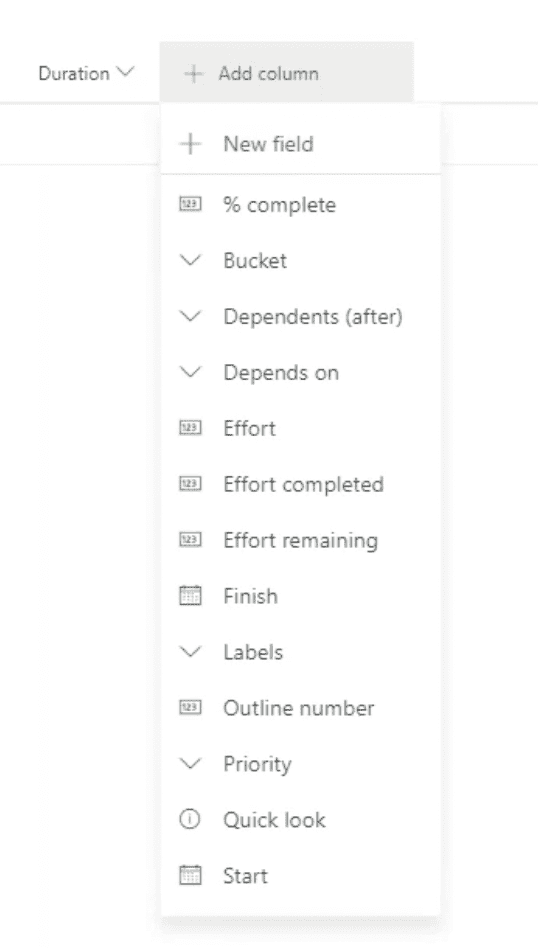
If the column you require does not exist, you can create a custom column, perhaps to assign tasks to Team Members or a Team, by clicking on New Field.
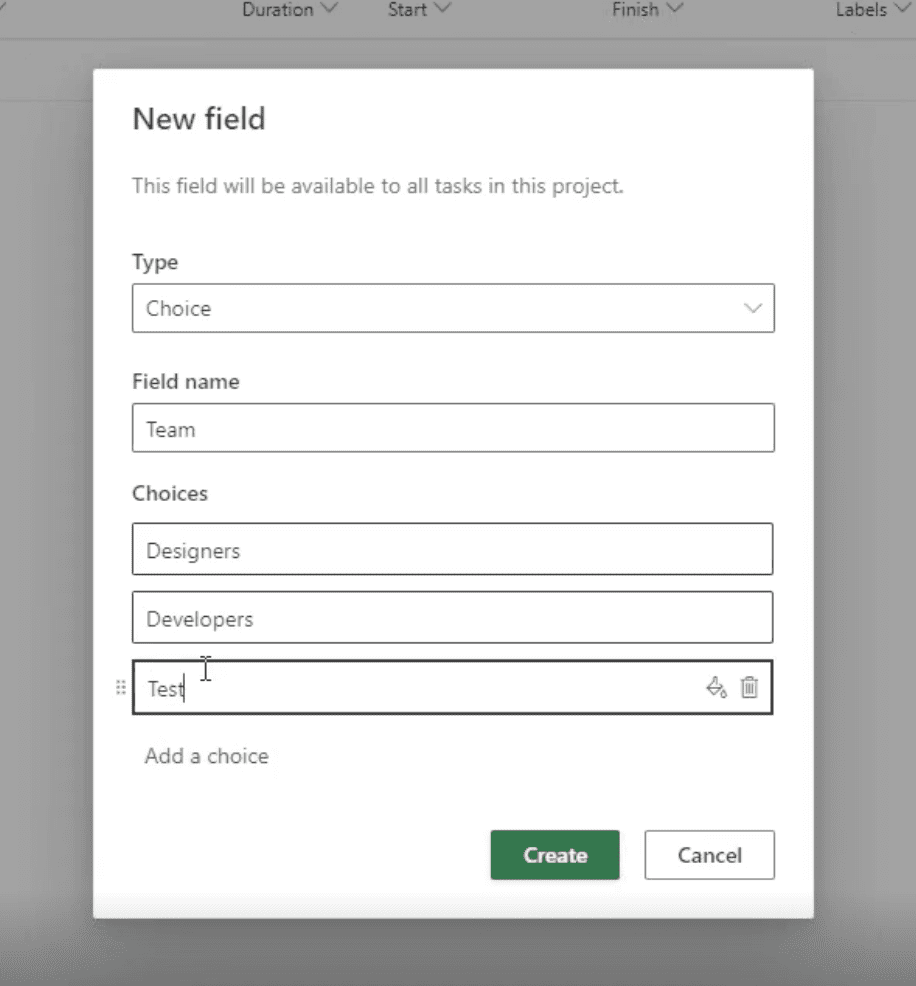
When you click on New Field, you will get the option to select your field type, such as Text, Date, Number, Yes/No or a multiple choice field. For our example we chose multiple choice. Here you can enter the Field name and your possible selections.
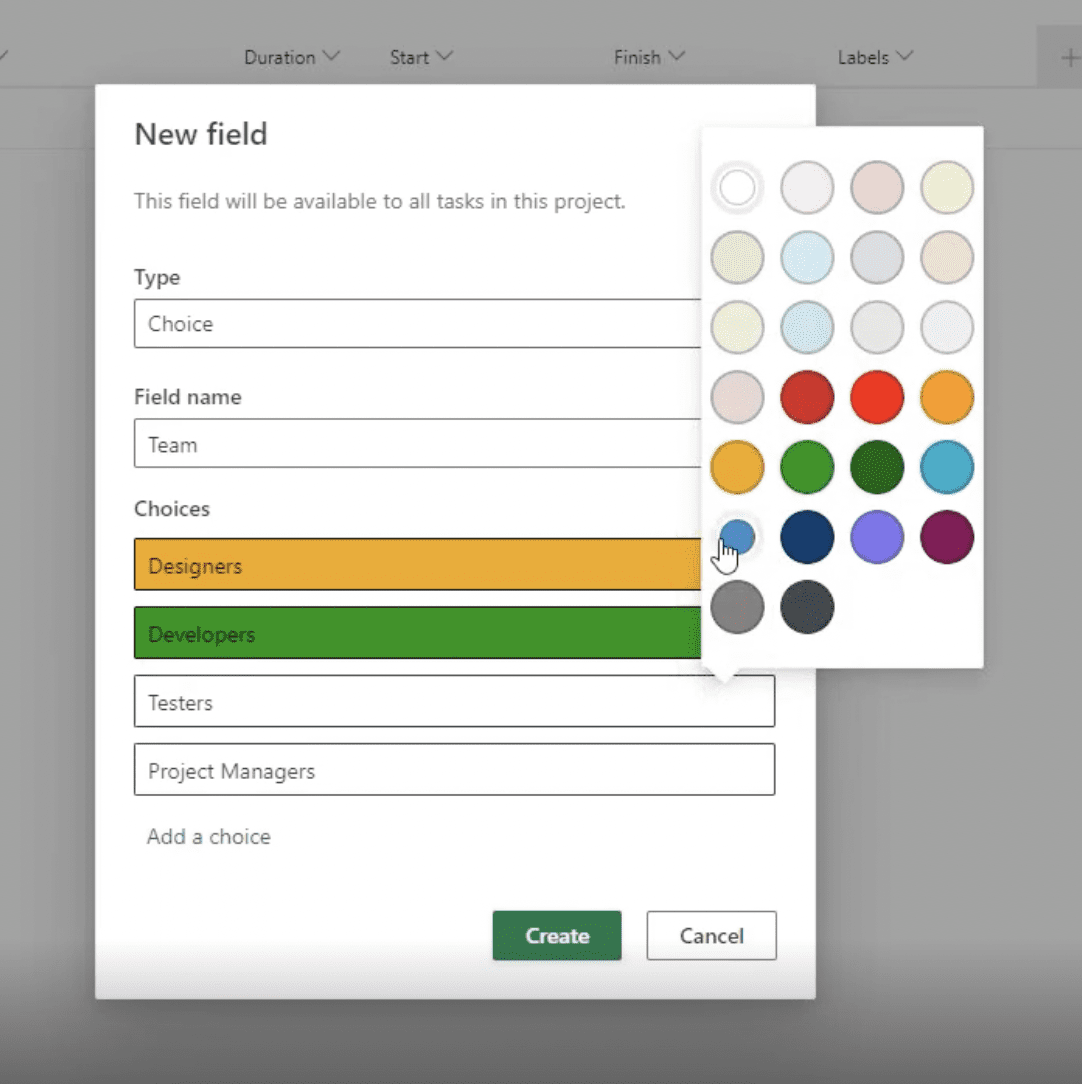
You can also give your fields custom colors by clicking on them and selecting the color.
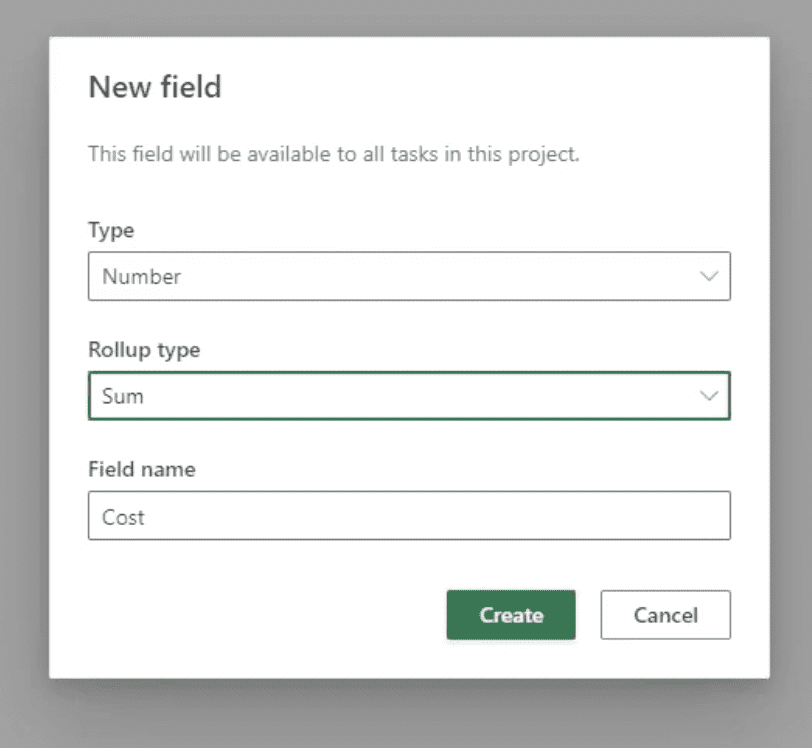
You can also use the New Field button to create a Cost column, to add the cost of each task. To do this, select the Number Field type. Name it “Cost,” choose “Sum” as the roll up type and make the title “Cost.”
Creating a Task Summary
How To Create Tasks
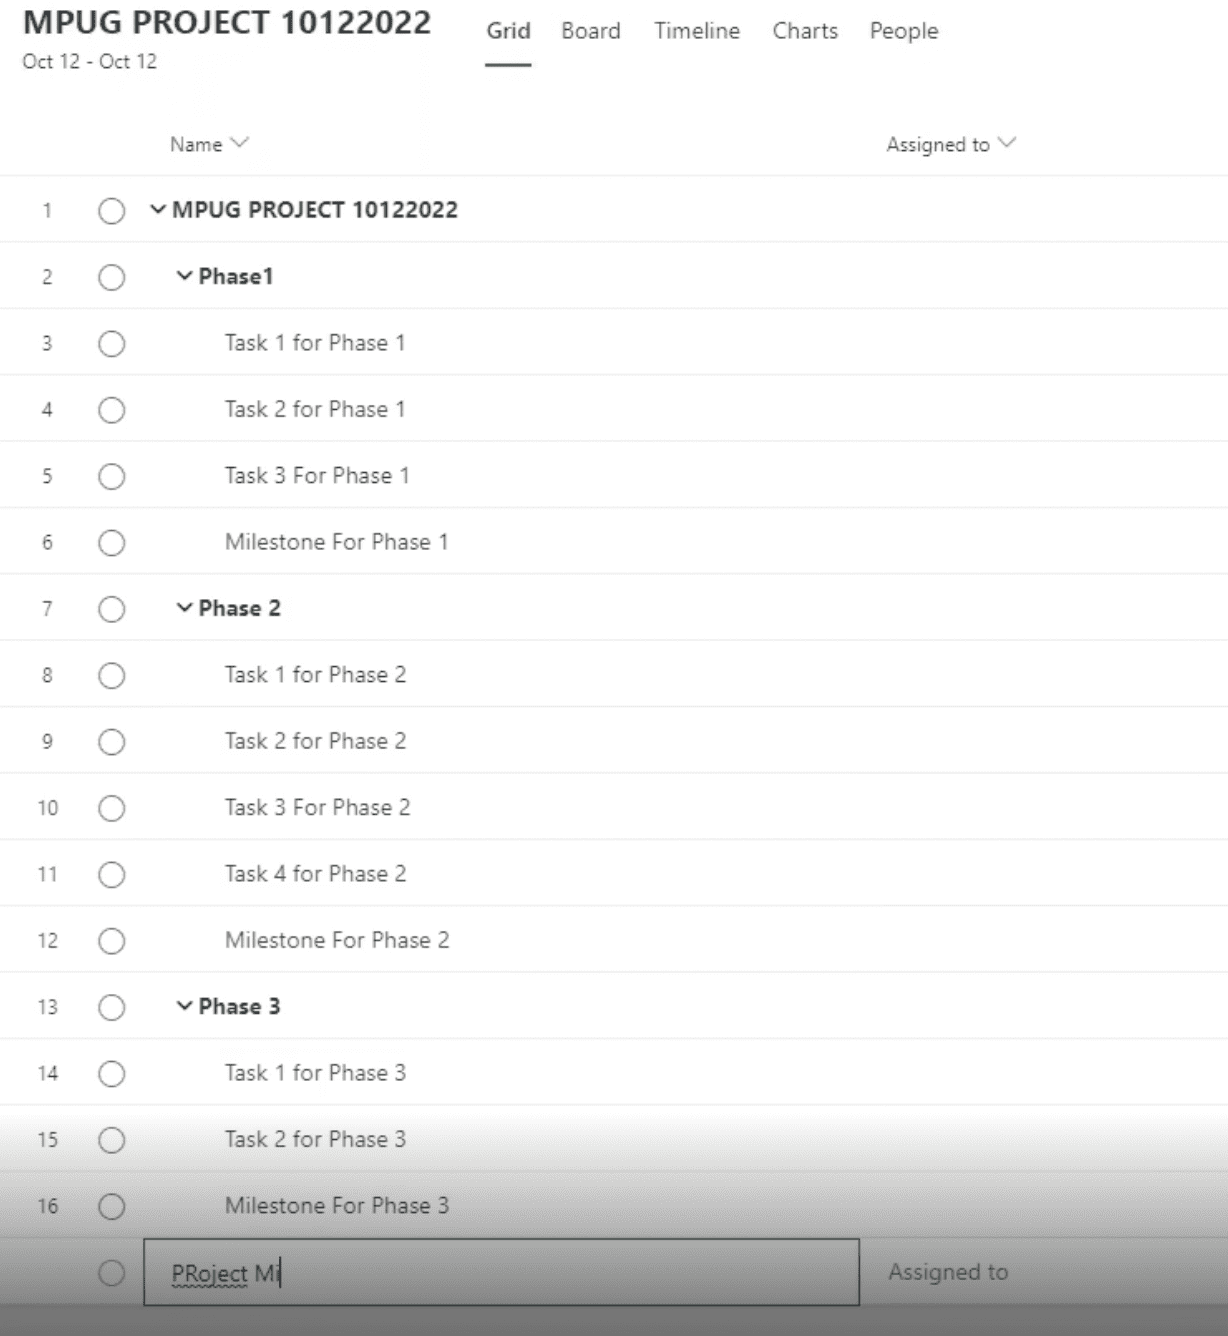
To create a Project Summary, you need to create your tasks and subtasks first. Click Create New Task and set it to the title of your project. Don’t add any fields to this task. Under the first row, create a Phase 1. Underneath you can create however many you need. In the example, we created Task 1-3 for phase 1. Then create your Milestone for phase 1.
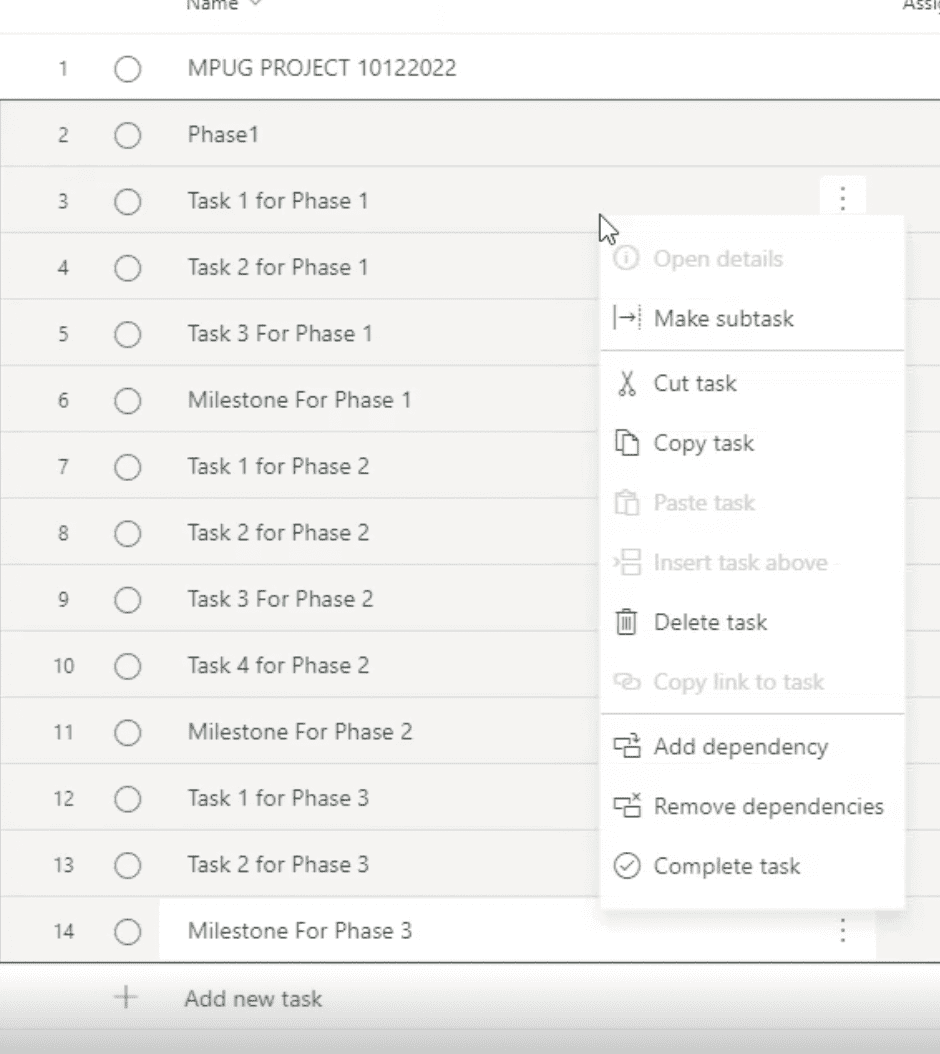
Once you have created your list of tasks, select all the tasks you want to convert to subtasks, right click and select “Make Subtask”. In order to create a summary task of the individual phases, highlight the sub tasks of these phases and click Make Subtask.
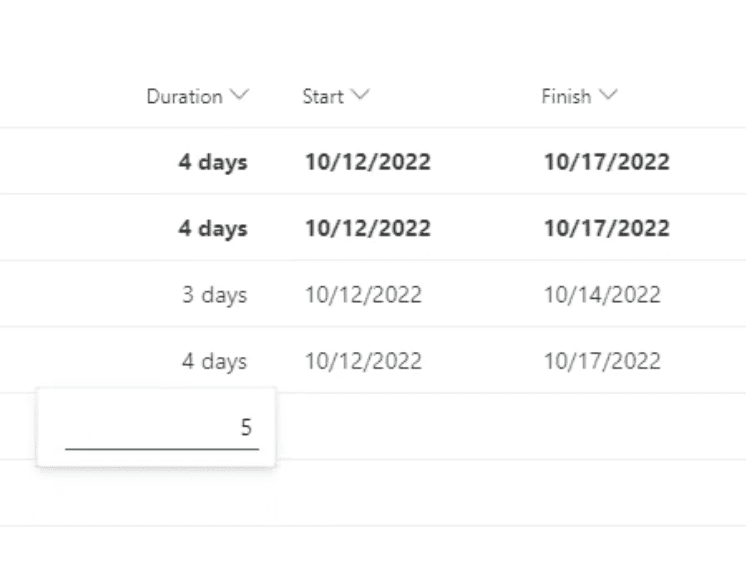
Create Task Duration
Creating a task duration is simple, and Project for the web does most of the work for you. To create task durations, simply enter the number of days, and Project for the web will populate the start and end date for you.
Creating labels
Labels are tags that you can customize to make managing tasks easier. You can create labels for task priority to ensure critical tasks get completed first.
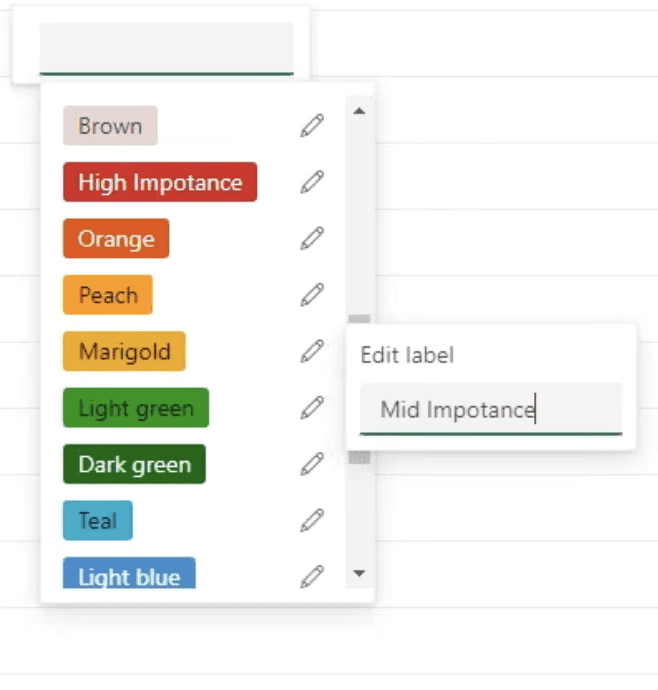
In our example, we have created priority labels to rank tasks from low priority to high priority, and we color coded that to suit. To do this, you need to decide which colors you want to use first. Then click on the pencil icon next to the respective label and change the text to your desired text. When done, you can click on the label to assign it to the task. You can add more than one label to a task.
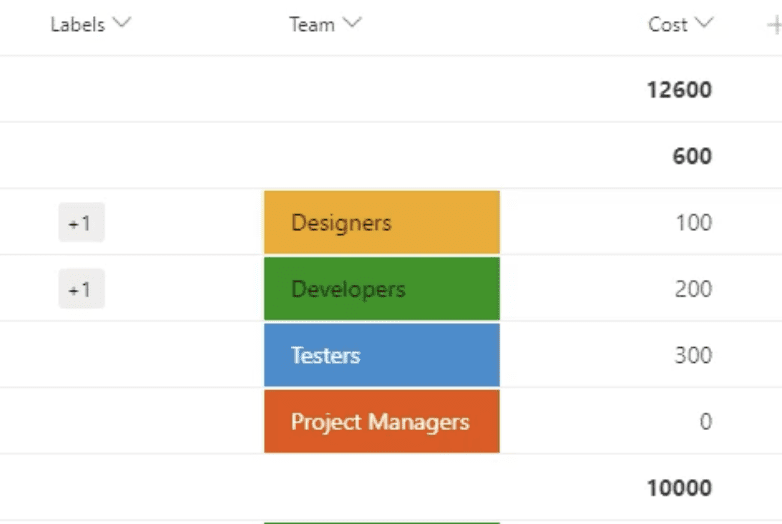
Adding Task Cost
Task cost will be added to the custom field you created earlier. Because you selected to make the rollup type equal sum, your project cost will automatically be calculated after adding costs of individual tasks.
Creating Task Dependencies
Now that you have finished setting up your tasks, you might want to create dependencies between tasks. Task dependencies allow you to execute tasks in the optimal order. To create dependencies, click on the add a column tab and select “depends on.”
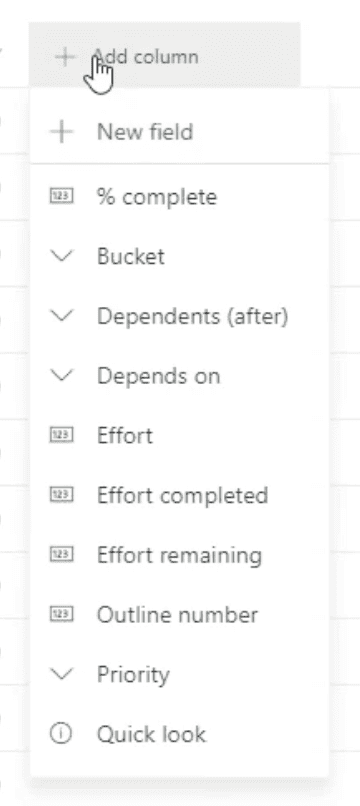
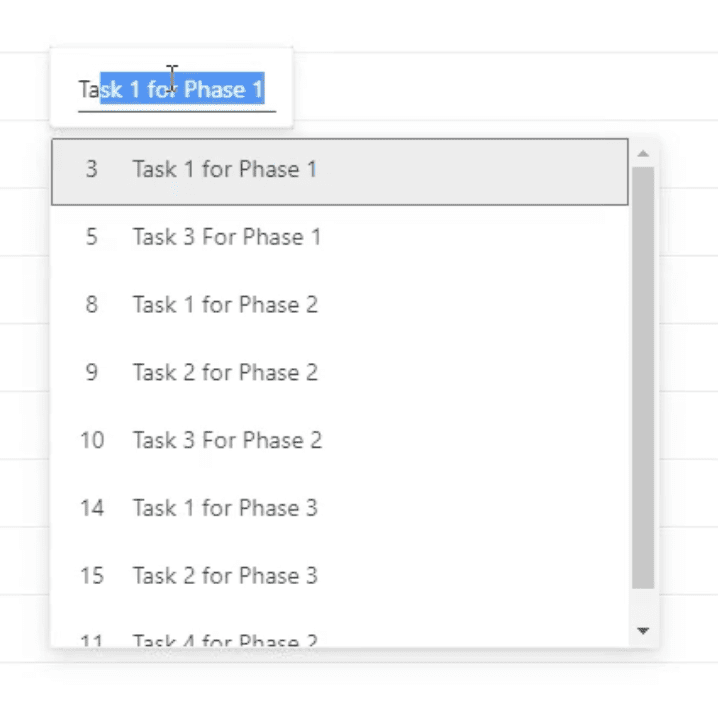
After selecting the depends on button a column will be created titled “depends on” where you can type and select the task that the corresponding field is dependent on. You can select tasks based on tasks beginning with the same letter or you can choose the corresponding number. You can add multiple tasks as a predecessor by clicking “Enter” after every selection.

You can also set the predecessor activity in the timeline tab. One thing to note is that is not possible to do a start-to-start relationship (illustrated above) in Microsoft Project for the Web. To set up other predecessor relationships click on the end or start of a task and drag to the end of the designated predecessor task.
Now you have a project schedule and you can view your project status by clicking on the title of your project.