Scheduling is an essential aspect of project management, and electronic tools such as Microsoft Project have made it easier than ever to create and manage project schedules. However, many people struggle with the software and end up using it as a glorified calendar rather than a dynamic scheduling tool. In this context, it’s important to understand the difference between scheduling based on dates versus durations and dependencies. This article discusses the benefits of using the latter approach and introduces the “4D-1D” approach to scheduling, which focuses on entering Deliverables, Durations, Dependencies, and Deadlines, but no Dates. Read on to learn how this approach can help you create more accurate and flexible project schedules.
Tip # 1: Focus on Durations and Dependencies, Not Dates
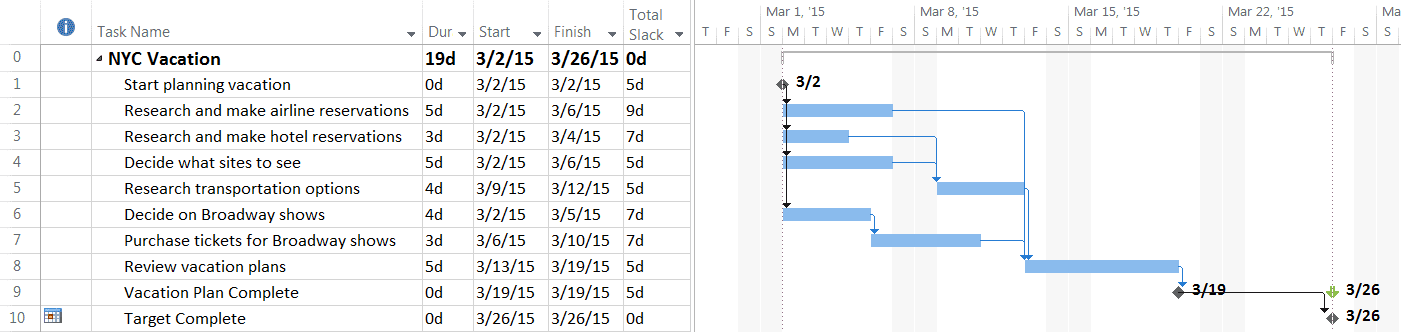
- When scheduling a project electronically, avoid entering start or finish dates for tasks.
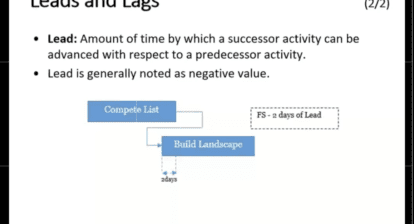
- Instead, enter durations and dependencies to create a forecast model.
- This approach allows Microsoft Project to calculate start and finish dates based on inputs, resulting in a dynamic and adaptable schedule.
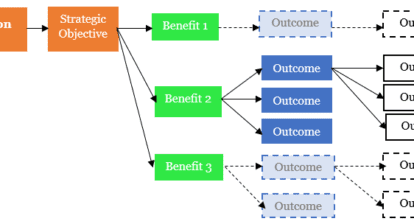
- Use the “4D-1D” approach: enter Deliverables, Durations, Dependencies, and Deadlines, but no Dates.
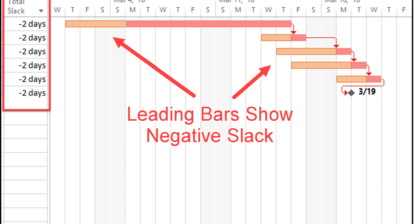
- Avoid rigid constraint dates whenever possible.
Tip # 2: Using the “Manually Scheduled” Task Option
- Recent versions of Microsoft Project have a “Manually Scheduled” task option that allows for entering dates if necessary.
- However, it’s crucial to eventually add dependencies and switch tasks to “Auto Scheduled” to maintain a forecast model and take advantage of Project’s scheduling capabilities.
- This approach ensures that the schedule remains accurate and adaptable.
Tip # 3: Customizing Autosave Settings
- Microsoft Project now includes an autosave feature that can be customized in the Options menu.
- Be aware that each autosave will wipe out the list of items you can Undo, so use this feature judiciously.
Tip # 4: Working with Project Server Schedules Offline
- To work with Project Server schedules offline, select an account to connect to Project Server and click “Work Offline” when starting Microsoft Project.
- This allows you to work on your Project Server schedules without server access.
- To make your schedules accessible offline, check out the schedule from the database by opening it in Read/Write mode and keeping it checked out when you close the schedule.
- When you restart Project Professional, select the same Project Server account to log in (even though you are not connected), which will give you offline access to your locally saved Project Server schedules.