
Overview
Have you ever tried to use the default task Status field in Microsoft Project? This field uses the Status date that you set in your project (or the Current date if you have not set a Status date) to calculate the current status of every task in your schedule. Once calculated, the Status field will return one of four values for each task in your project schedule. These values are:
- Complete
- On Schedule
- Late
- Future Task
In the past couple of weeks, I have been experimenting with the Status field, and have encountered a couple of issues that concern me. The primary issue with this field is that it does not calculate the Late value the way I would have expected it to do. To me, the Status field should calculate a Late value whenever it encounters one of the following conditions:
- An unstarted task has a Start date that is earlier than the Status date.
- The progress line for an in-progress task does not reach the Status date for the project.
In my experimentation, however, I discovered that Microsoft Project will calculate an unexpected On Schedule value when it encounters one of the following situations:
- The Start date of an unstarted task is one day earlier than the Status date.
- The progress line for an in-progress task reaches within one day of the Status date for the project.
Thinking that I may have encountered a bug in Microsoft Project, I did a little more research. Specifically, I read the Help article on the Status (Task) field. In the How Calculated section of this article, I discovered the reason for the previous behavior. To quote the Help article:
“If timephased cumulative percent complete is spread to at least the day before the status date, then the Status field contains On Schedule.”
After reading the Help article and understanding fully how the Status field values are calculated, I said to myself, “I respectfully disagree.” For example, take a look at the project schedule in Figure 1. Suppose that the Current date for this project is Tuesday, April 5 (shown by the green gridline in the Gantt Chart screen). And suppose that I set the Status date to Friday, April 1 (shown by the red dashed gridline in the Gantt Chart screen), which represents the last working day of last week’s reporting period.
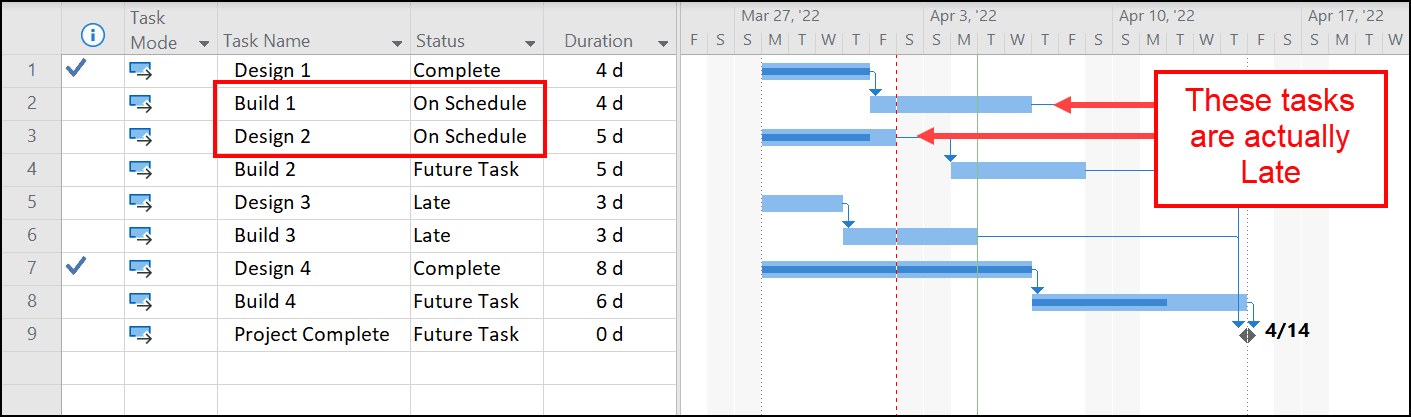
Figure 1: Status field values for each task
In Figure 1 shown previously, notice that the Status field displays an On Schedule value for the Build 1 and Design 2 tasks. In reality, these two tasks are Late tasks. Given that the Status date is Friday of last week, the Build 1 task should have 1 day of task progress, and the Design 2 task should have been completed. Because neither of these happened, the tasks are actually late and are not on schedule.
Furthermore, in Figure 1 shown previously, the Design 4 and Build 4 tasks have progress in the future (to the right of the Status date line). In scheduling terms, we refer to this situation as “out of sequence progress” or “future progress”. In fact, in the world of accurate project scheduling, there should never be any actual progress in the future!
As a result of my frustrations with the default task default Status field, I decided to see if I could create a custom field that would accurately depict the current schedule status of every task, based on whatever date you set for the Status date. And furthermore, I would like this custom field to “flag” tasks have “future progress” entered.
Solution
The good news is that after a lot of experimentation, I was able to successfully create my own custom Schedule Status field that accurately portrays the true schedule status of every task based on the Status date of the project. Here is how to create your own custom Schedule Status field:
- Open any project that is currently in-progress.
- Click the Project tab to display the Project ribbon.
- In the Properties section of the Project ribbon, click the Custom Fields button.
- In the upper-right corner of the Custom Fields dialog, click the Type pick list and select the Text value, such as shown in Figure 2.
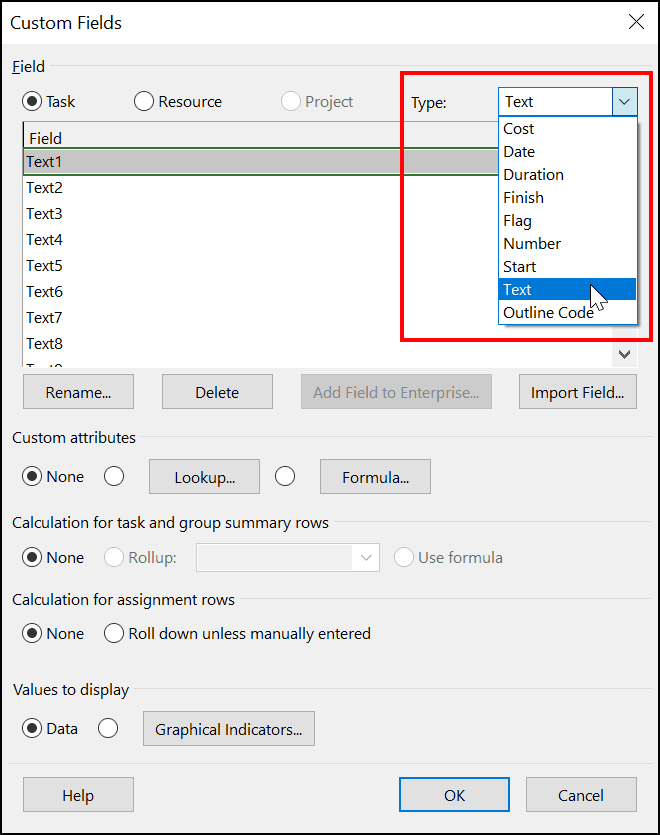
Figure 2: Select the Text field type
5. In the list of custom Text fields, select the first unused Text field and then click the Rename button.
6. In the Rename Field dialog, enter Schedule Status as the name of the custom field such as shown in Figure 3, and then click the OK button.
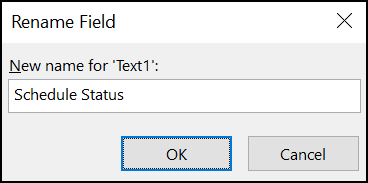
Figure 3: Rename field dialog
7. Leave the new Schedule Status field selected and then click the Formula button in the Custom attributes section of the dialog.
8. In the Formula dialog, copy the following formula in this blog post article and paste it into the dialog, such as shown in Figure 4.
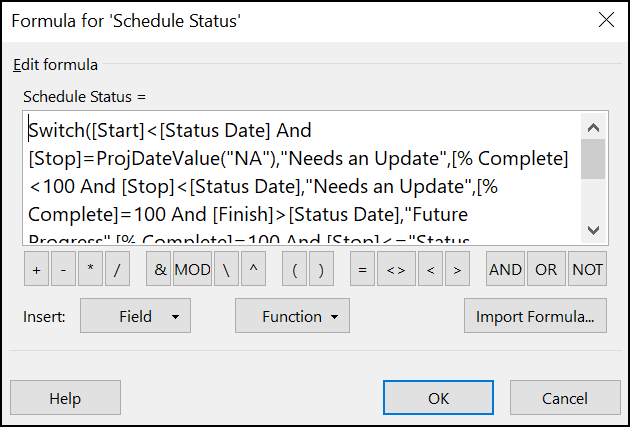
Figure 4: Formula dialog with custom formula
The formula to paste into the Formula dialog is as follows:
Switch([Start]<[Status Date] And [Stop]=ProjDateValue(“NA”),”Needs an Update”,[% Complete]<100 And [Stop]<[Status Date],”Needs an Update”,[% Complete]=100 And [Finish]>[Status Date],”Future Progress”,[% Complete]=100 And [Stop]<=”Status Date”,”Completed Task”,[% Complete]<100 And [Stop]=[Status Date],”On Schedule”,[% Complete]=0 And [Start]>=[Status Date],”Future Task”,[Finish]>[Status Date] And [Stop]>[Status Date],”Future Progress”)
WARNING: If you copy and paste the formula from this article, make sure that the paste operation results in straight quotes in the formula (the ” ” characters) instead of the curly quotes that are used by default in Microsoft Word (curly quotes look like this “ “).
In the preceding formula, I opted to use the Switch function rather than a series of nested IIF statements. The formula works as follows:
- The formula tests to determine if the task is an unstarted task with a Start date earlier than the Status date. If true, the formula displays a “Needs an Update” value. If false, the formula applies the next test.
- The formula tests to determine if the task is an in-progress task with progress that does not extend to the Status date. If true, the formula displays a “Needs an Update” value. If false, the formula applies the next test.
- The formula tests to determine if the task is a completed task with a Finish date in the future (the Finish date of the task is later than the Status date). If true, the formula displays a “Future Progress” value. If false, the formula applies the next test.
- The formula tests to determine if the task is a completed task with a Finish date less than or equal to the Status date. If true, If true, the formula displays a “Completed Task” value. If false, the formula applies the next test.
- The formula tests to determine if the task is an in-progress task with progress that extends to the Status date. If true, the formula displays an “On Schedule” value. If false, the formula applies the next test.
- The formula tests to determine if the task is an unstarted task with a Start date in the future (the Start date is greater than or equal to the Status date). If true, the formula displays a “Future Task” value. If false, the formula applies the next test.
- The formula tests to determine if the task is an in-progress task with a Finish date in the future (the Finish date of the task is later than the Status date) and with progress that extends past the Status date. If true, the formula displays a “Future Progress” value.
In this formula, I attempted to test for every possible condition people might encounter in their projects. If the formula encounters a condition which I failed to anticipate, the formula will display an Error value.
Note: If you encounter a condition in one of your own projects that causes the formula to fail and display an error message, please reach out to me. Let me know the condition that resulted in the error message so that I can correct the formula and then update this blog post article. Thanks!
9. Click the OK button to close the Formula dialog.
10. In the confirmation dialog shown in Figure 5, click the Yes button.
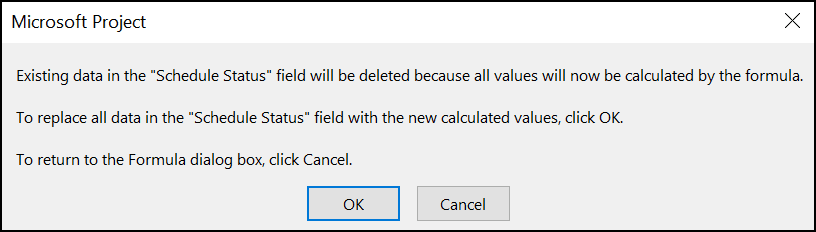
Figure 5: Formula confirmation dialog
11. In the Calculation for task and group summary rows section of the Custom Fields dialog, select the Use formula option, such as shown in Figure 6.
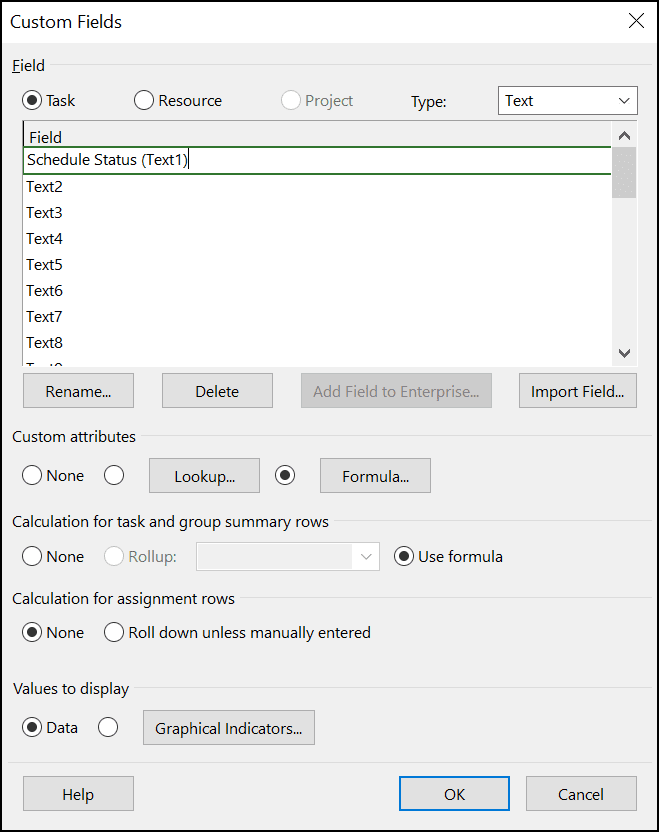
Figure 6: Select the Use Formula option
12. In the Custom Fields dialog, click the OK button.
To use this custom field, first set the Status date to the last day of the previous reporting period (usually last Friday). Then insert the Schedule Status field in the Gantt Chart view.
Notice in Figure 7 that I set the Status date to Friday, April 1, and that I inserted the custom Schedule Status field to the left of the default Status field. Compare the differences between the values shown in these two fields. Please notice the following:
- For task IDs #2 and #3, the custom Schedule Status field correctly indicates that these two tasks need a progress update, while the default Status field incorrectly reports that these tasks are on schedule.
- For task IDs #7 and #8, the custom Schedule Status field reports that these tasks are ahead of schedule, while the default Schedule field simply reports that one is a completed task and the other is a future task, completely disregarding the fact that both tasks have progress in the future.
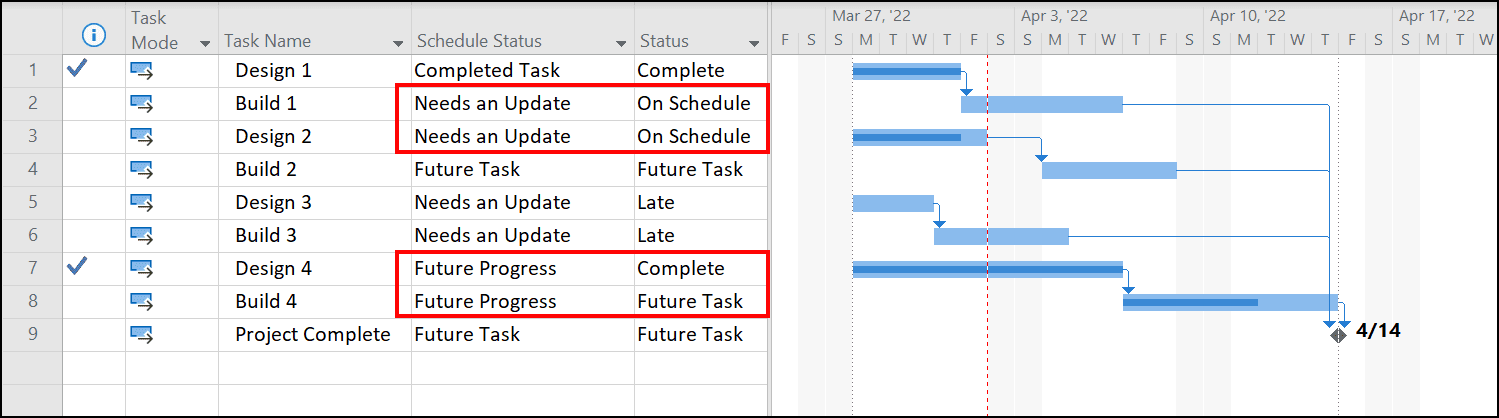
Figure 7: Custom Scheduled Status field in use
If you are a regular user of the default Status field, I would encourage you to try creating and using the custom Schedule Status field I describe in this blog post article. If you find that the custom field works well in one of your own projects, be sure to use the Organizer tool to copy this custom field to your Global.mpt file for use with all of your projects.


Eric Uyttewaal
Dale, I never trusted the output of the Status field having seen some weird results. I largely ignored the fields as a result. Dale, thank you for analyzing what is exactly wrong with this field and developing a solid workaround solution. Great job!
Ronald Smith
Great article and I enjoy reading your other articles!
When you have about five minutes to talk, I would like to discuss the Rebaseline feature with you.
FYI: I have had about 50 MPUG articles published so far. Take care – ronbriansmith@yahoo.com
Dale Allen Howard
Peter —
Thank you for your comment and for finding a way to improve the custom field formula! Way to go!! 🙂
eDale
Rick
Like so many others I really appreciate the work you put into making the Status Date field useful.
I have been doing extensive testing with schedule comparison and hit a snag with the custom field. Is seems that it will over-ride random field comparisons (one at a time and different). I first encountered it with “Start” then “Duration” fields. It appears random at this point other than to say it effects the 4th comparison column from the left.
Rebuilding tables and lowering the number of columns has helped in some instances but not all.